
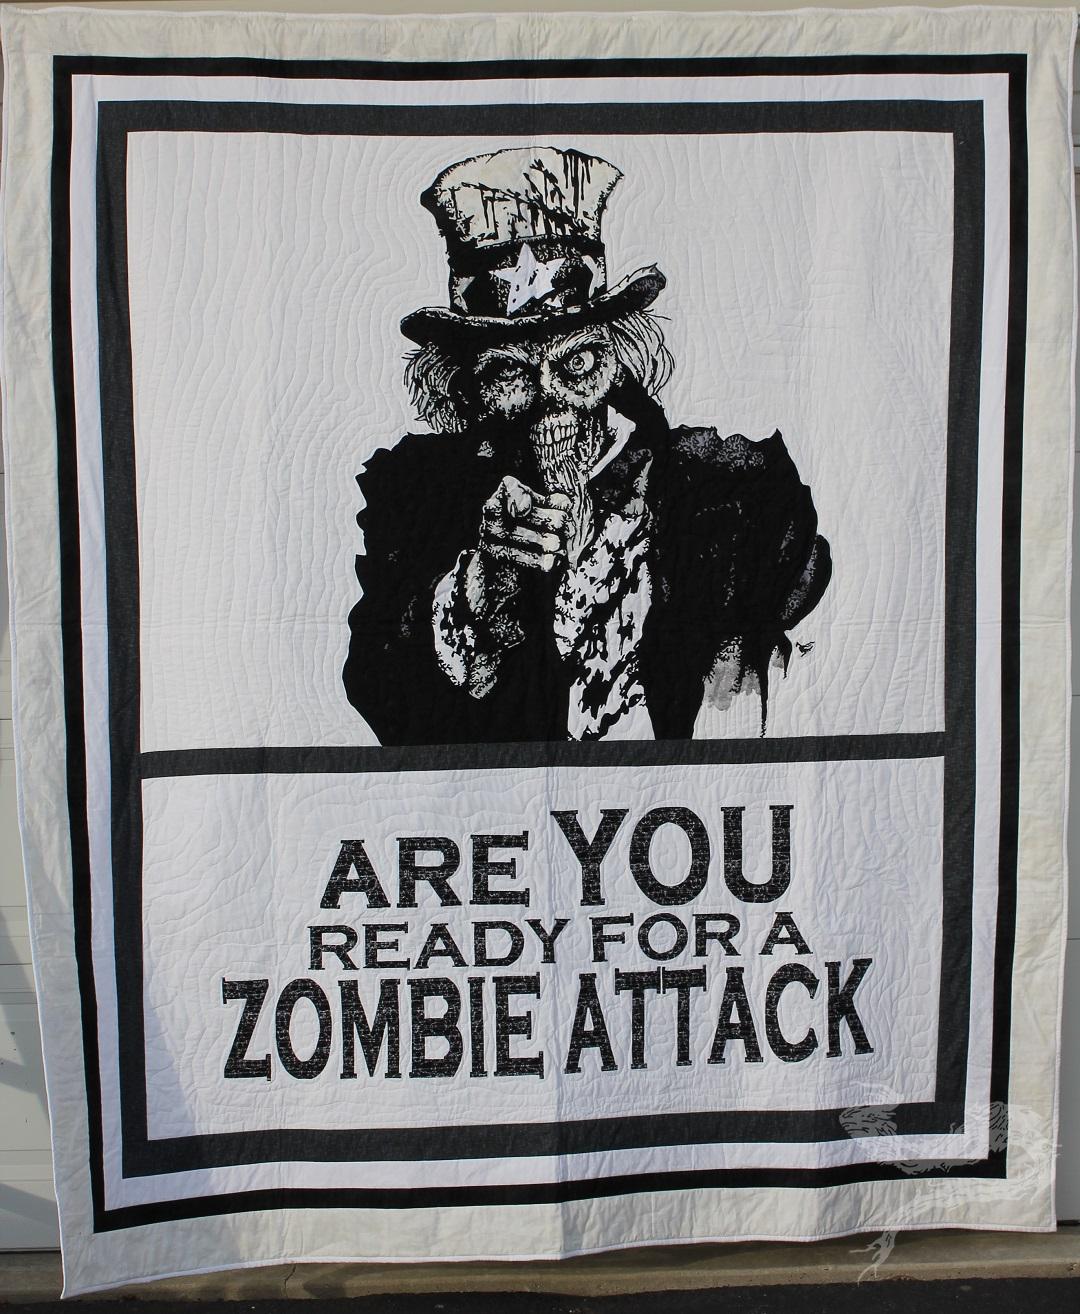
Zombie Sam. I can’t say this without smiling.
I’d met Billy Tackett at a convention in Omaha. Through a random happenstance, I’d found some artwork that I’d really enjoyed – yet had no idea how to find it – and there it was. Of course, I quickly bought the print! As the weekend went on, I found myself talking to Mr. Tackett about his various pieces, what I was beginning to do with fabrics, and would he – maybe – consider allowing me to use one of his pieces to see if I could make it work. I figured it was going to take a couple of years to get my skills up enough to be ready to for a crack at his artwork. More conversations followed, and the general gist of it was he’d consider it, but I had some homework to do.
Over the next few weeks, I’d started pouring over all of the artwork he had posted online. Piece by piece, I was making a list of works that I thought would be ideal to the style/technique I was developing. When I’d next meet Mr. Tackett, I wanted to have a list of pieces for him to pick and choose from. We’d met up again, a little later that year, in St. Louis at another convention. By then, I was prepared with a proposal and had photographs of what I’d done. I REALLY wanted to see what I could do with his artwork. He’d told me it wouldn’t take me two years to be ready; he was right.
It wasn’t until the part way into the following year that I’d get the chance I wanted. The hi-res image of a Billy Tackett piece had arrived. He’d given me no guidelines, save those that I’d outlined in my proposal, and let me do what I wanted to do. The one stipulation was that he didn’t want to see any in-process photos. It was one of those ‘show me the magic first, and then show me how you did it’. My goal was to have the finished piece ready to present to him at the upcoming St. Louis convention that year. I had about two and a half months.
It took me the better part of two weeks to get the image processed, printed out, and figure out where/how I was going to start. Most of that time was my base pattern hanging on my design wall and me just staring at it. I’d never done anything like this before, and I was a fair bit nervous. I’d sat down with my paper journal (because I keep notes and documentation about complicated projects), and started writing out all my ideas – pros and cons, goals, thoughts, and general progress – or lack thereof.
This wasn’t going to get done with me just staring at it. I started to assemble the fabrics I had, and began building my fabric palette. 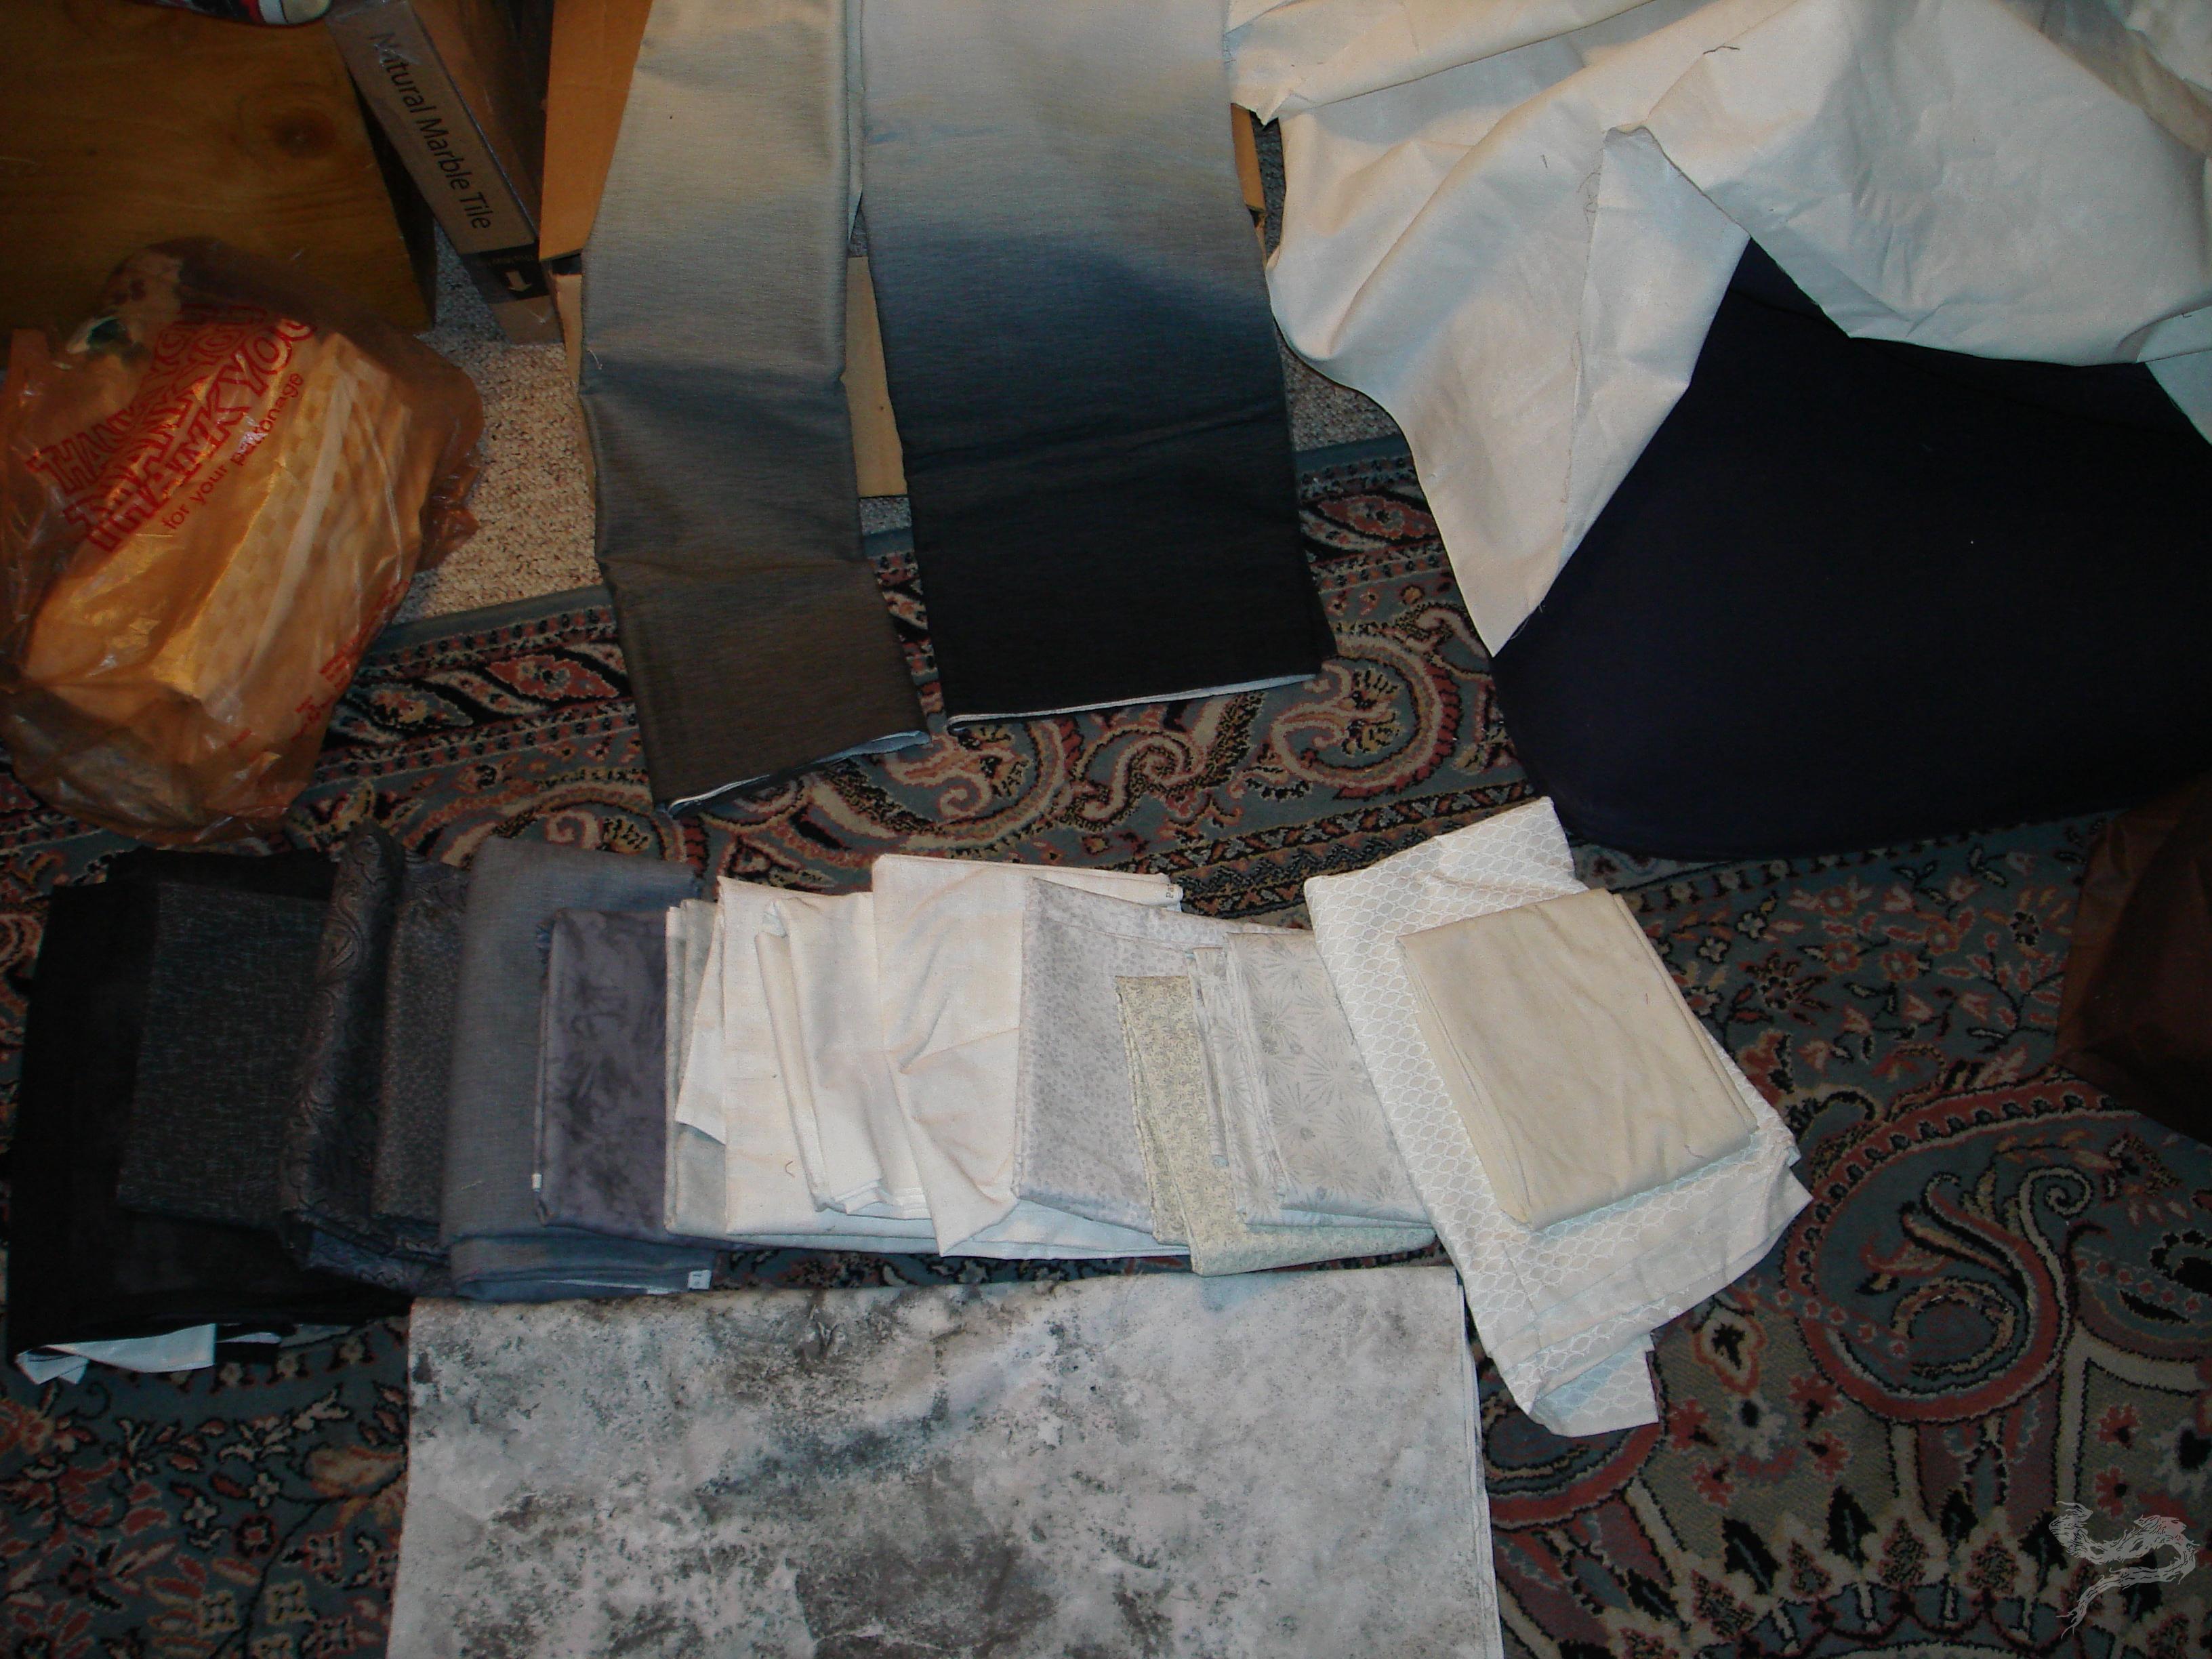 Knowing not all the fabrics I’d chosen were going to be used, I wanted to make sure I had enough to pick and choose from. I had two major goals for this project:
- When you first see this piece, I wanted you to plainly see Billy Tackett’s work.
- However, I wanted to draw people in to look at the details I’d added and see MY work.
Not knowing where else to start, I figured I’d work my way from the top down. Once I’d gotten the background fabric pinned up on the wall, I started with the top hat.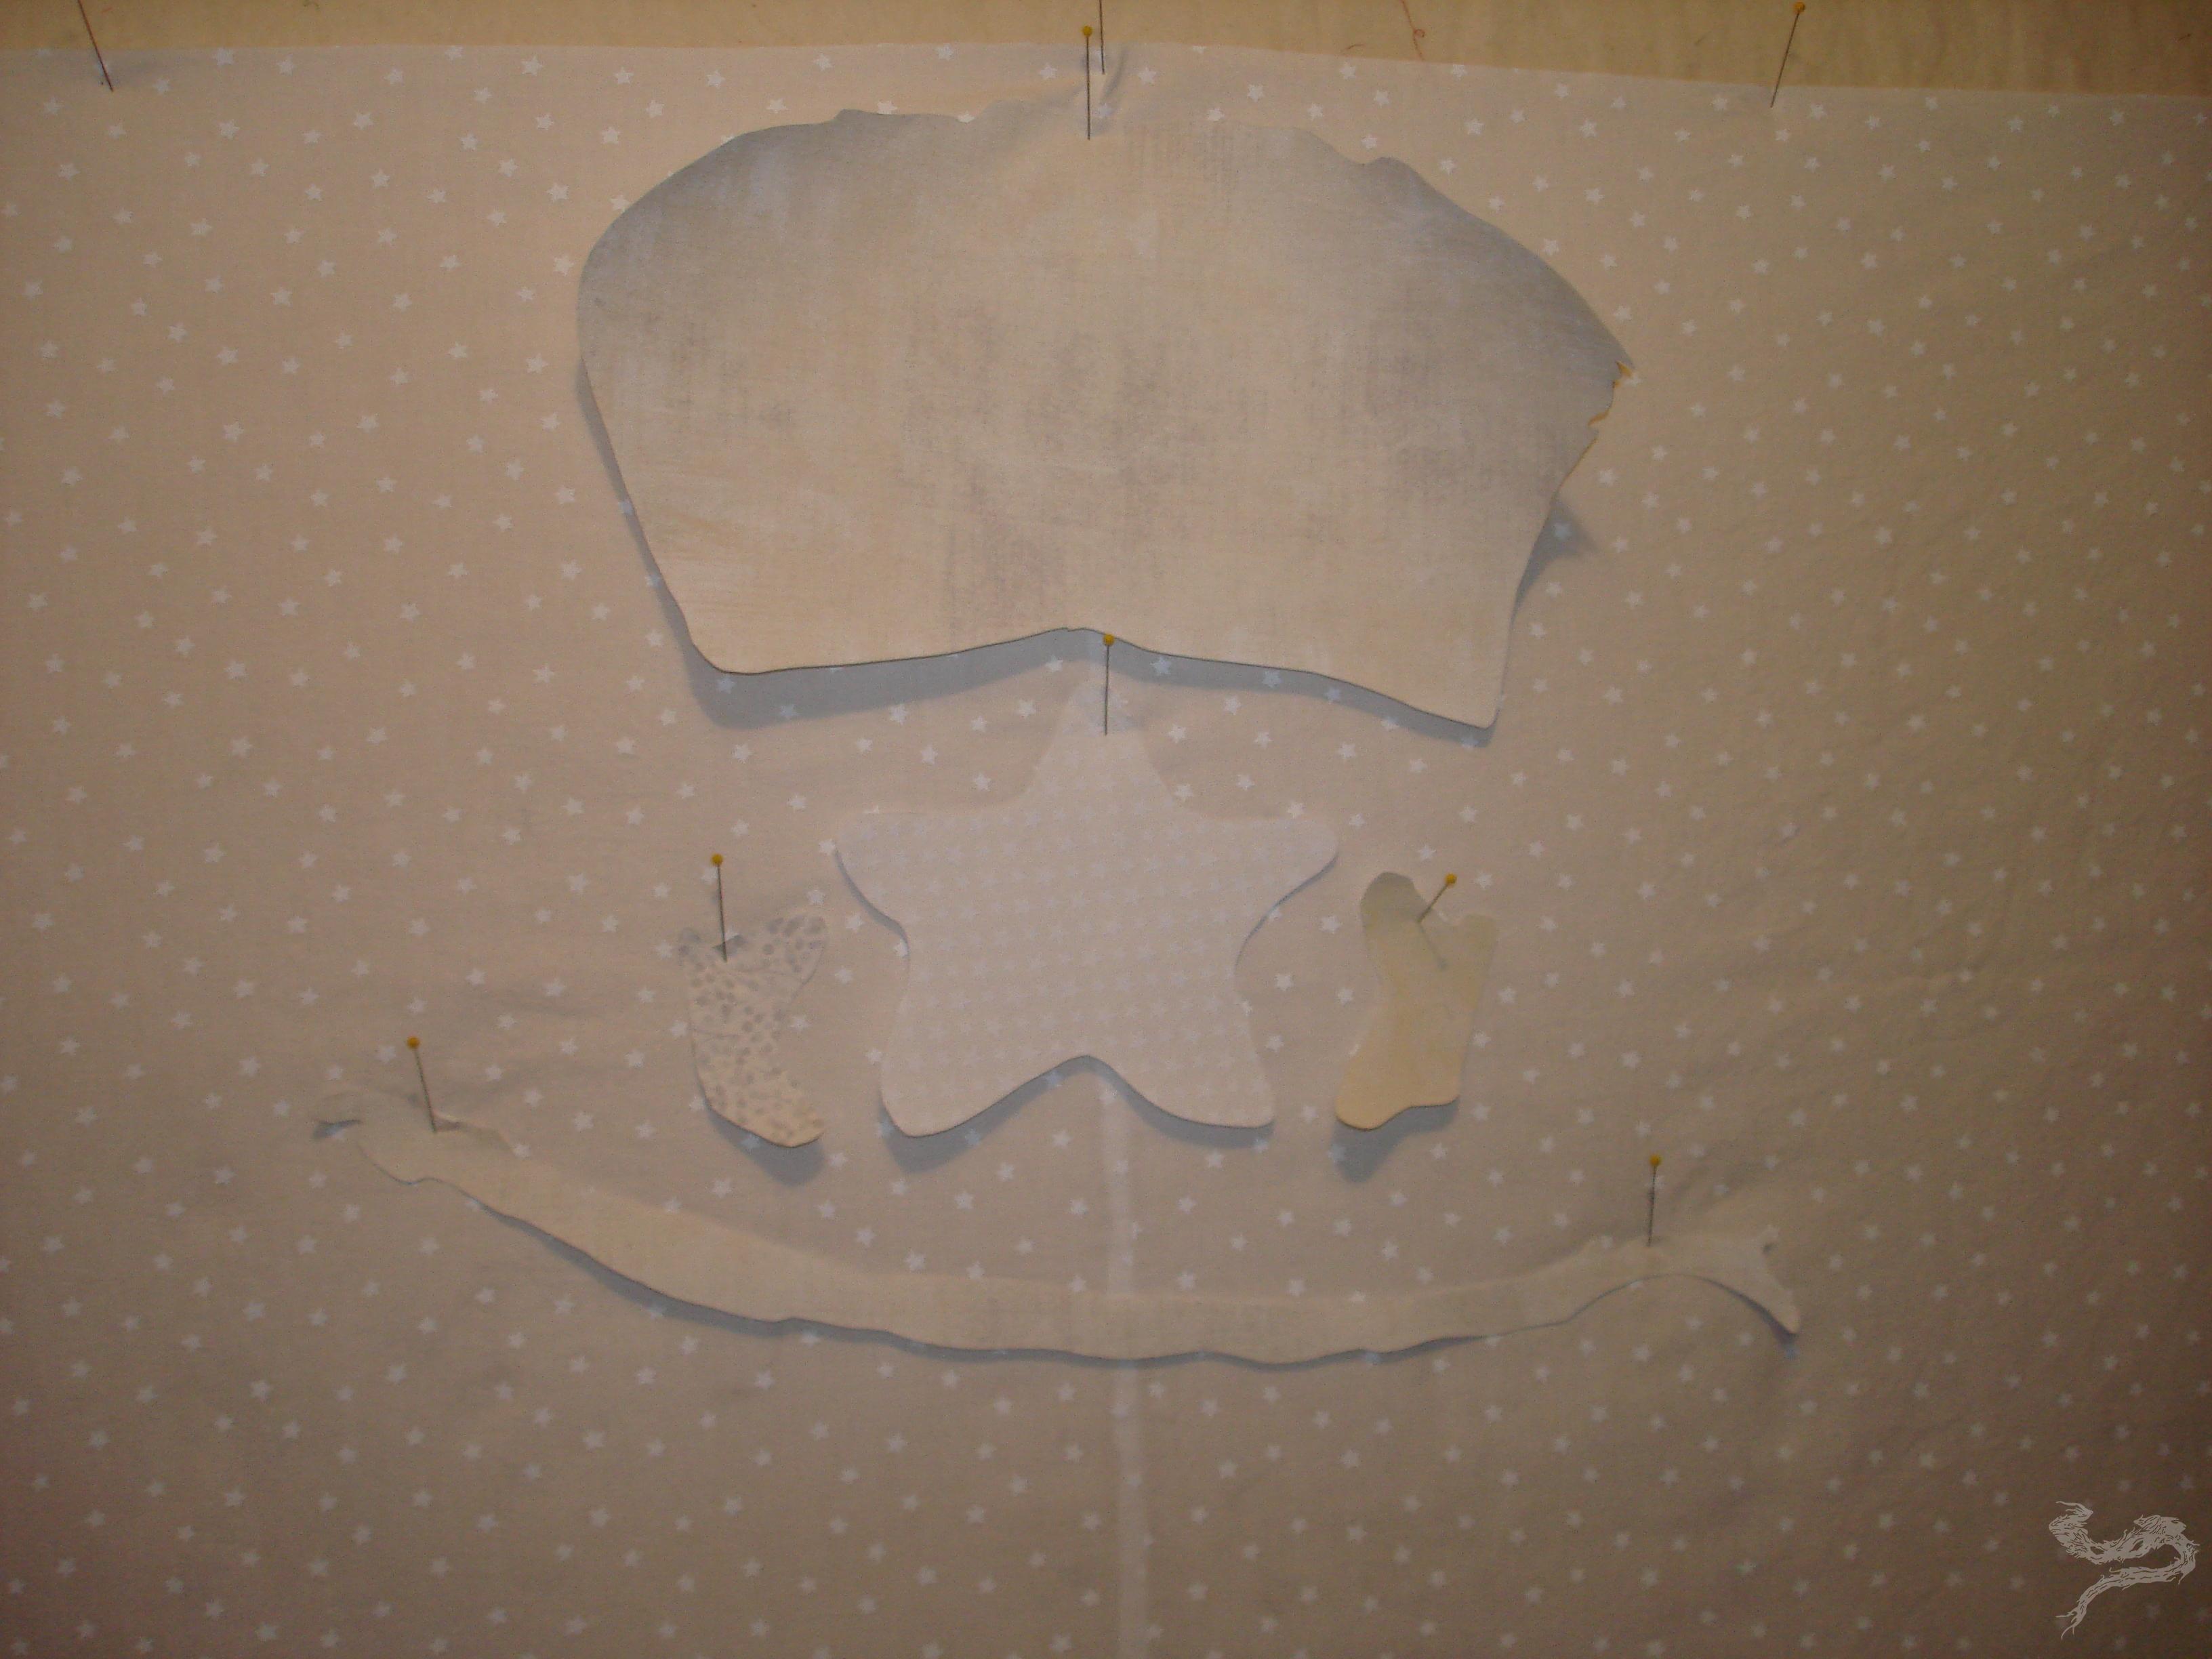 When I made the Willowy Being, I’d started with the lights and gradually moved to the darks. This seemed like as good of an idea as anything, plus it gave me a place to begin.
It didn’t work. Mr. Tackett’s artwork is more precise and detailed than a photograph. I needed to rethink how I was going to go about doing this. Then, it dawned on me. Most artists I’d seen usually started with a line drawing, and then filled in the details. Maybe I should consider following this example. About 5 hours into this project, I knew I was on to something!! 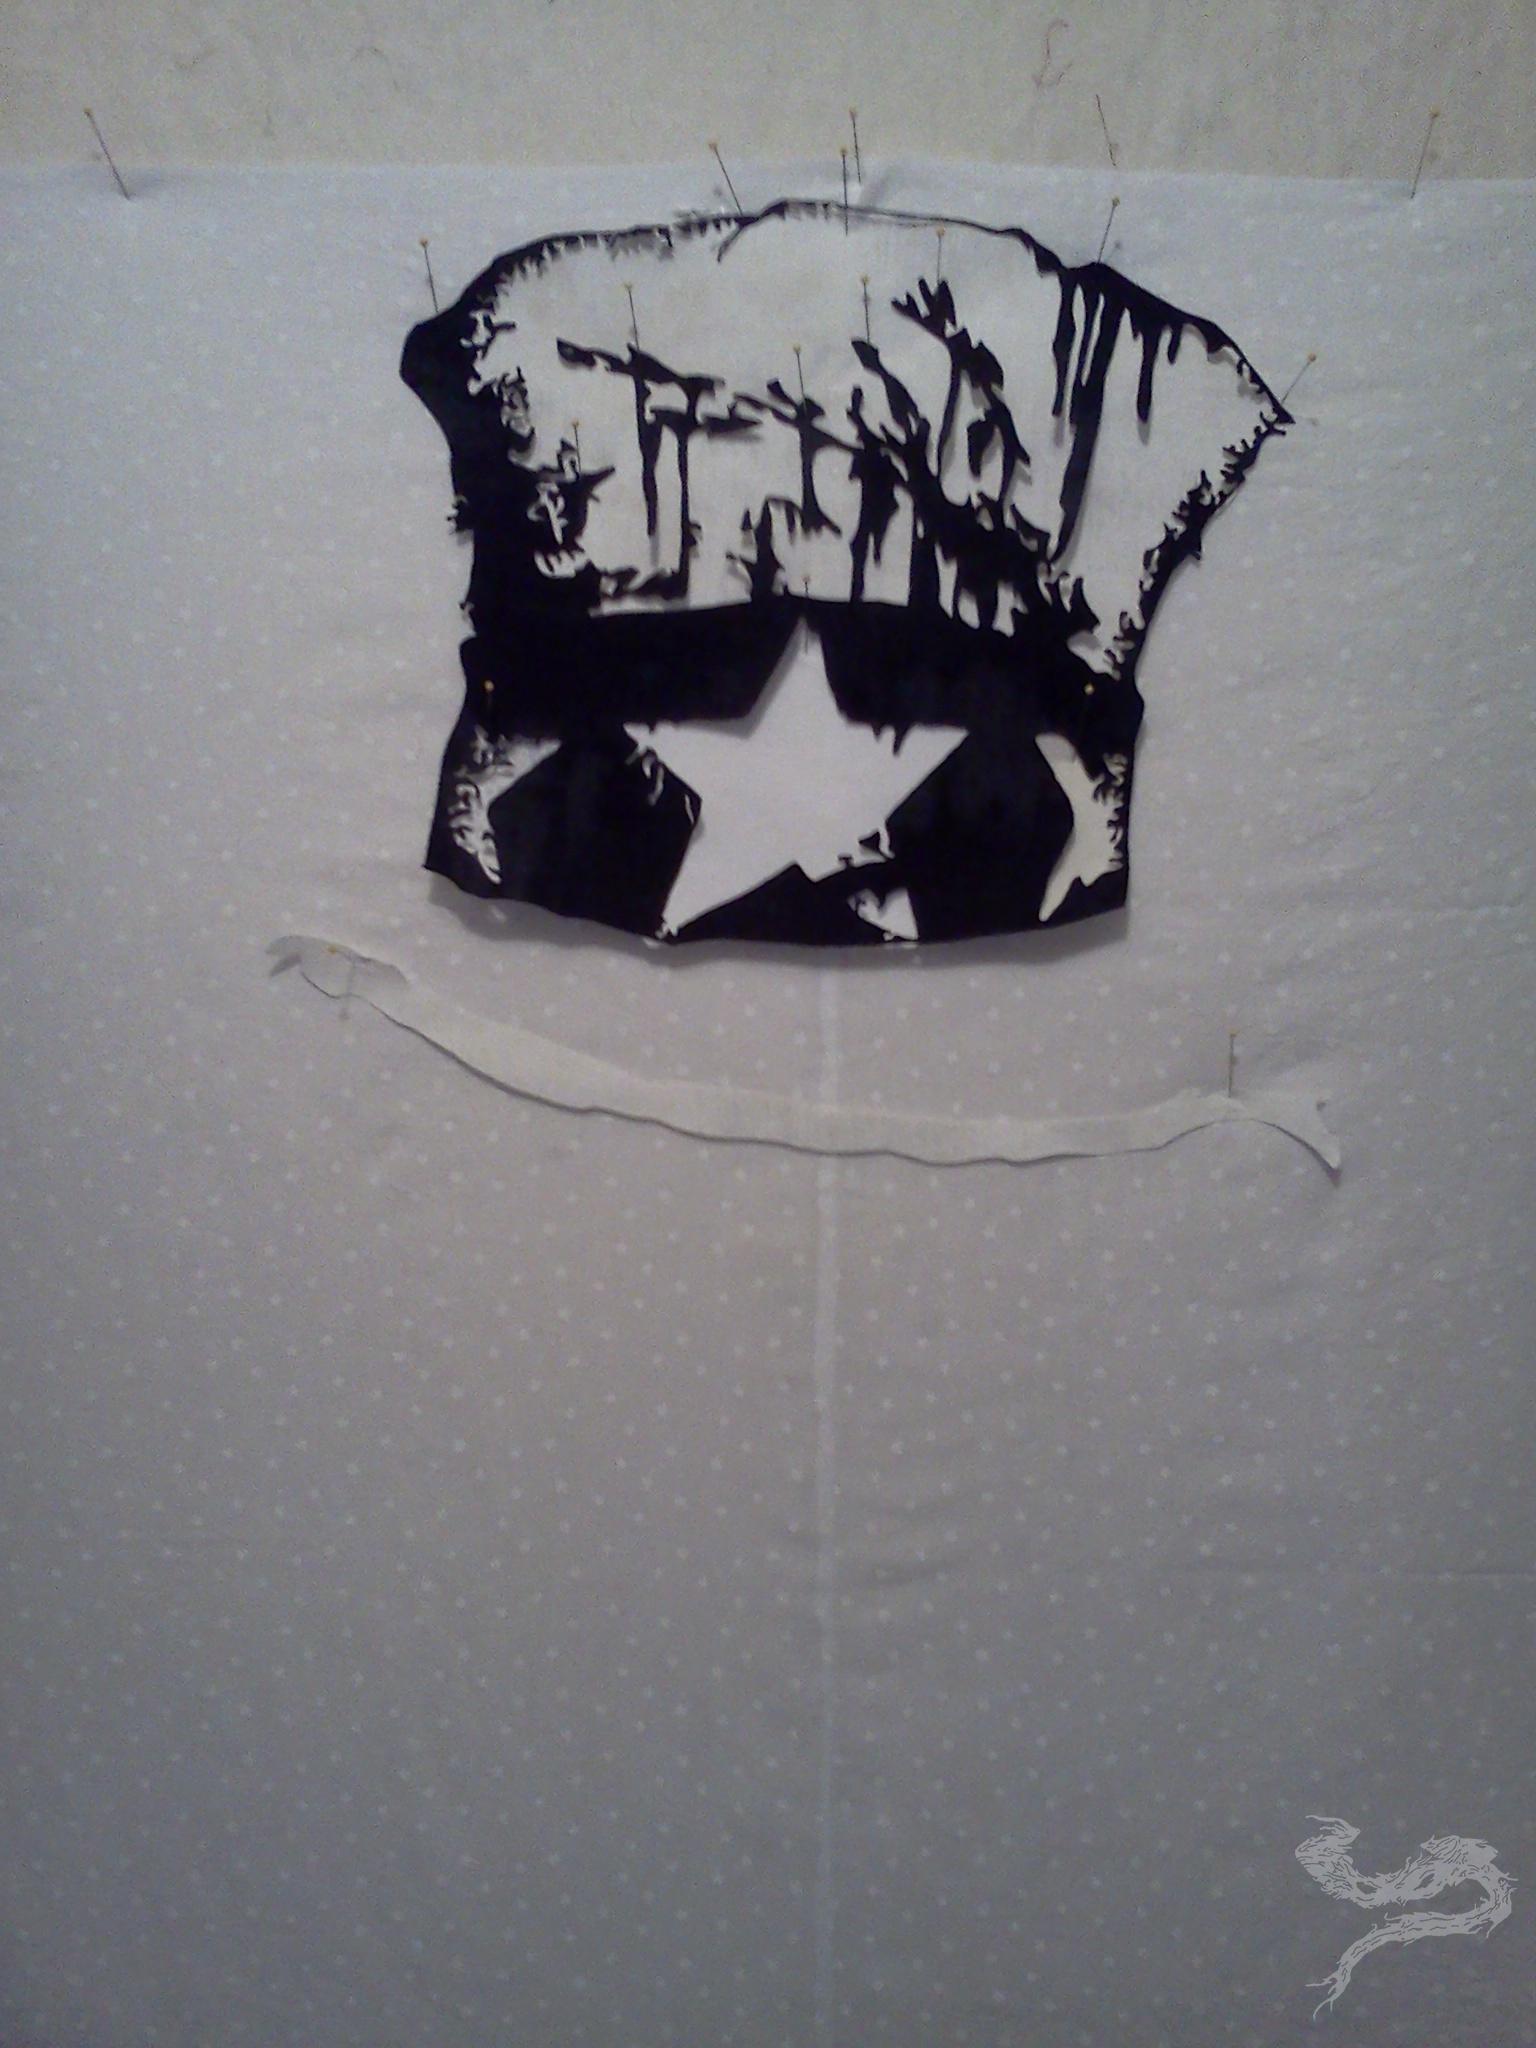
This project was going to be a LOT of hand cutting – more than I’d ever done before. I was limited in my time to get work in because of three deciding factors: my job, the sun, and how much my hands could take. My job, for obvious reasons. The boss would have frowned heavily on my bringing any of this to work. The sun, because I was using my patio door as a vertical light table. Cloudy days were not looked upon with favor. My hands, because the scissors I was using to do all the intricate cutting were causing issues with my fingers. I was developing numbness in my thumb and middle finger where the scissors were putting pressure on them.
The ‘technique’ I was using is called “raw edge applique”. The simplest way I can explain it is like this: I’m making a bunch of fabric patches, cutting out the shapes, and pinning them into place. I’ll fuse them down when I’m comfortable enough with what I’ve gotten done, and then sew all the pieces down afterwards. From there, it’s assembling the rest of the quilt top and making the quilt.
I don’t joke when I say cloudy days were frowned upon. I had limited time and a lot of work to get done. I’d figured out that if I spent as much time as I could tracing out the areas I wanted/needed to cut, I could get a lot of prep work done ahead of time. In the evenings or on rainy/cloudy days, I could spend cutting pieces out. At the end of the day, I’d have to vacuum my living room and couch because of all the little snippets of fabric that would go flying every which way – despite my cutting over a bag to catch the worst of it.
Through trial and error on a couple of previous quilts, I’d found that if I used a light-weight paperback fusible web I’d get pieces that wouldn’t stand up on their own. Meaning, the end product wouldn’t be as stiff as a board. Texture and pliability (like any other kind of quilt) were something I wanted to make sure was included.
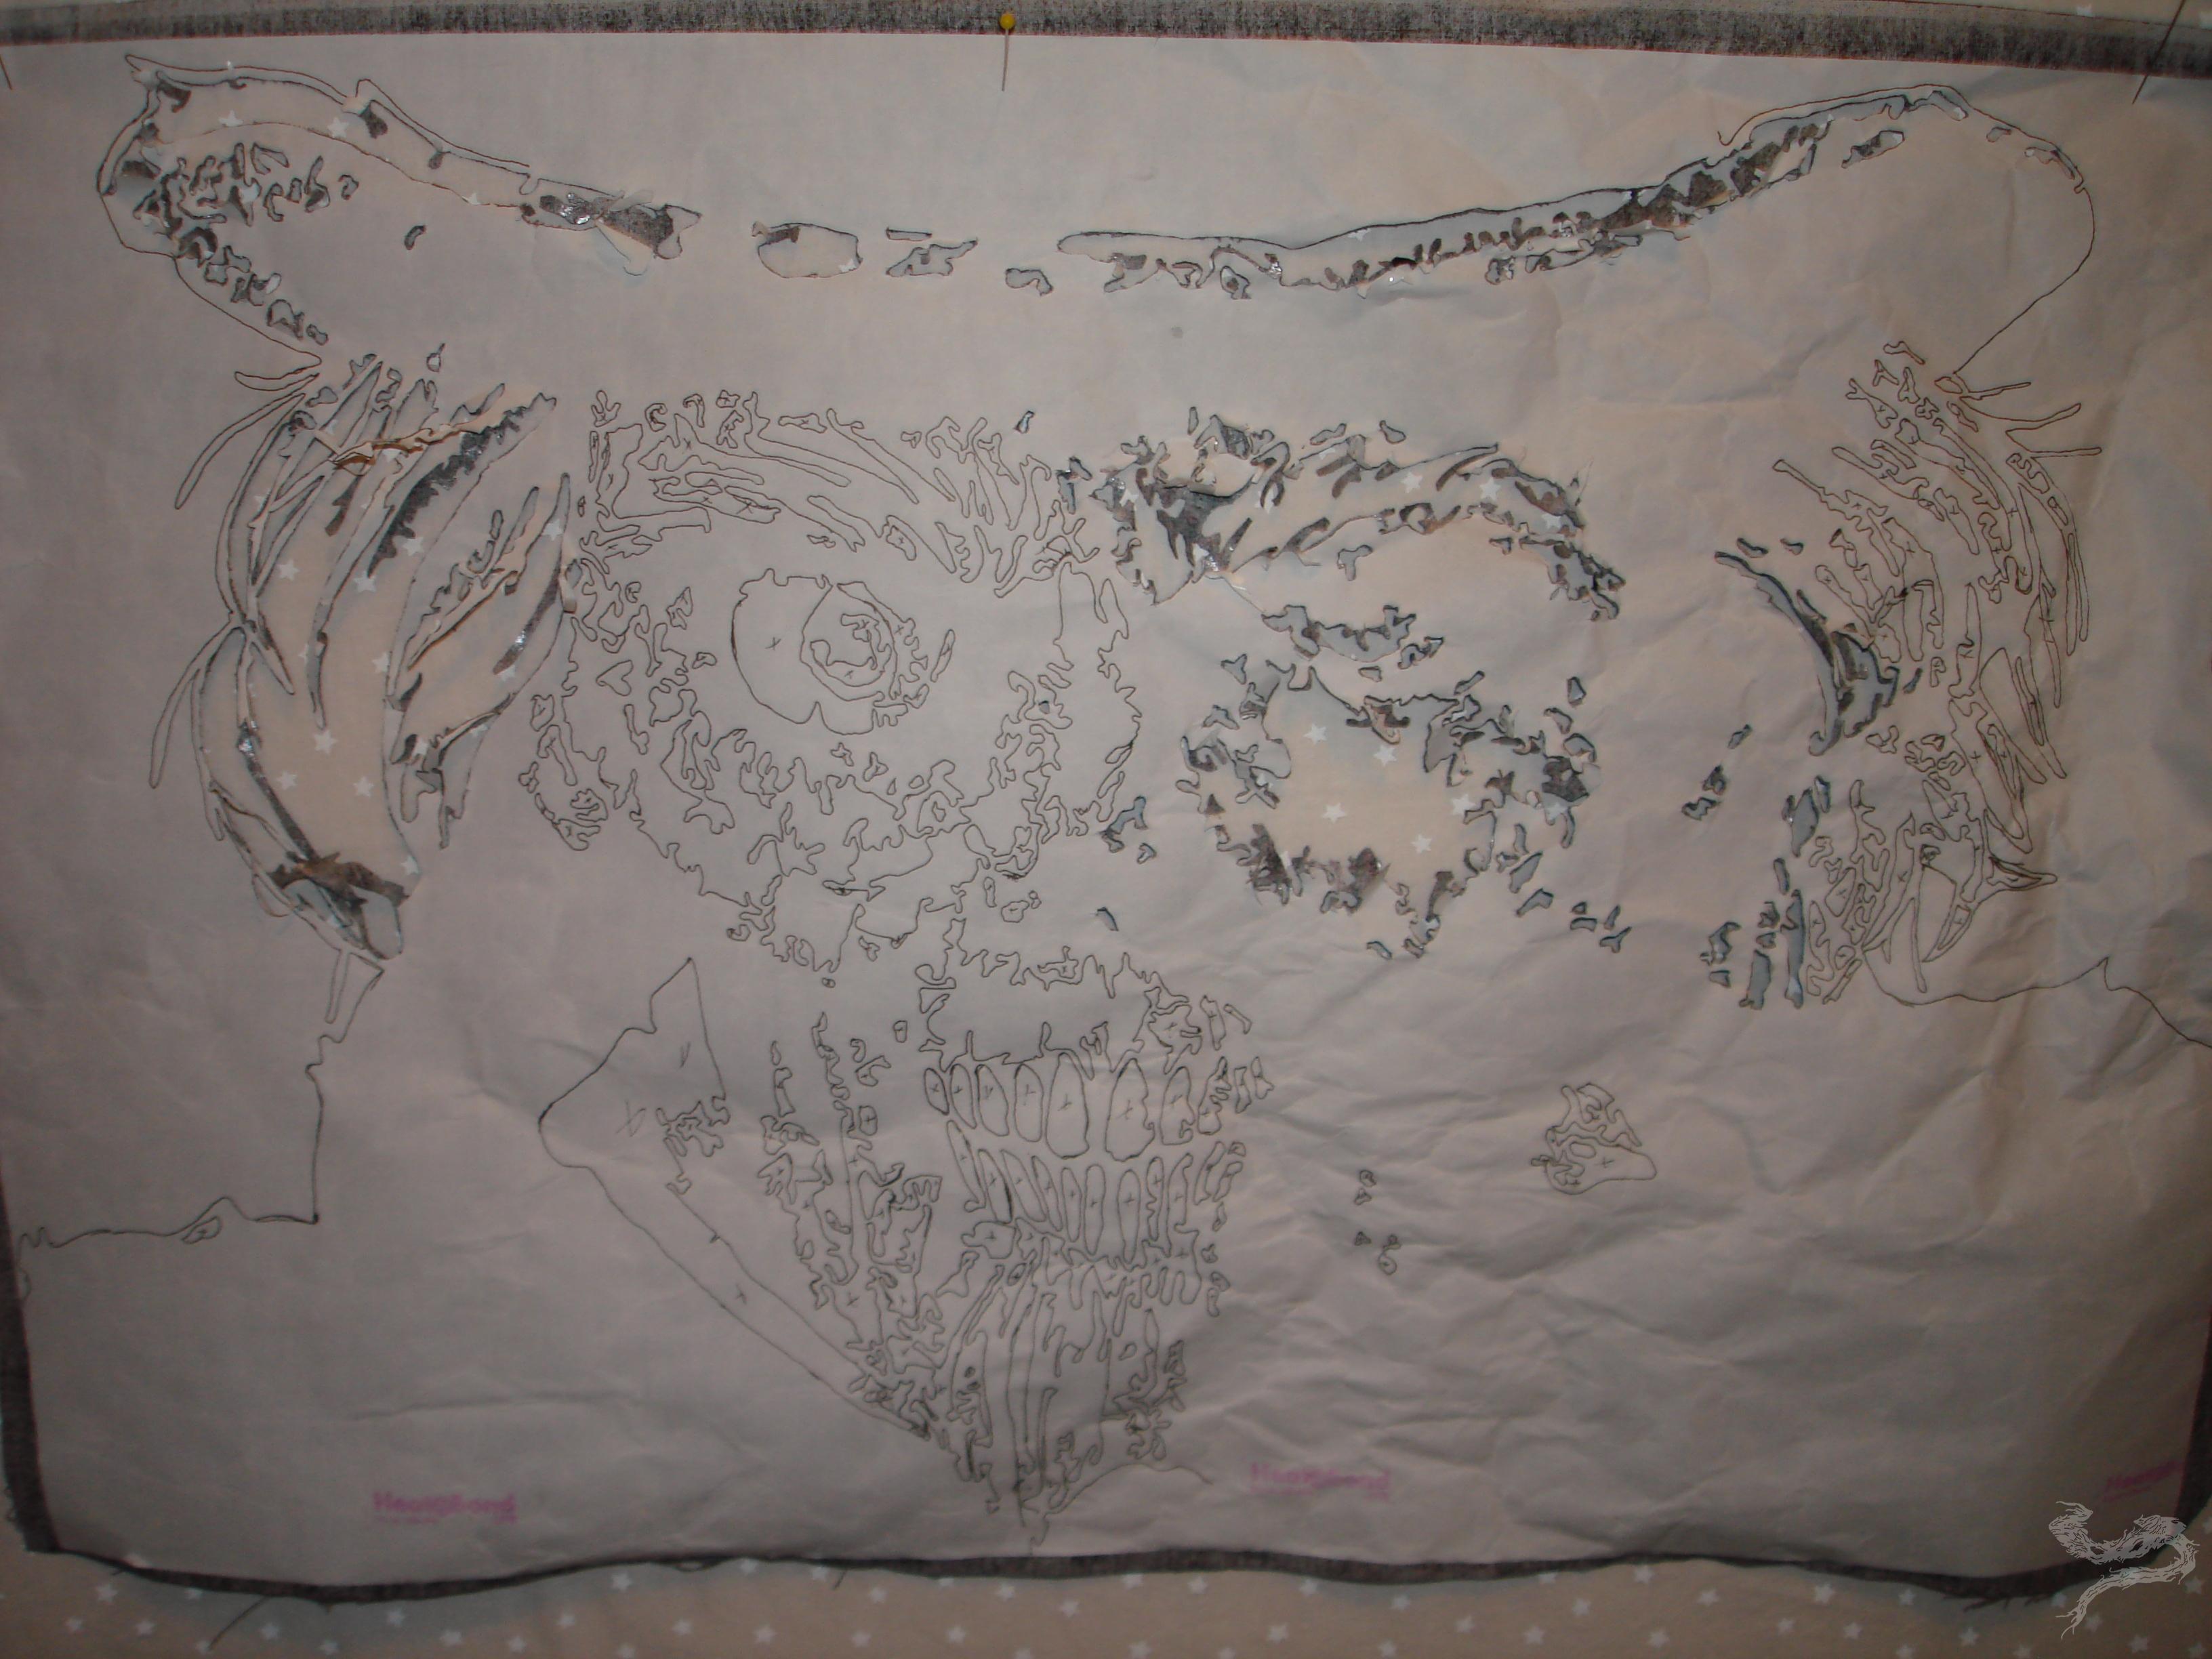 This is what I saw when I was cutting put my pieces. It looked like a weird paint-by-number set up. The lines were my cut lines. It seemed a little overwhelming and difficult to follow. It’s when I turned the piece around, to the fabric side, that you finally saw Sam looking back at you.
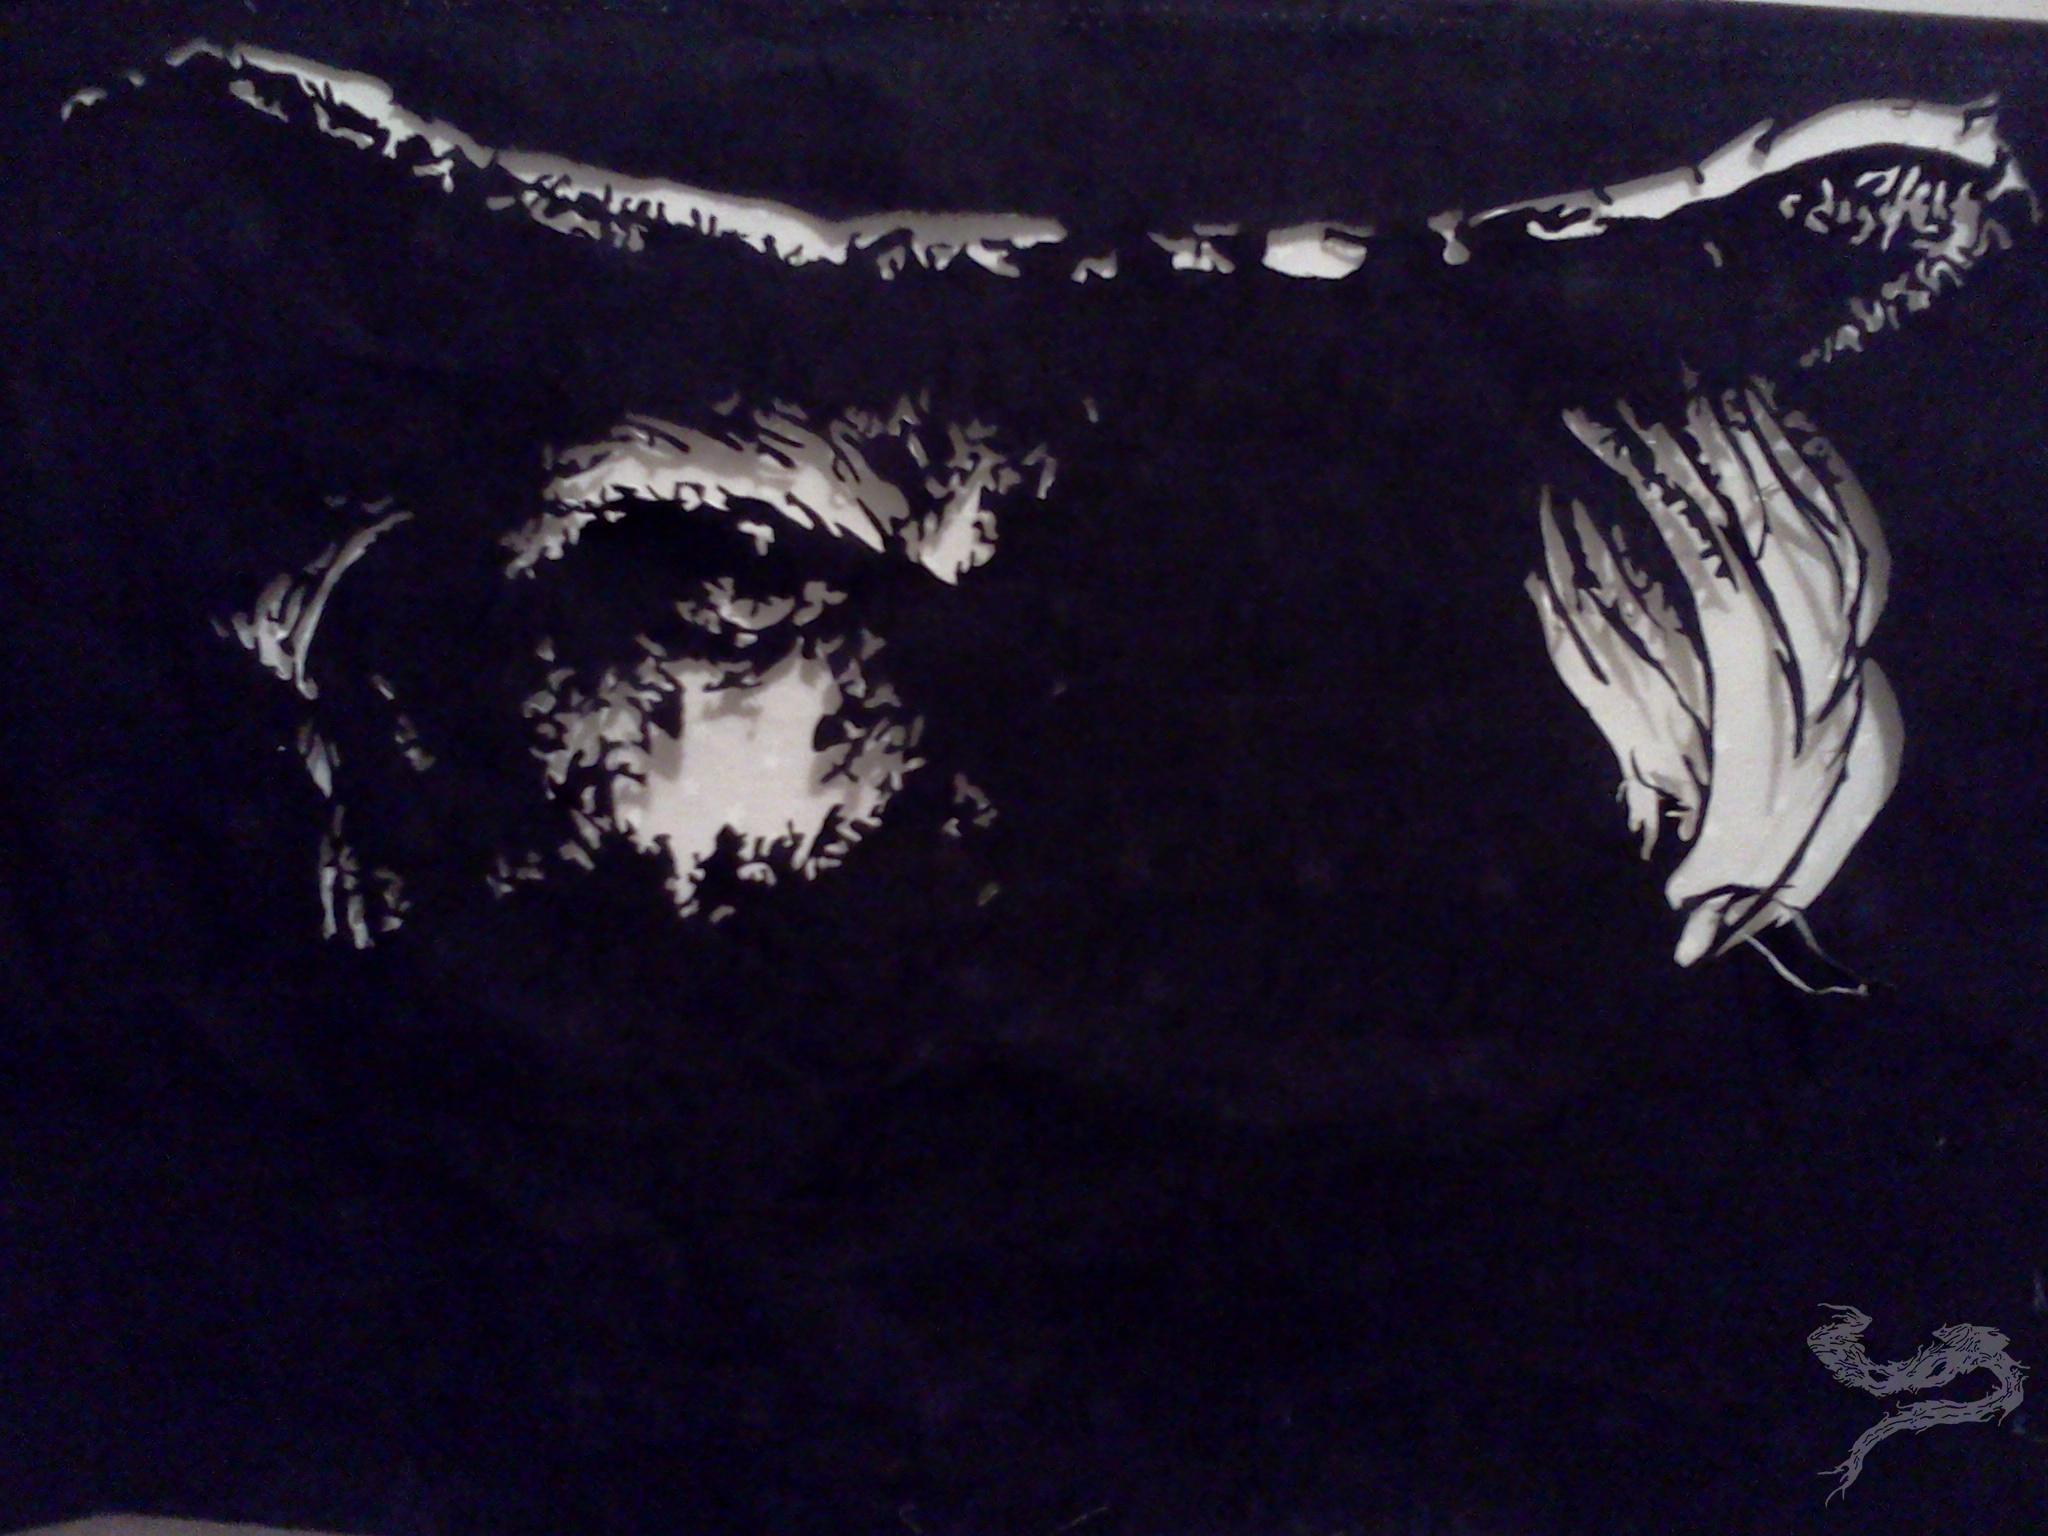
Two hours of cutting later 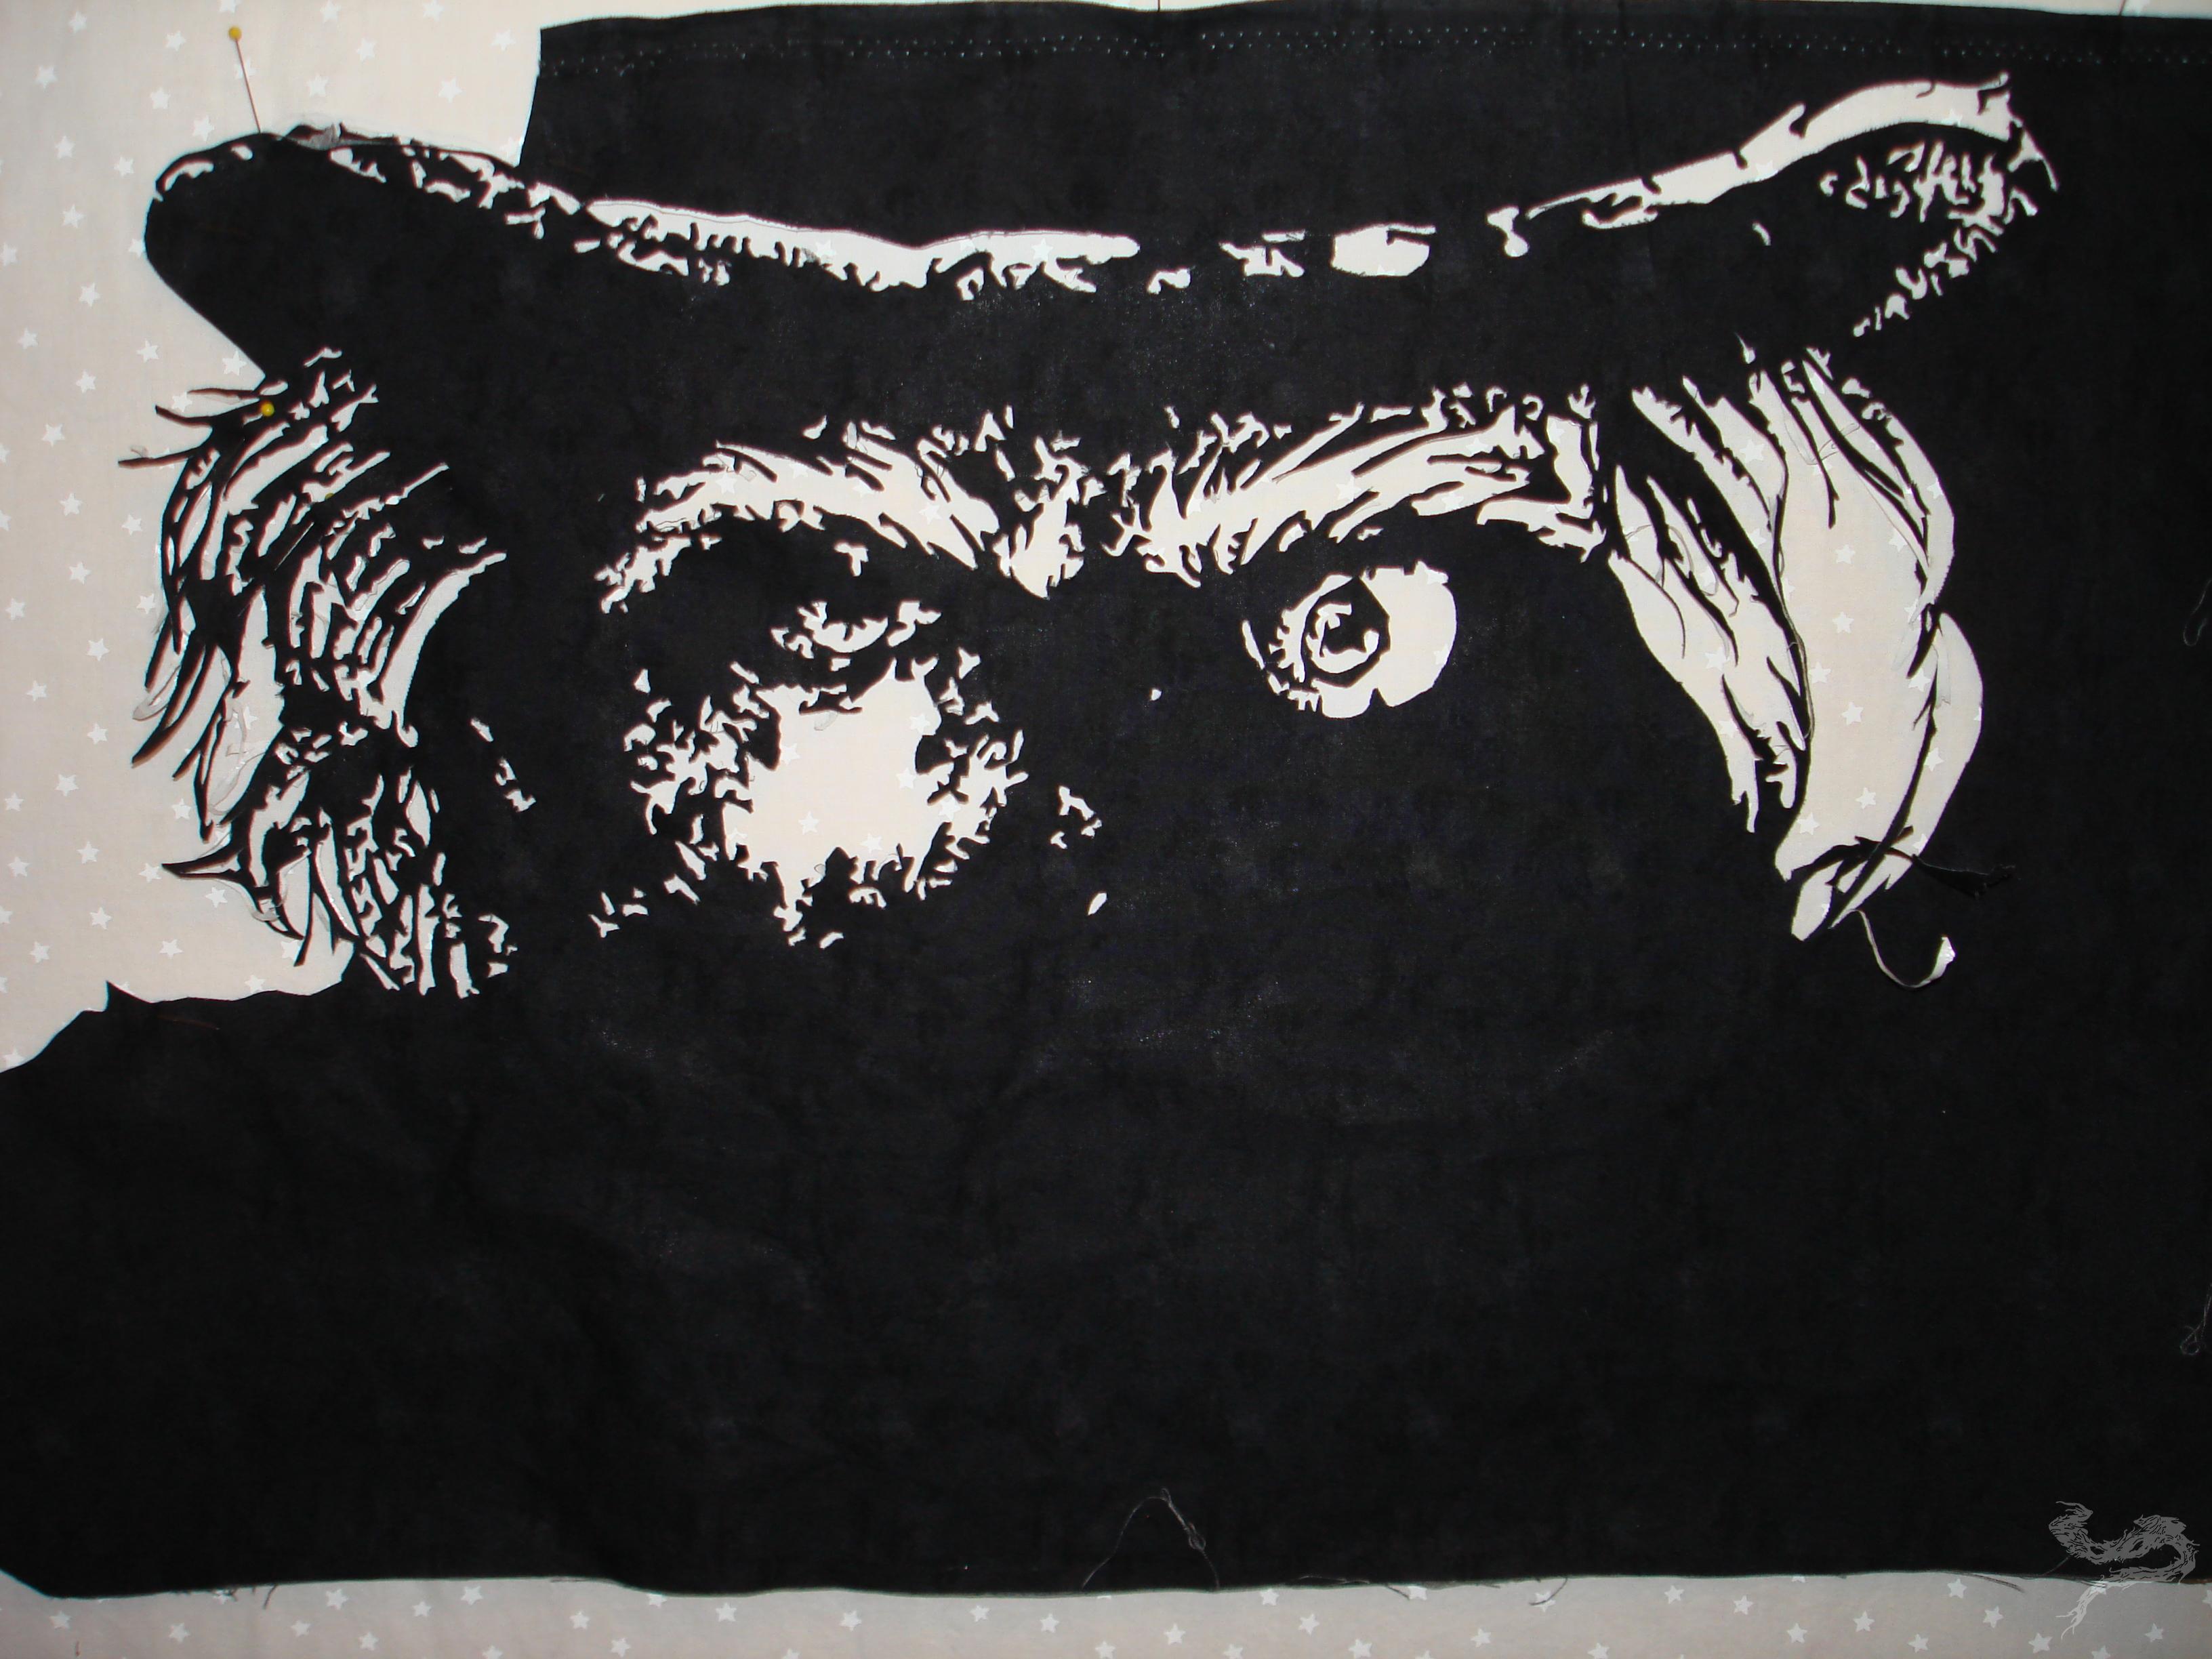
Two more hours later 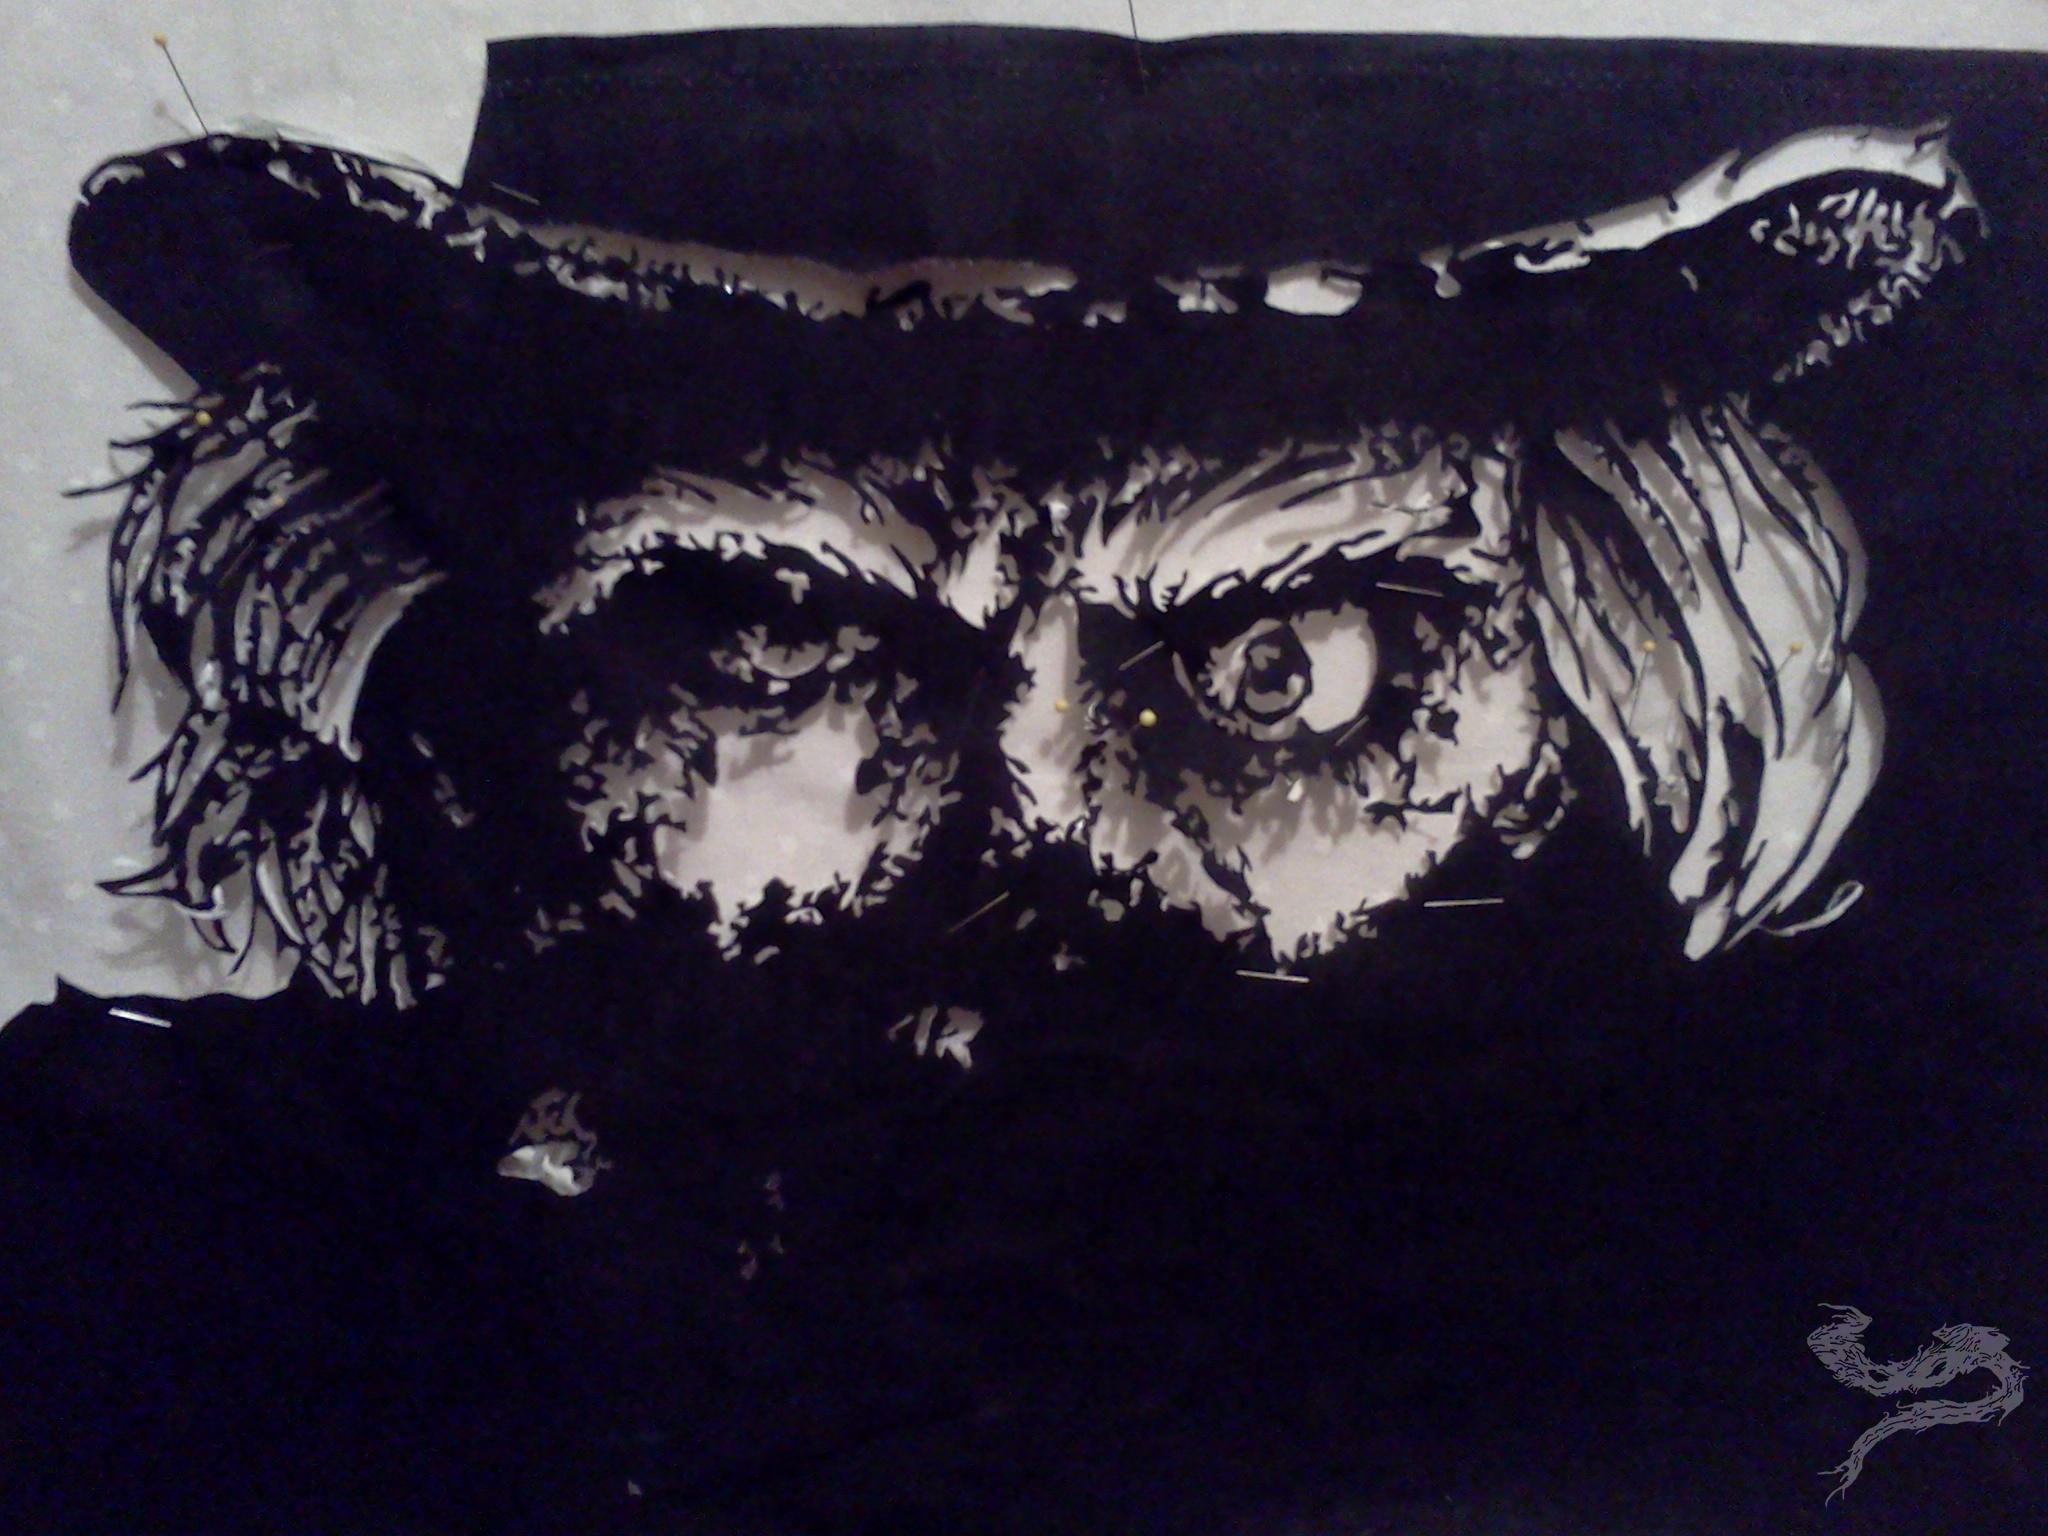
And another two hours later 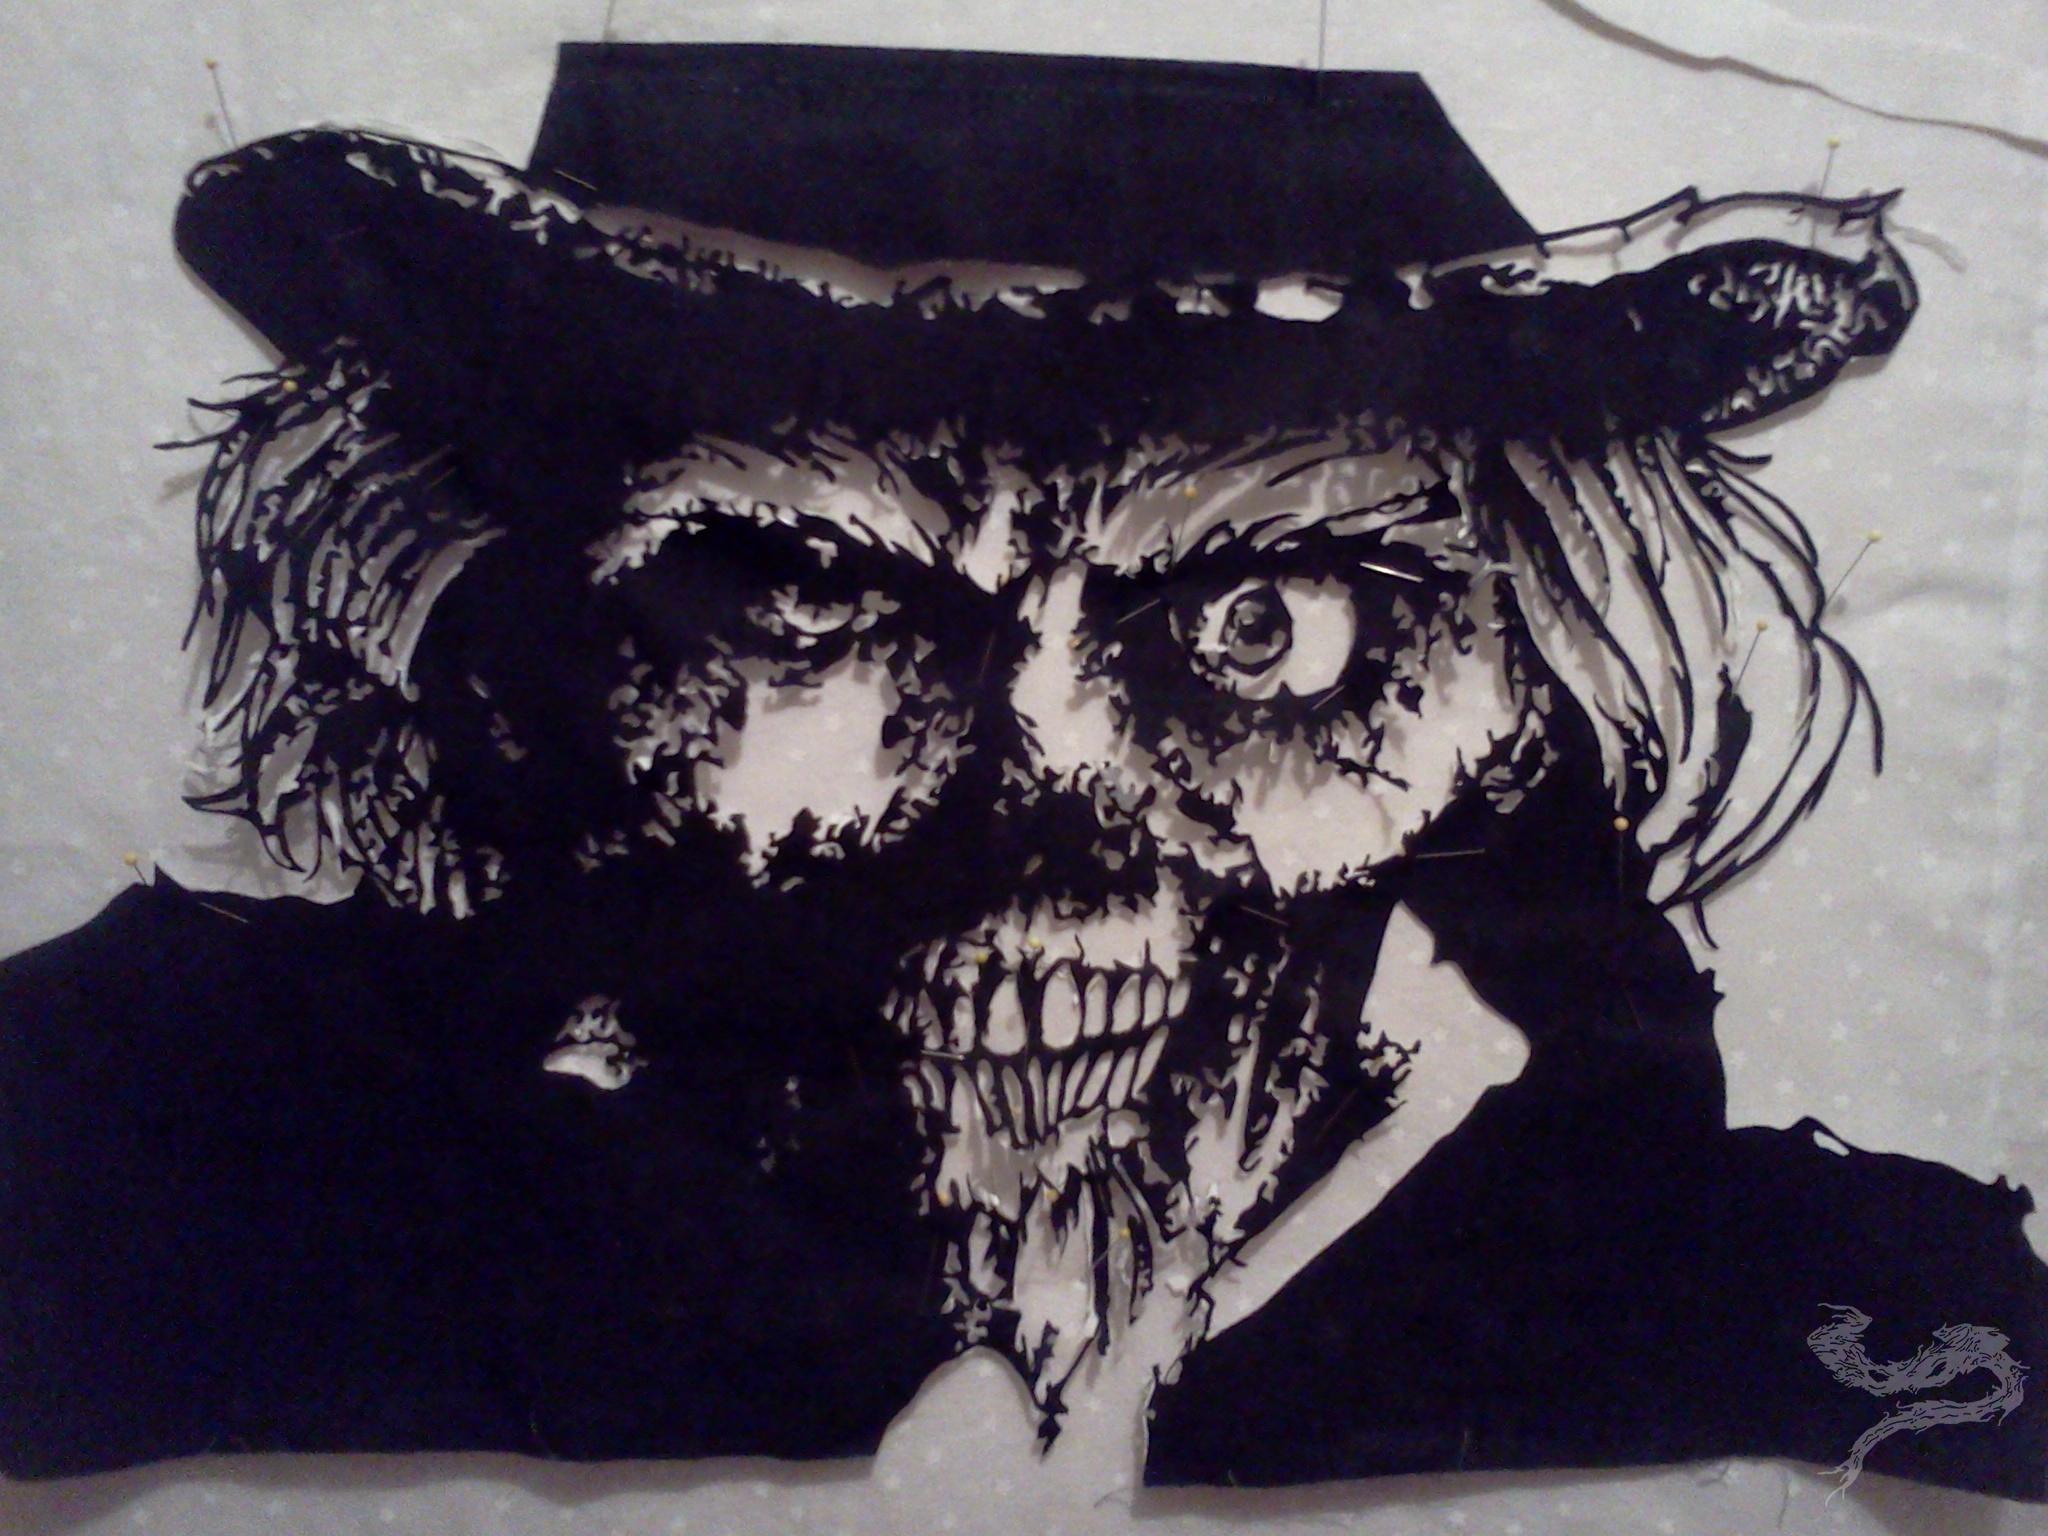
The next thing I needed to do was put the hat to the head (or the head to the hat). 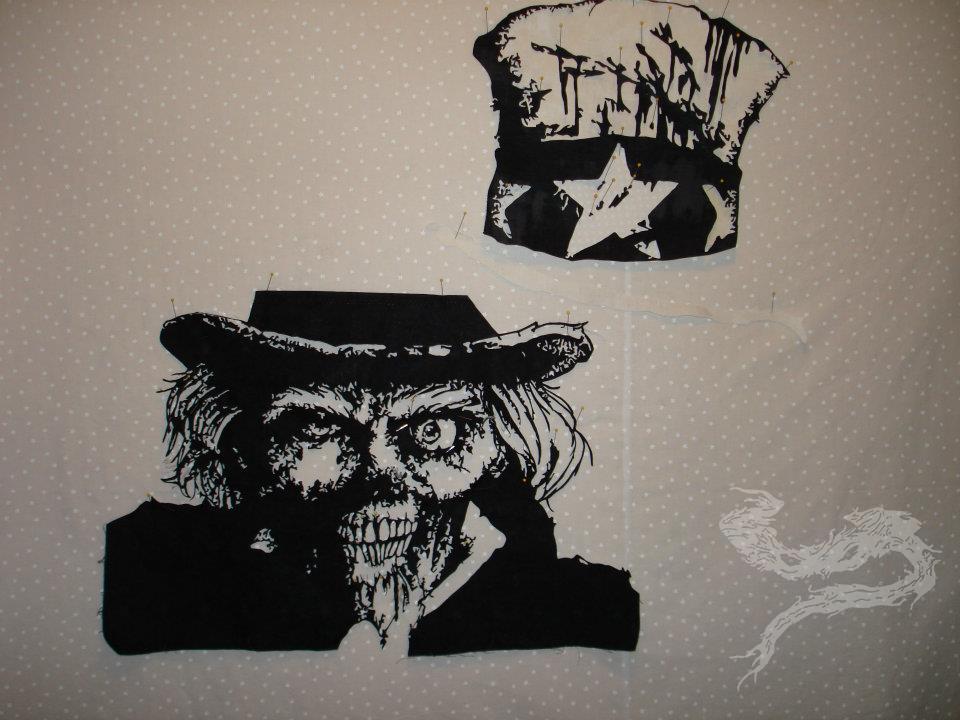
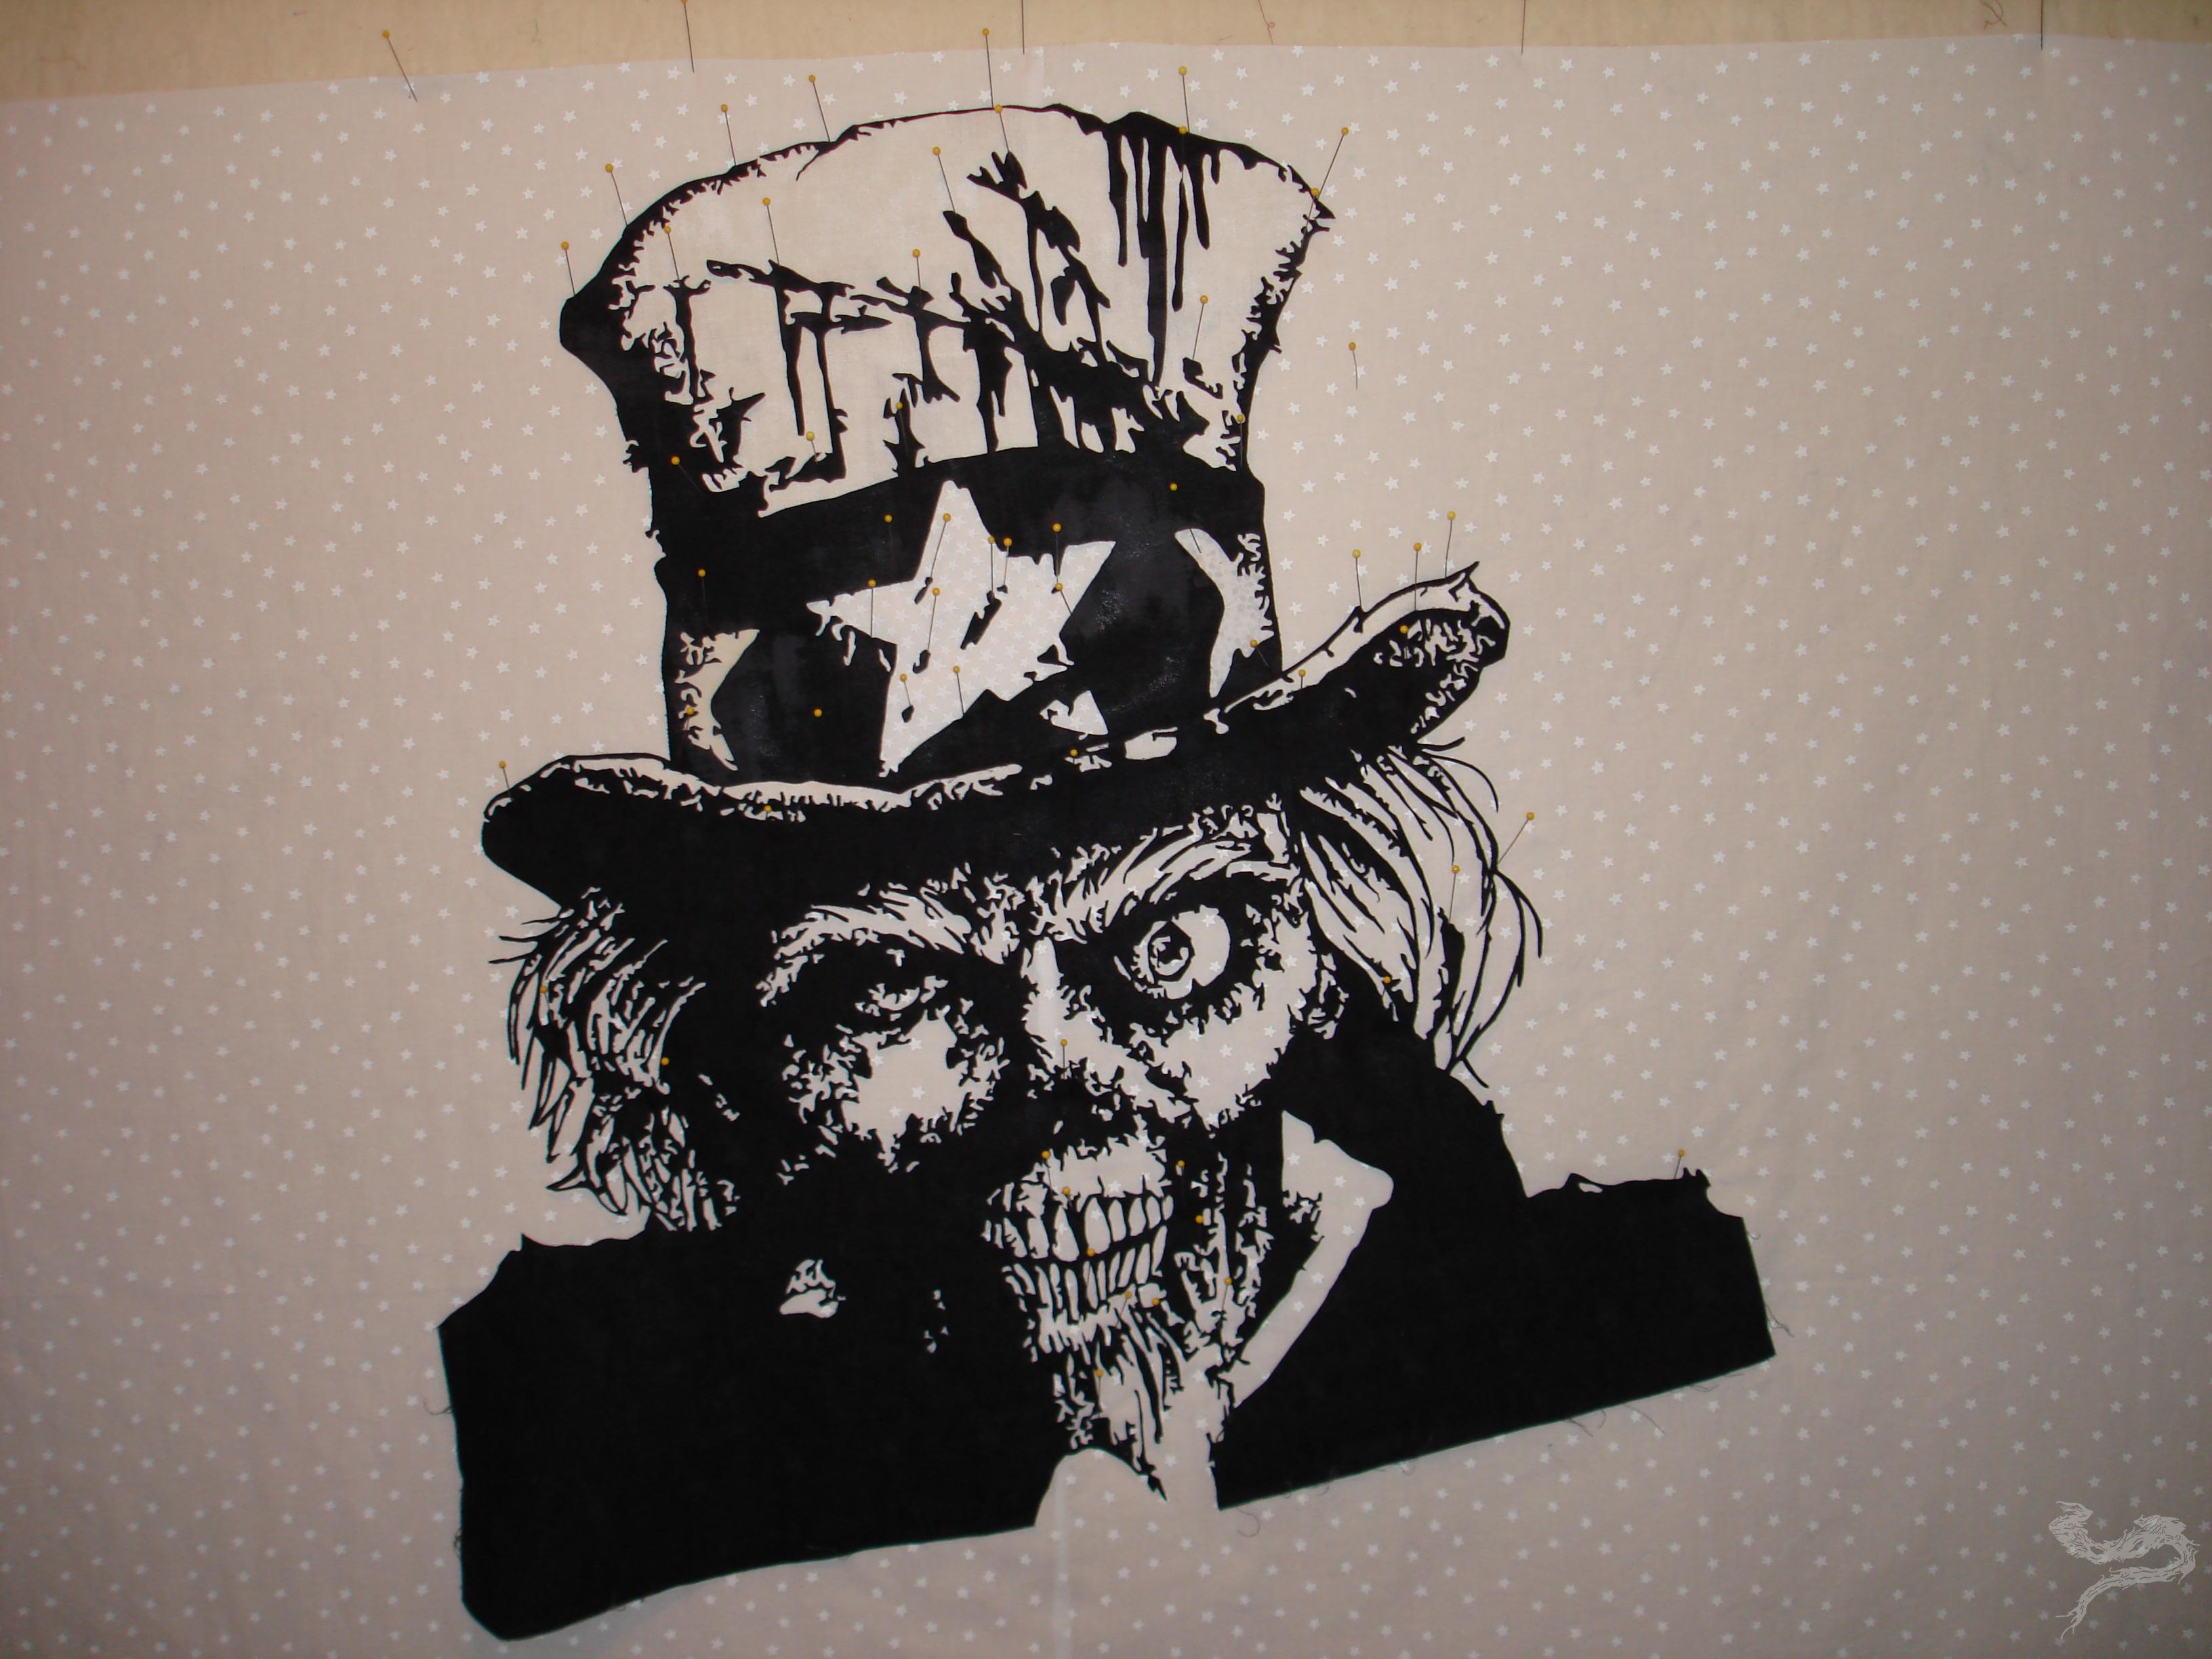
By now, you’ve got a pretty good idea of what I’m working with and where I’m going to take it. Section by section, I was getting the main ‘outline’ done. I wouldn’t even consider doing any other kind of shading or highlighting until the main body was done. It would take me almost an entire month to get the work done. 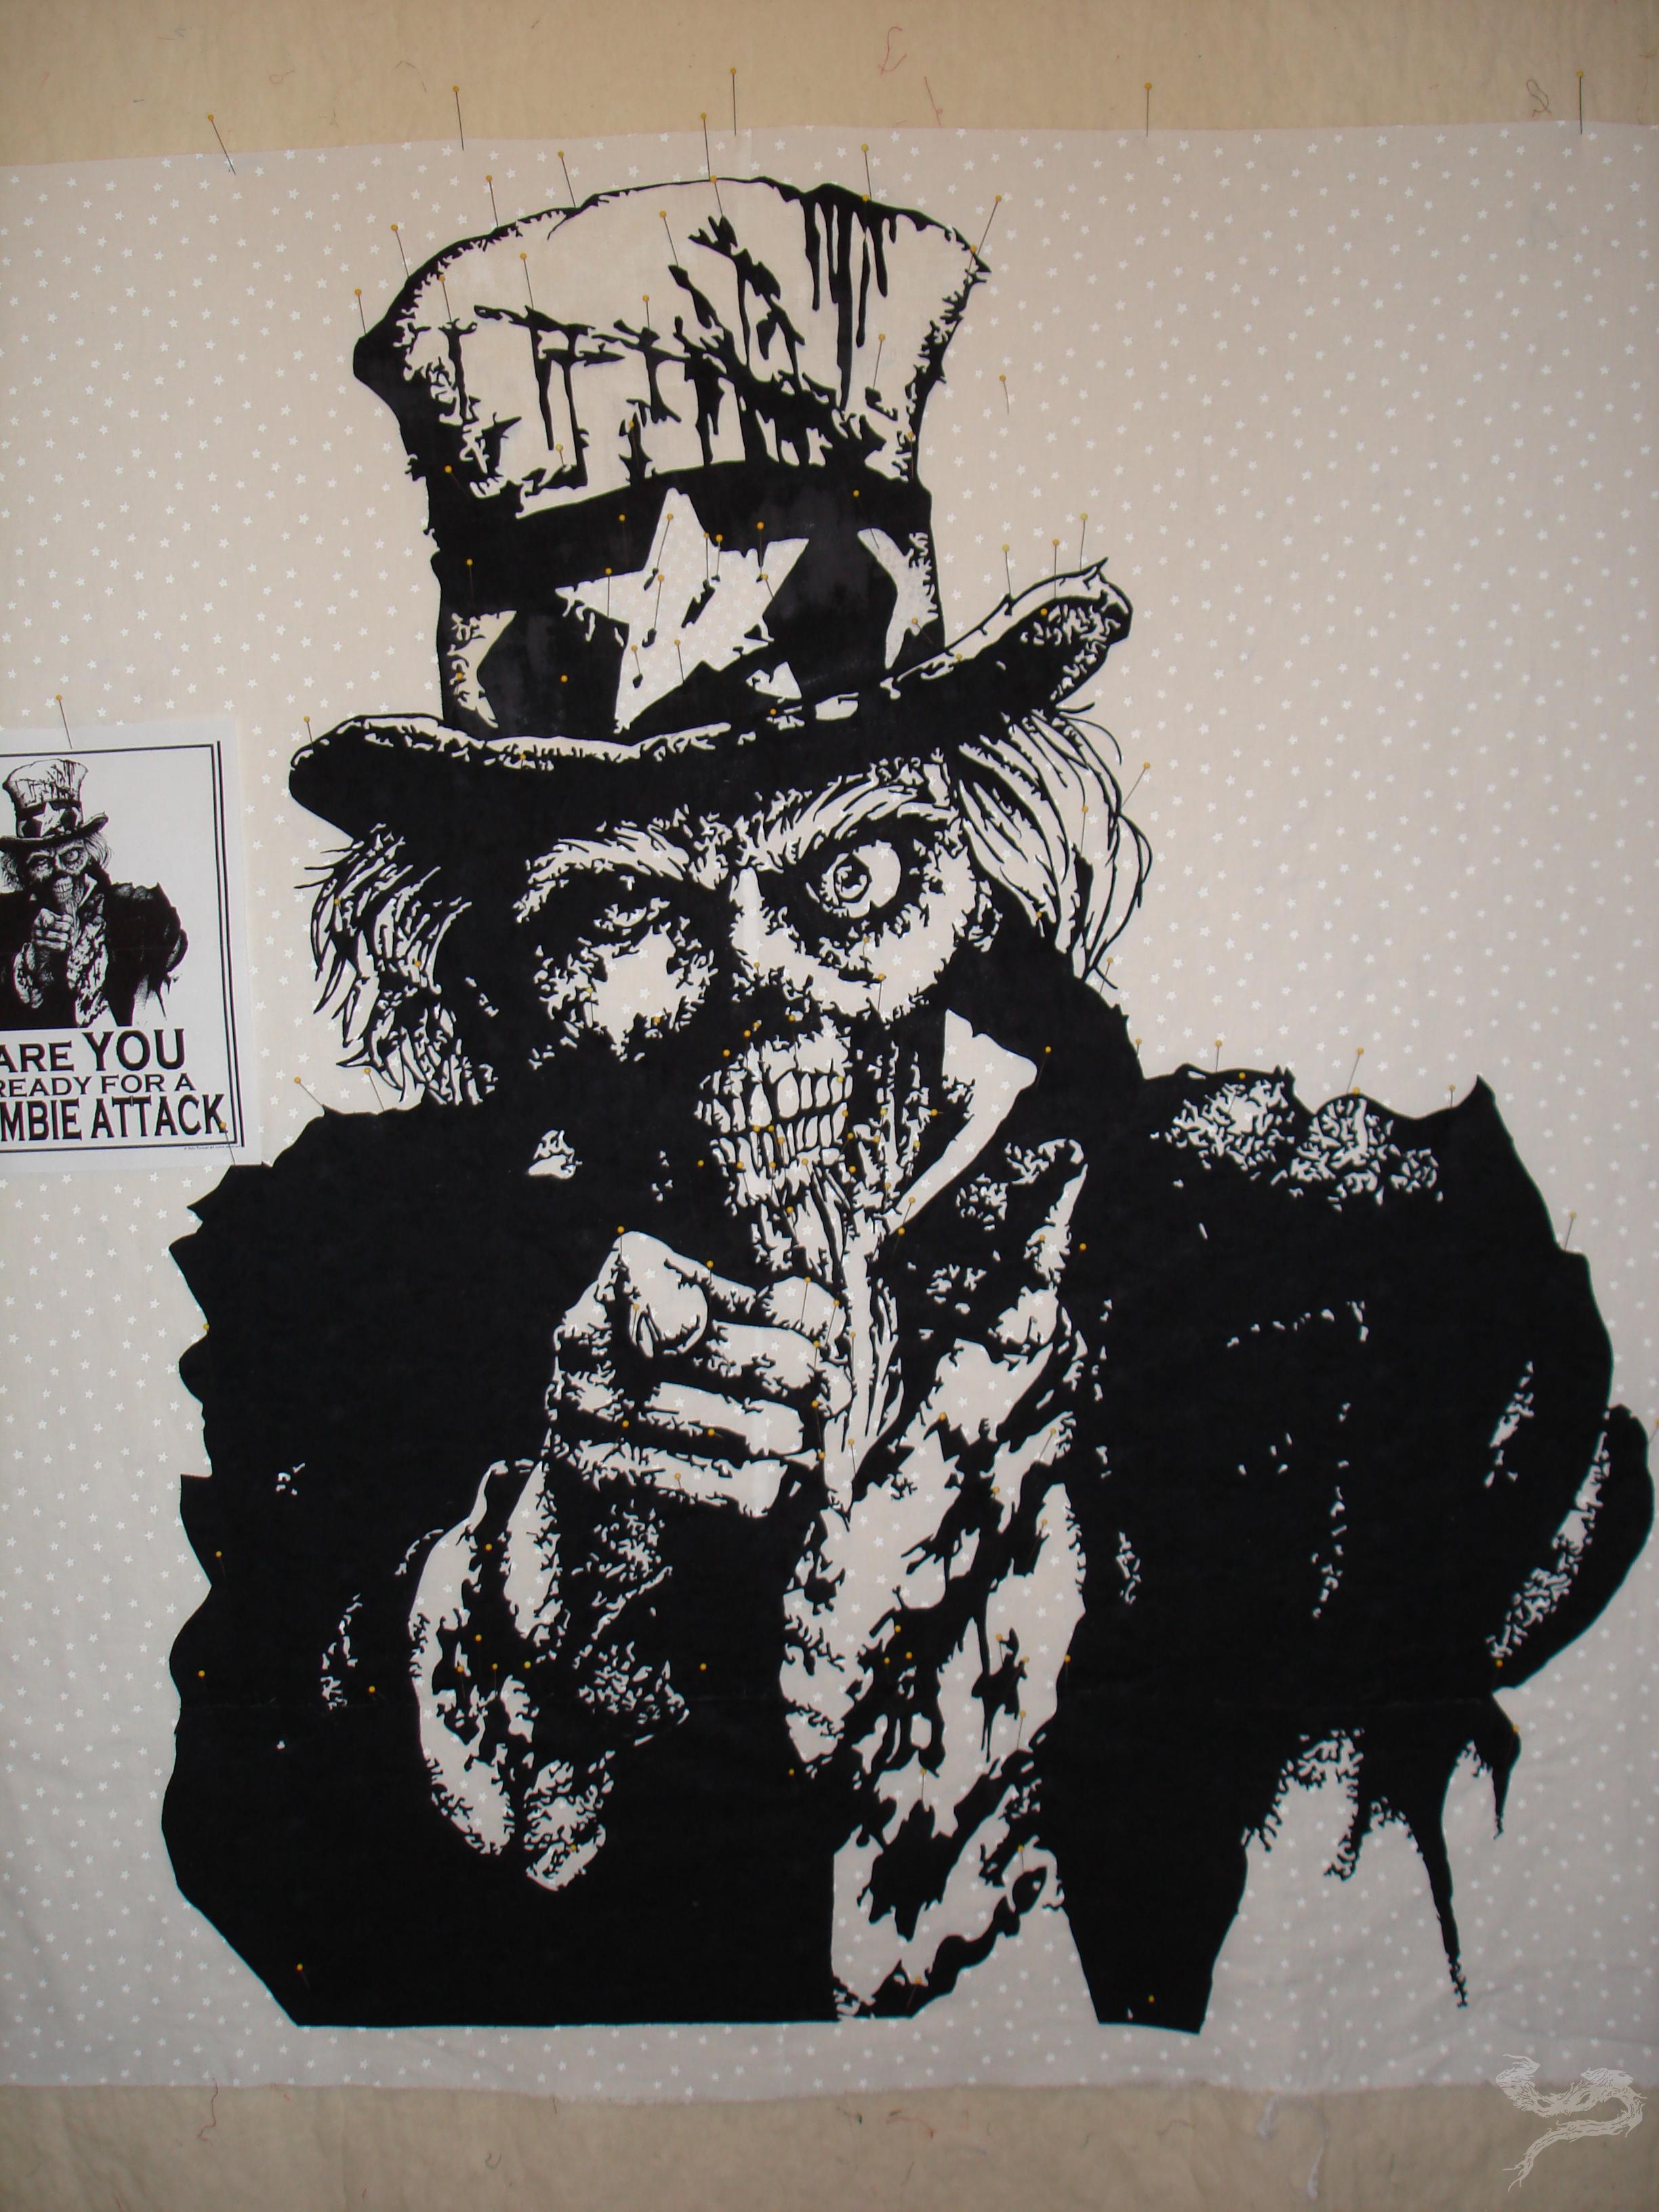 The little image over Sam’s right shoulder (the photo’s left side) was my placement image to work from. It’s actually my base pattern printed out on a regular sized sheet of paper.
While excited about what I’d gotten done, there was something that was bothering me. There’s something not right with this. It took me a little while to figure out what it was. Then, I faced the question of: Do I cut it out and remake? Or, do I just leave it, because no one’s going to notice it but me. Knowing the clock is ticking and not being happy with what I saw as an issue, I knew I’d have to cut the section out and redo it. I wanted to be proud of what I’d accomplished, not be sort of satisfied.
So, the hatband was cut out. There was no way I was going to recut the entire hat section. 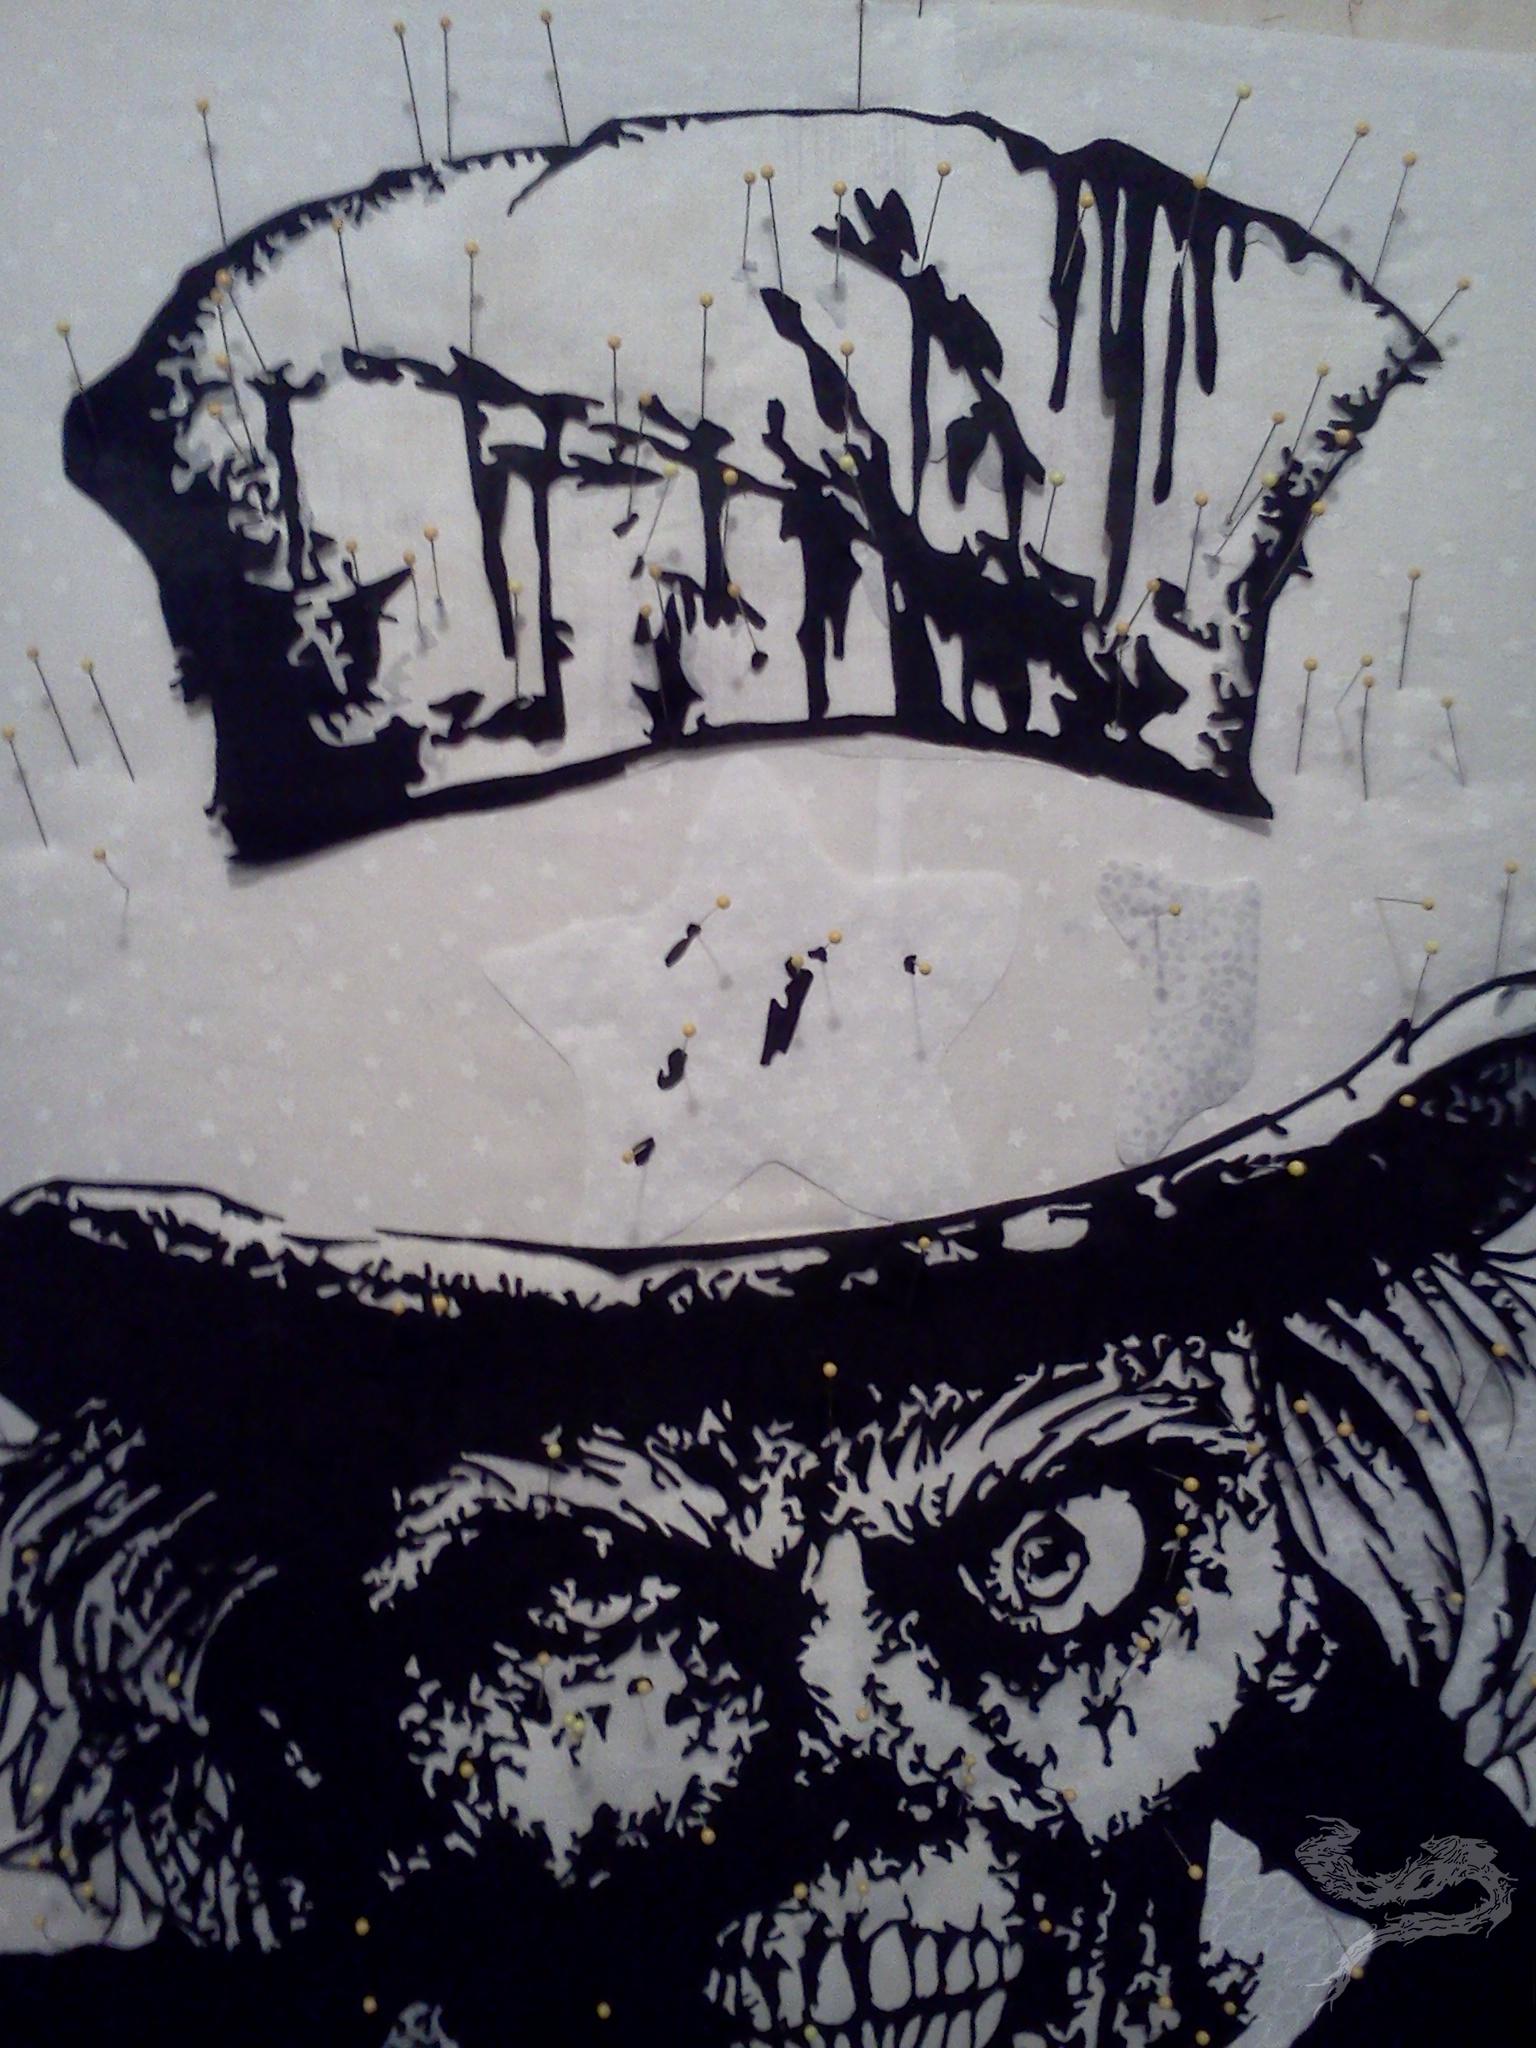
Unless you knew what to look for, most wouldn’t have noticed the change. I did. I’d put so much detail into the rest of the main body, I couldn’t not do the same for the rest of it. It felt like I was short-changing it, otherwise. 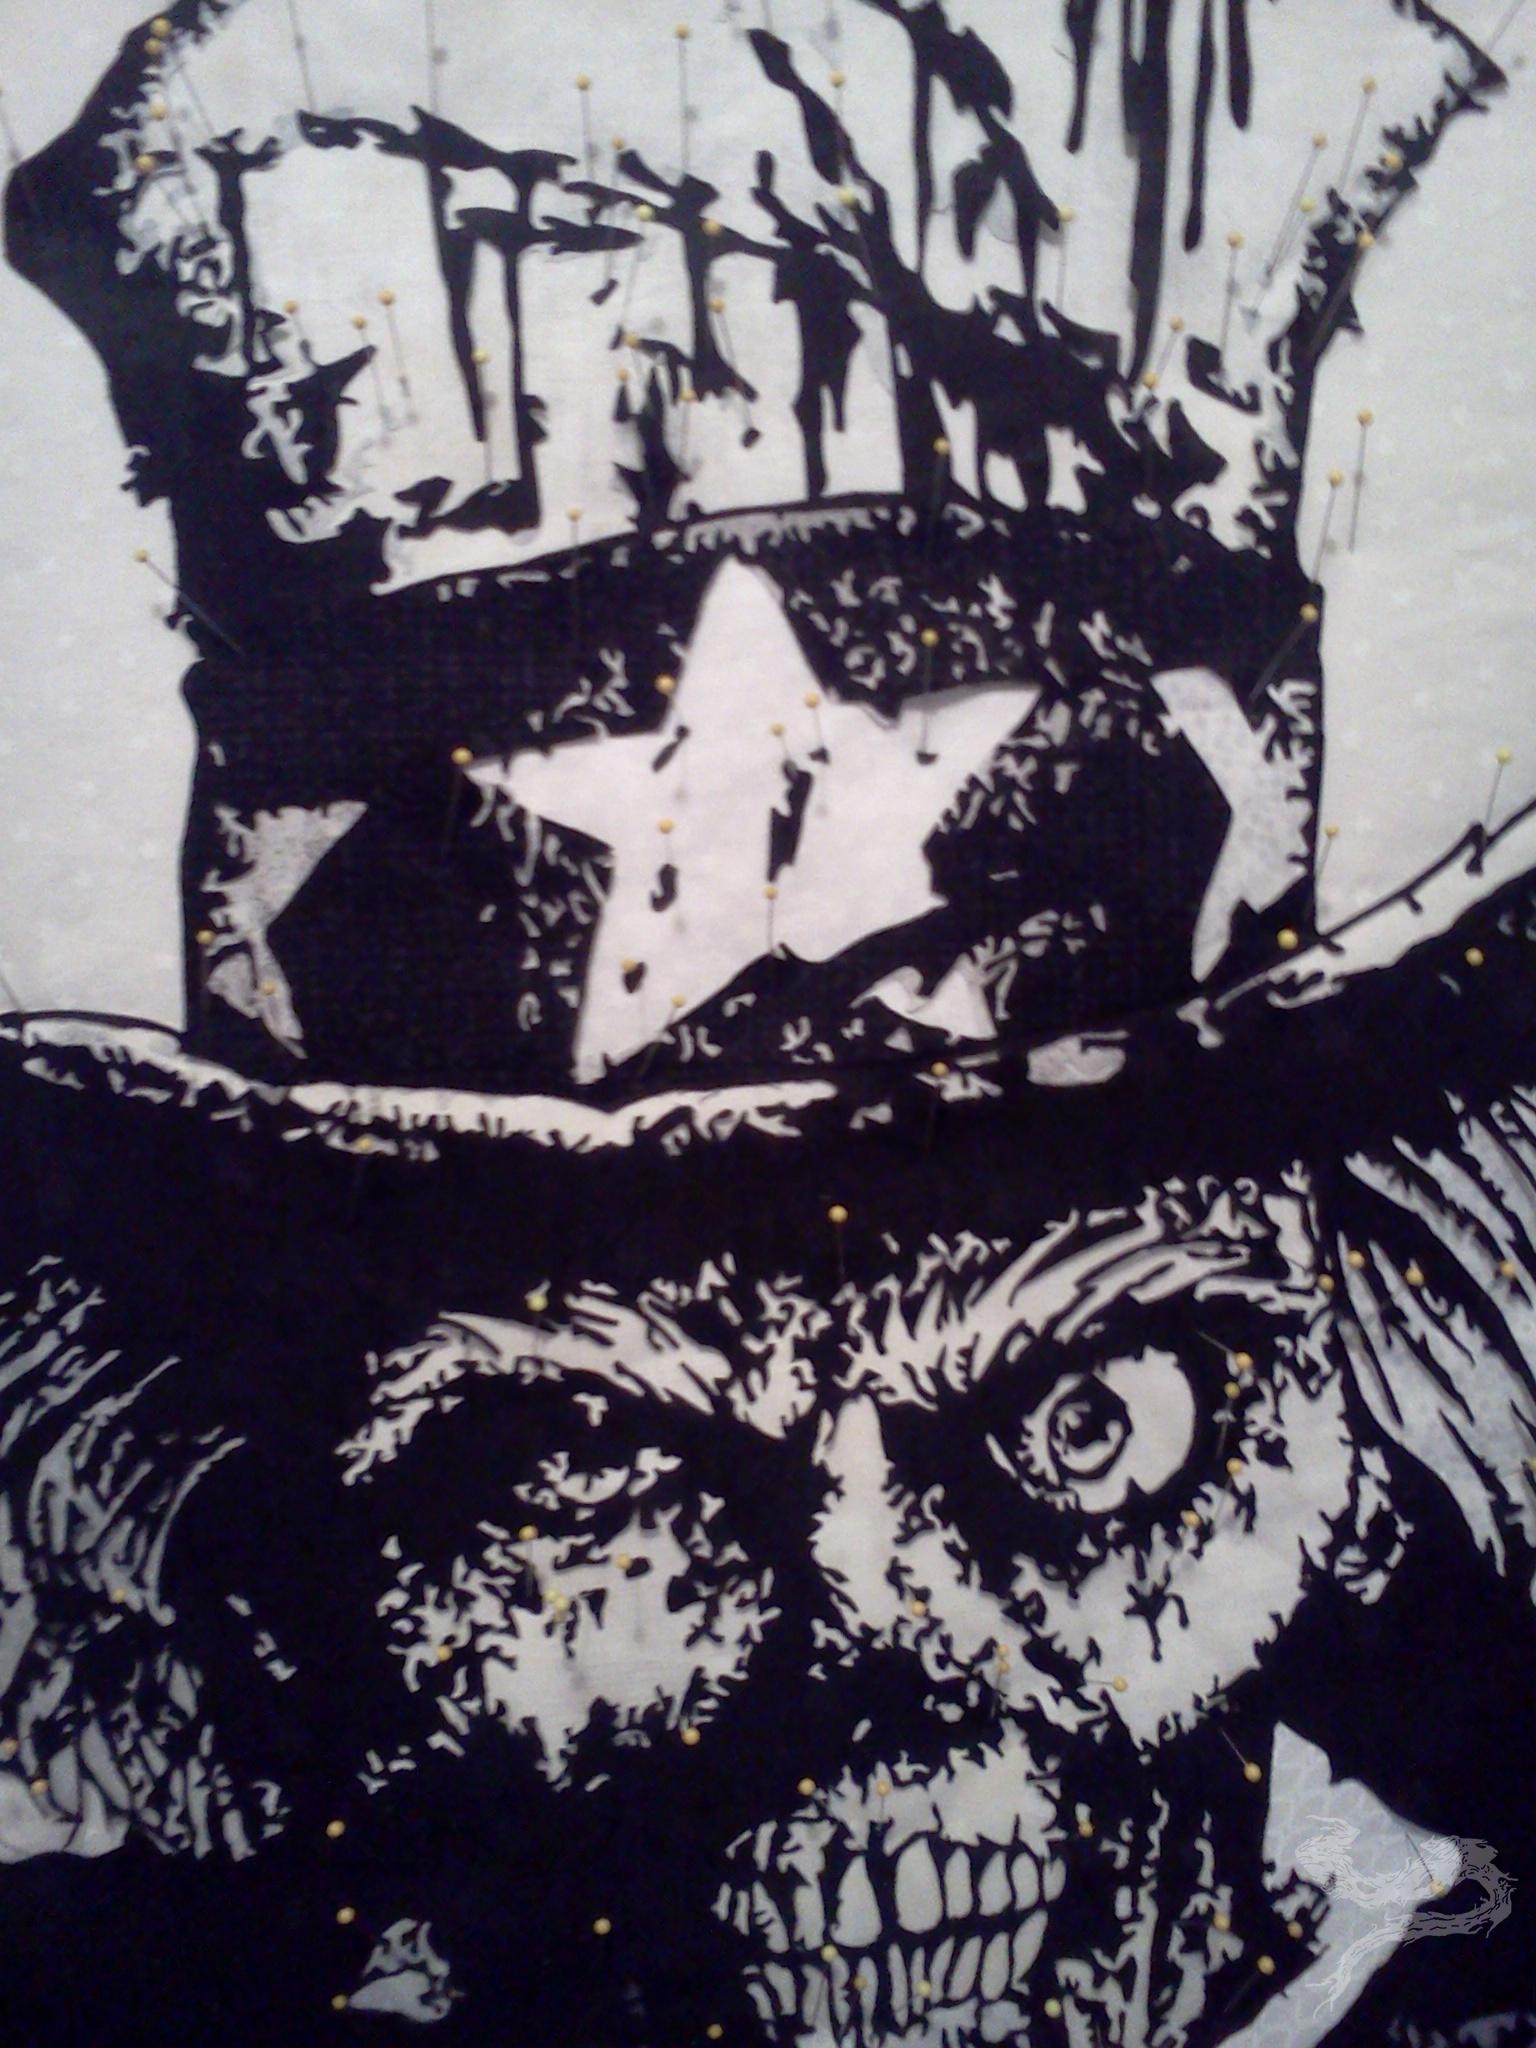
From here on out, it was all about the shading, shadowing, and seeing if I could ‘pull off’ my ideas. It would take someone who didn’t know what I’d been doing quite a while to figure it all out. But once a bit of it was picked up on, I’d hoped you’d find yourself looking for the other things I’d put in there.
This is where MY ideas come into play. All of the fabrics on the front of this quilt are are either prints or batiks. There is not one single “plain” or “solid” fabric until you got to the backing. I did this on purpose. The fabric I used for the shirt? It wasn’t used anywhere else on the quilt. The fabric I used to shade in the teeth? A light, buttery yellow batik and not used anywhere else. It’s all the subtle bits and details that I really played in. I was having fun. This was exciting!
I can say, with all seriousness, that I can definitely tell the difference between Mr. Tackett’s original design and what I’d created. It’s all because of the gray “mask” piece shown here. 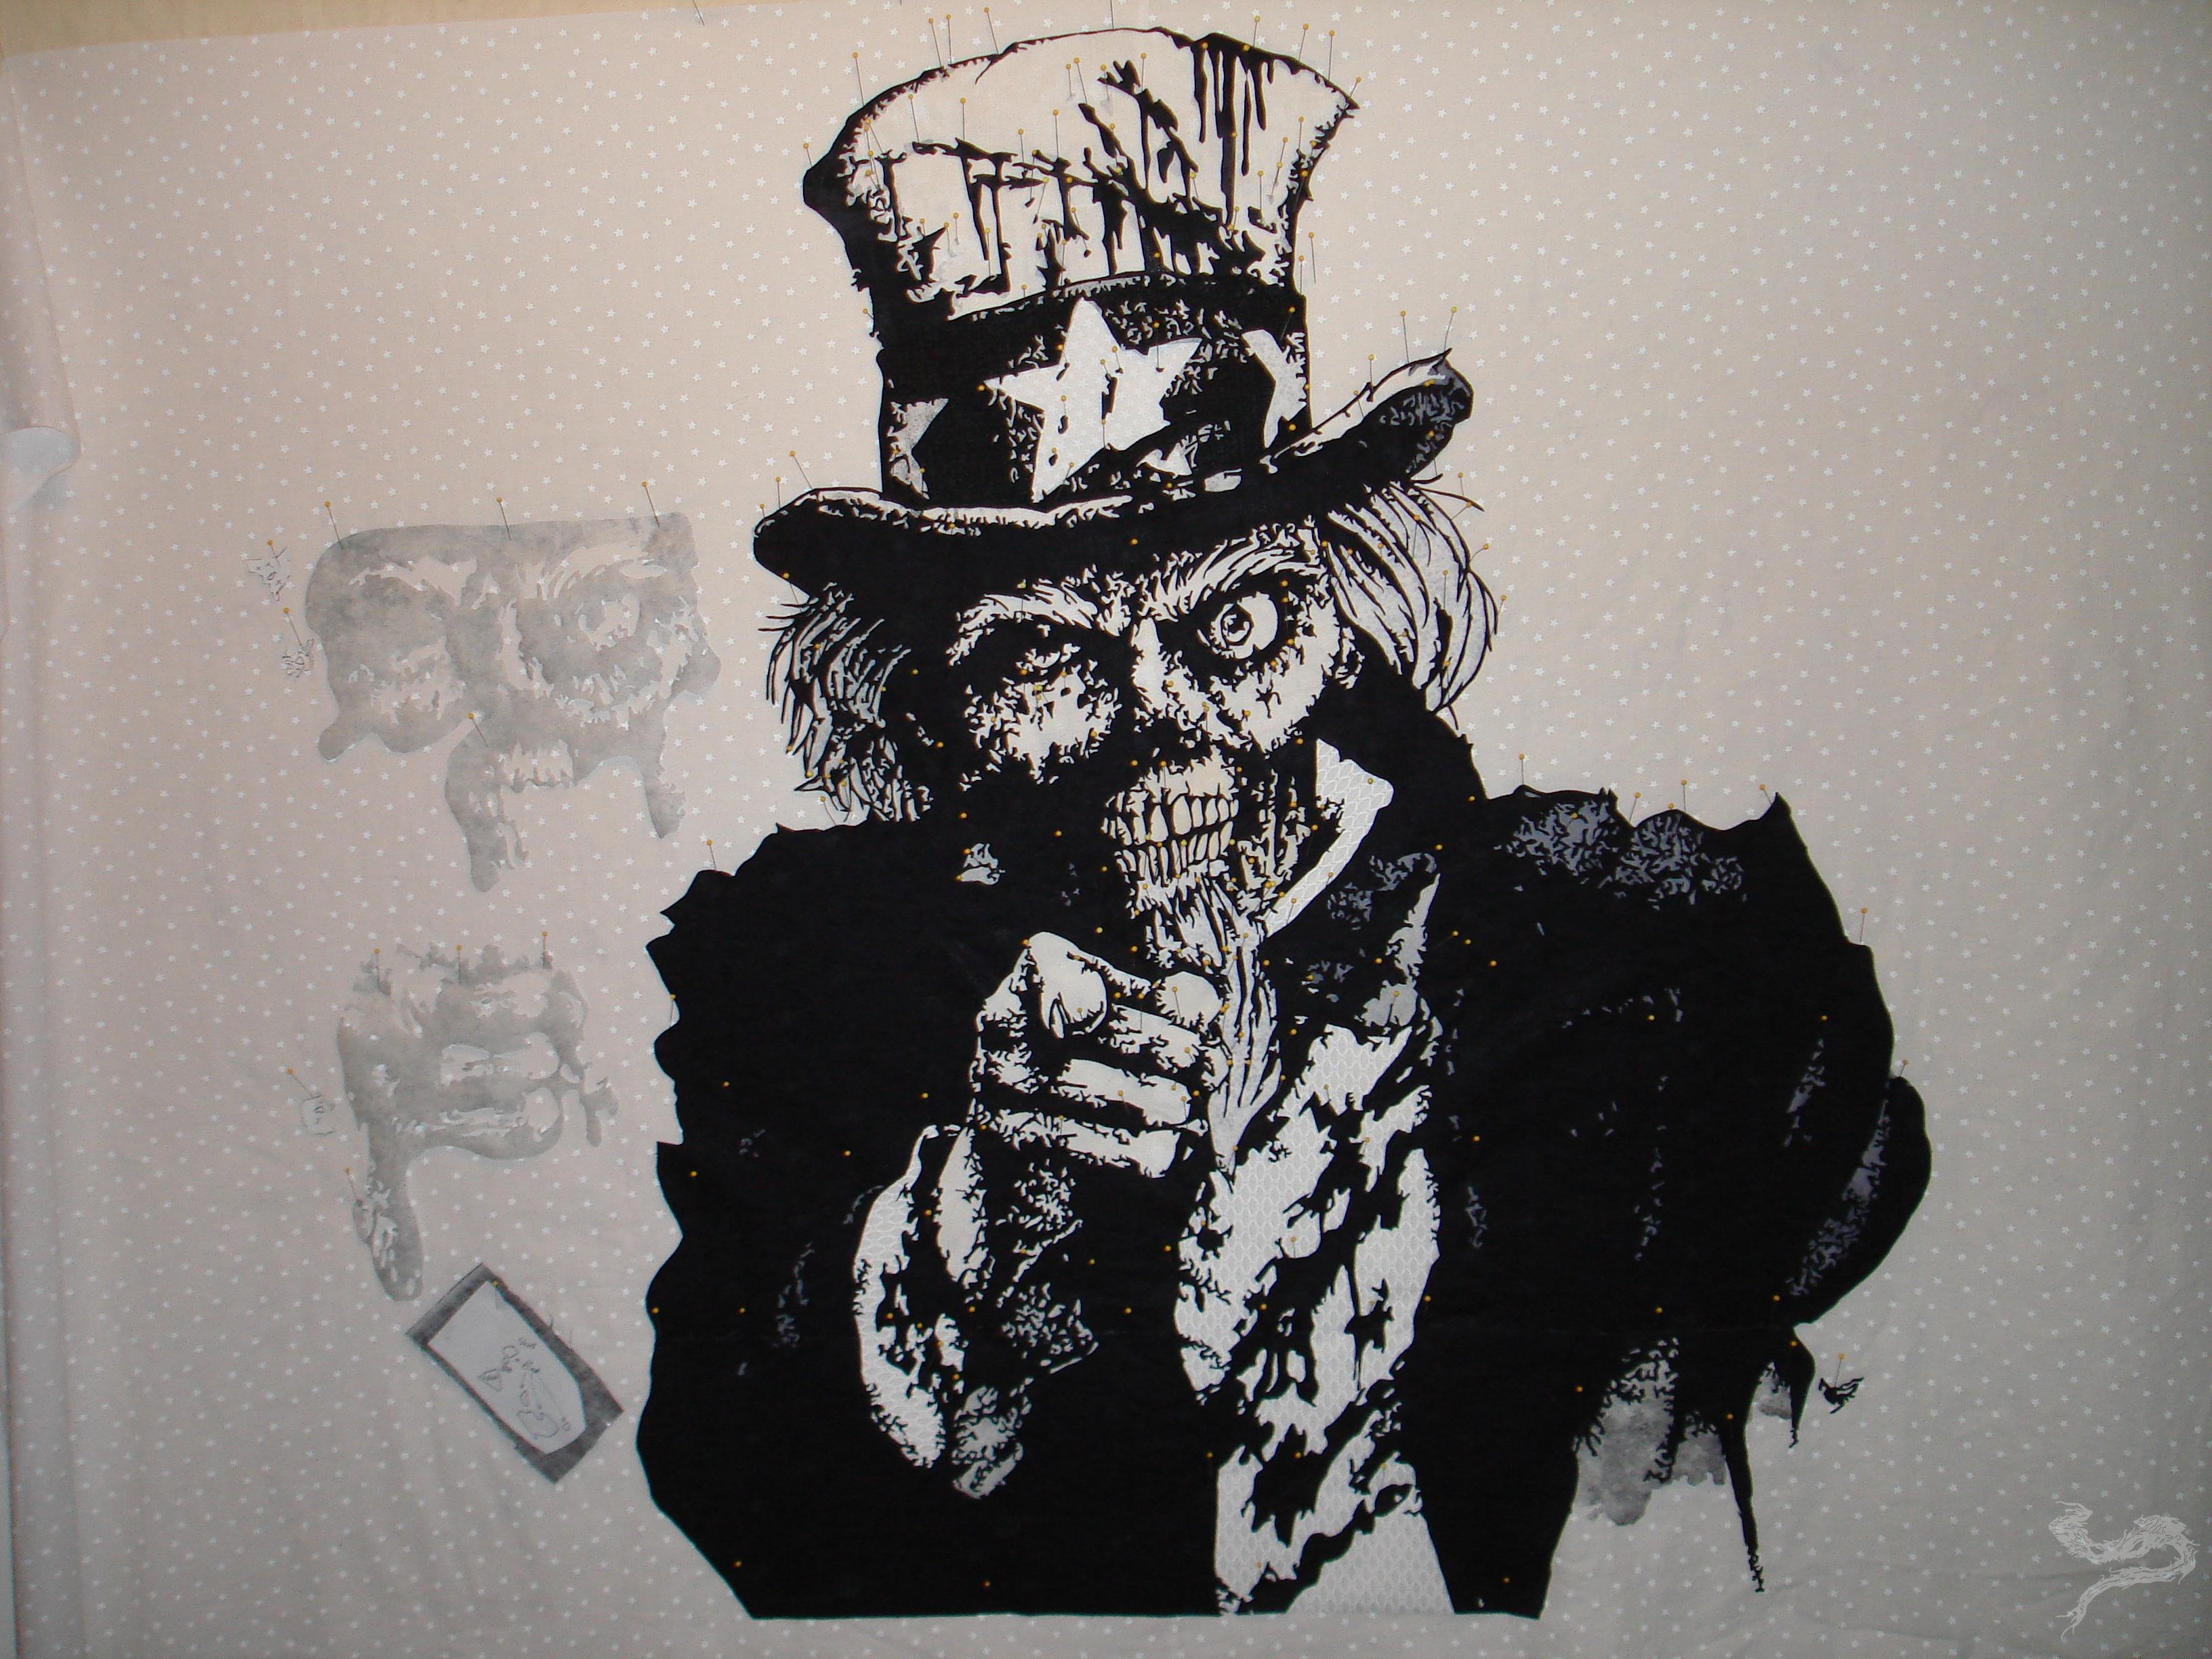 I needed to get this piece of shading in place, and the only way I knew of how to do it without disturbing too much of what I’d already done, was to go through Sam’s nose. Getting the “mask” under the black took a bit of finagling and fidgeting. What I ended up with as a final look gave Sam a “broken nose”.
 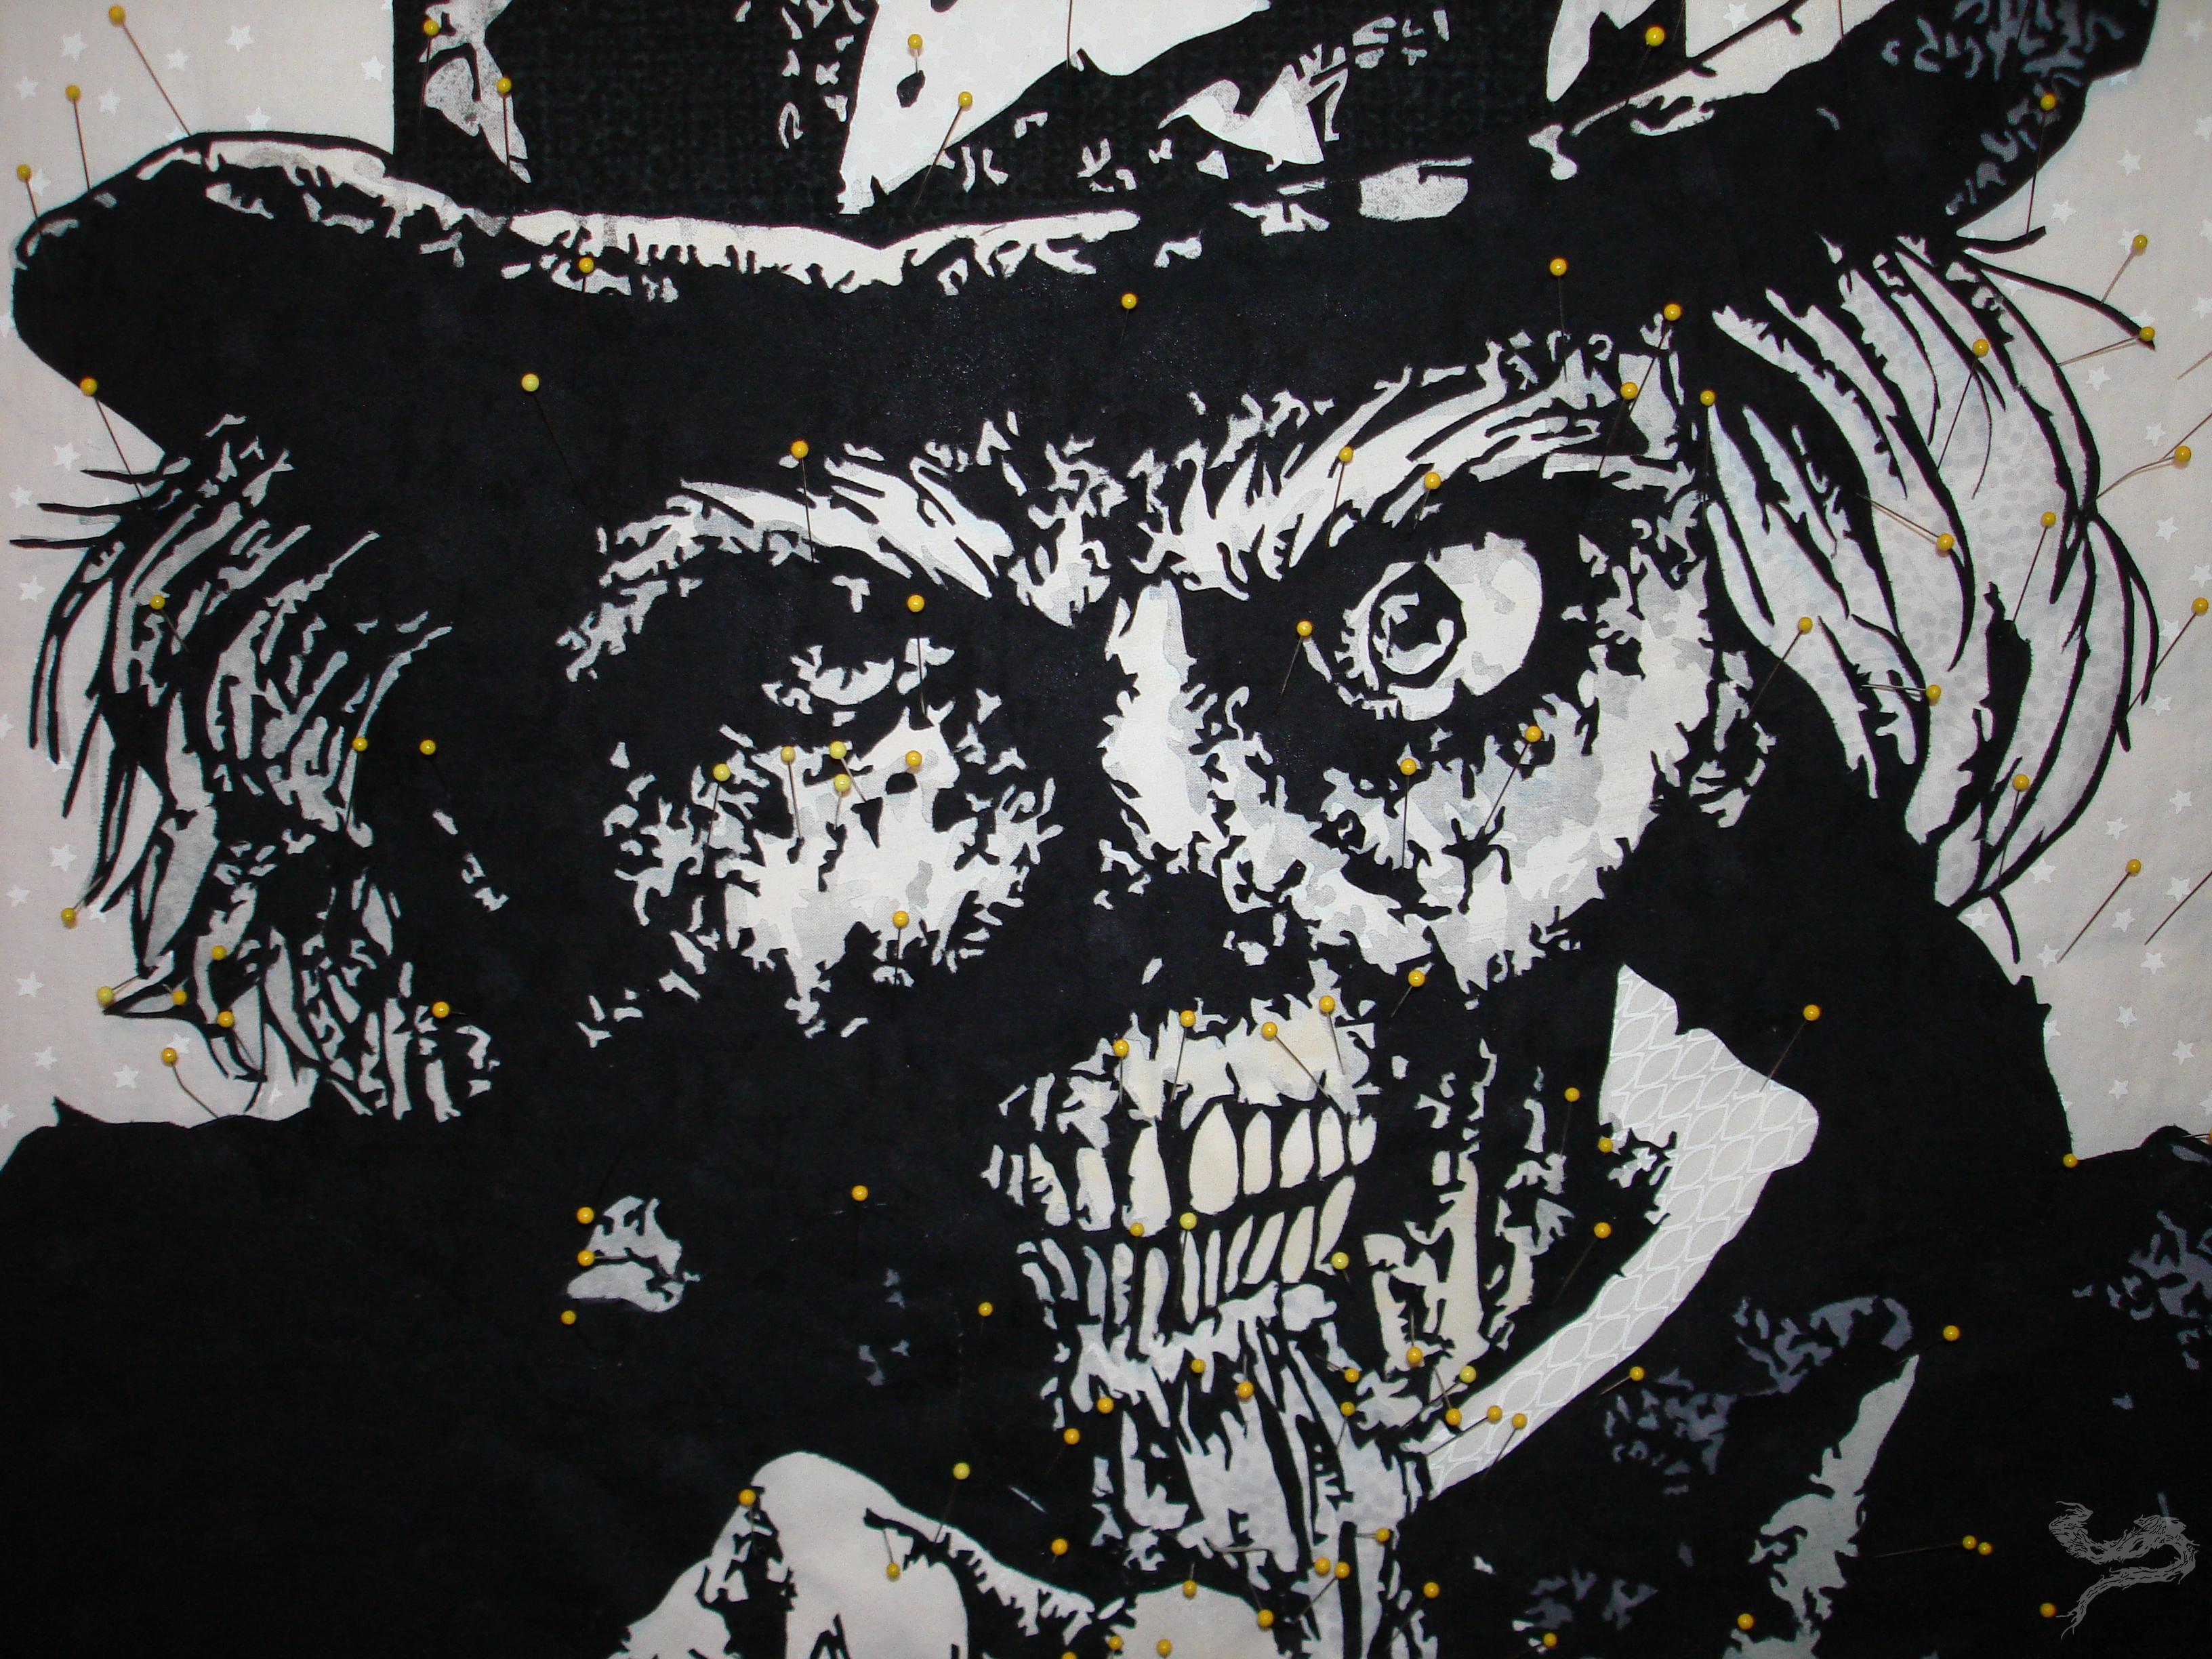 Unless you’re looking for it, you’d never notice it.
To give you some kind of idea how many pins were involved in holding all of these pieces in place. Sam looked like a porcupine from the side.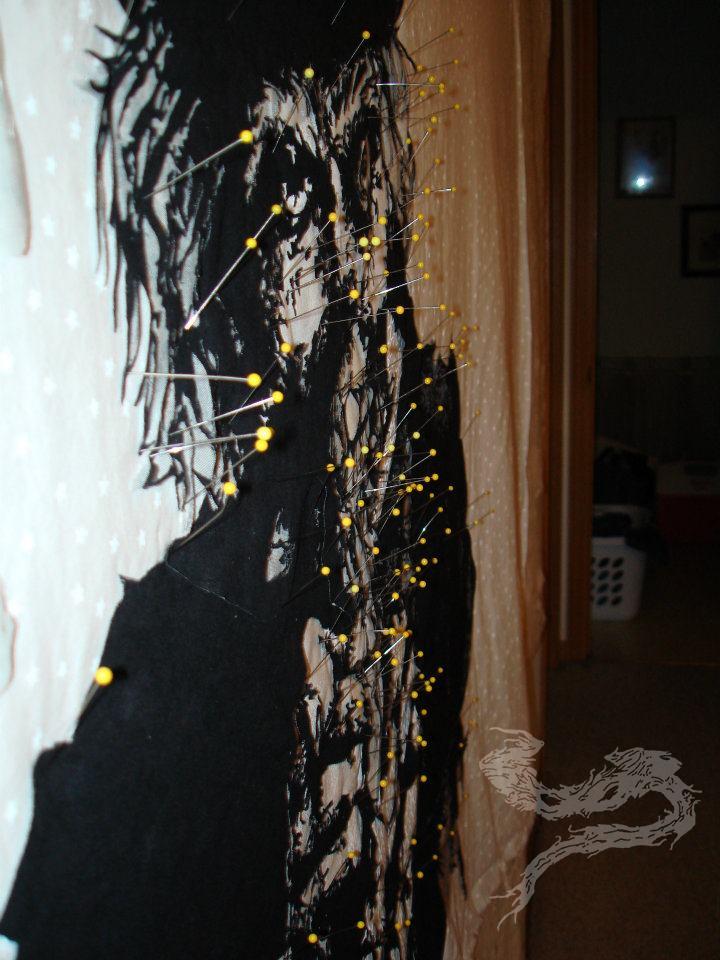
I was just about done with the main image. I still had the lettering to go. My problem? I didn’t have enough of the white-on-white star fabric I’d used for the background of Sam. I was going to have to come up with something so the lettering section would work. 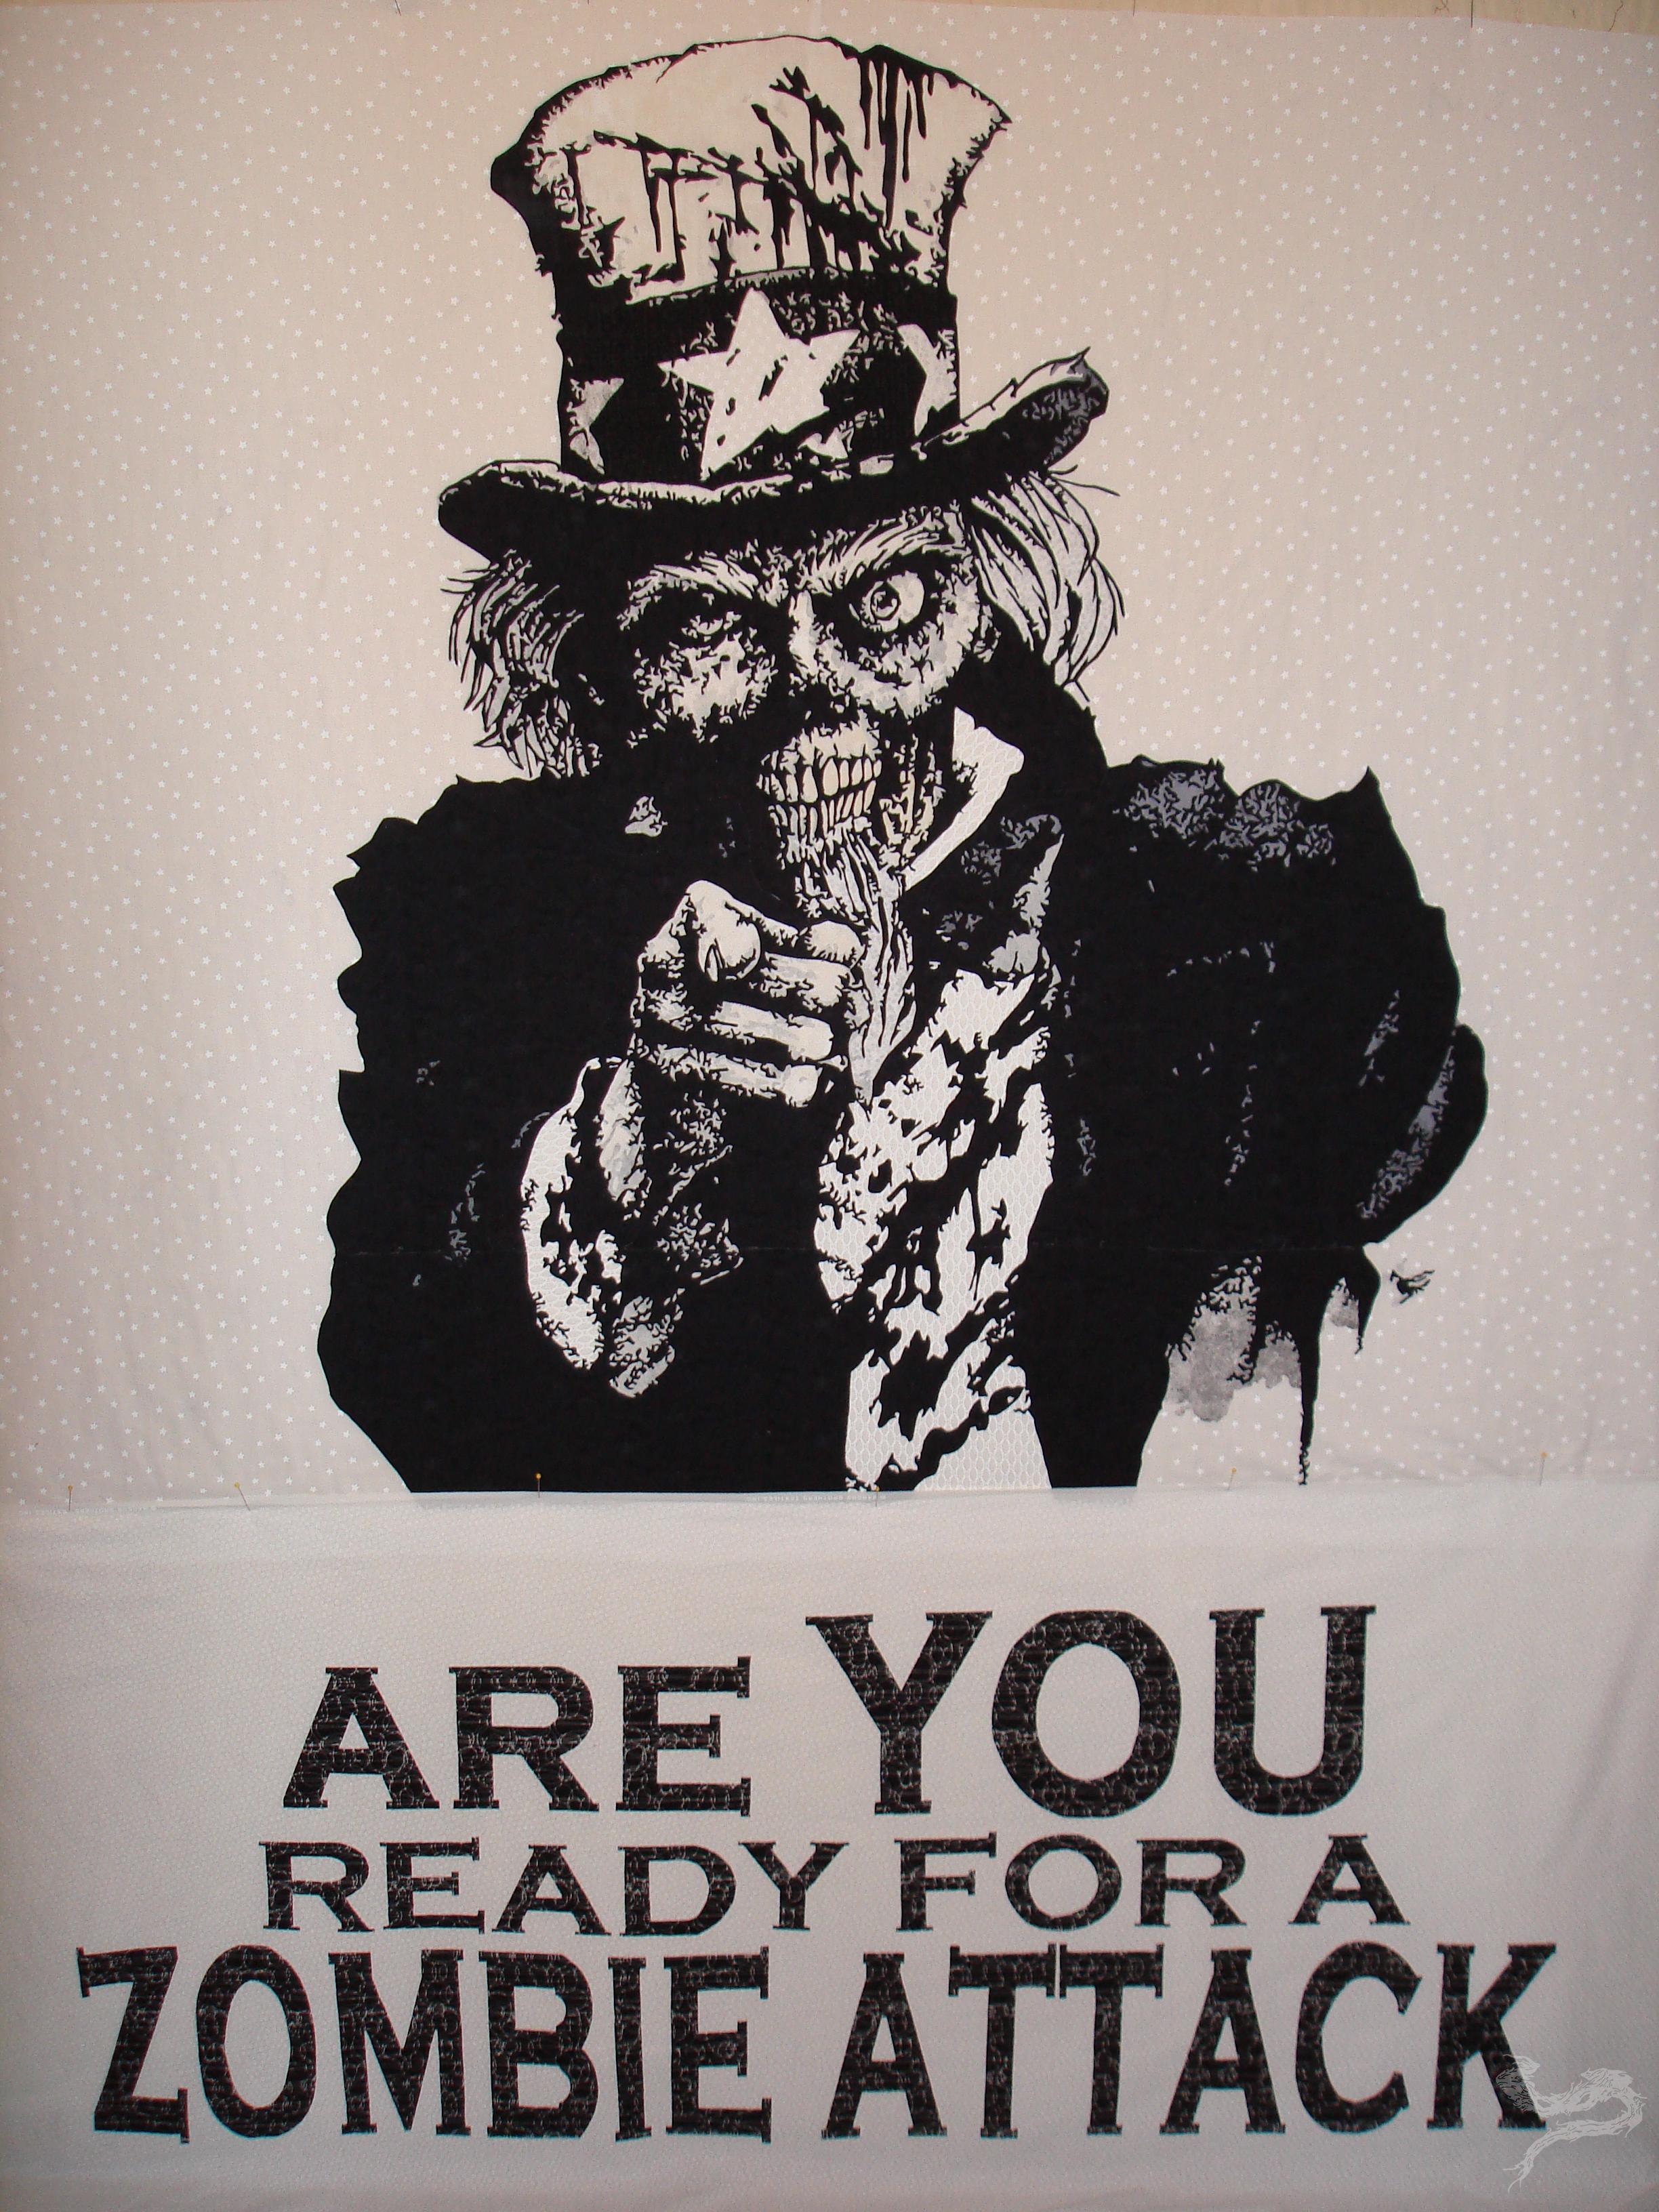
Well, heck! I’d been playing with the different fabrics all over this project, what was one more? 
As you can see, I’d figured something out. This was 3 days before I was due to present it to Mr. Tackett in St. Louis. Do I take the time and quilt it, all the while running the risk of ruining the overall piece? Or, do I present him with the completed quilt top only? Trust me when I say my friends were incredible sounding boards. When push came to shove, they were ready to back whatever solution I came up with. They’d been with me on this incredible journey from the very start, and were going to stay with me through the end.
I took an entire day to quilt Sam on my home machine. I wanted to have a completed quilt. Anything less felt like I would have failed. And failure was NOT an option. 11 1/2 hours later, I held the final quilt in my hands.
81 1/2 hours of physical work, which translates into about two months of my life, I had done something so radically different from anything I’d ever seen before. This is when the insecurities slapped me upside the head. How would Mr. Tackett feel about what I’d done? I’m not going to go into the different pathways my brain wanted to go. Let’s just say that I was bracing myself for just about anything.
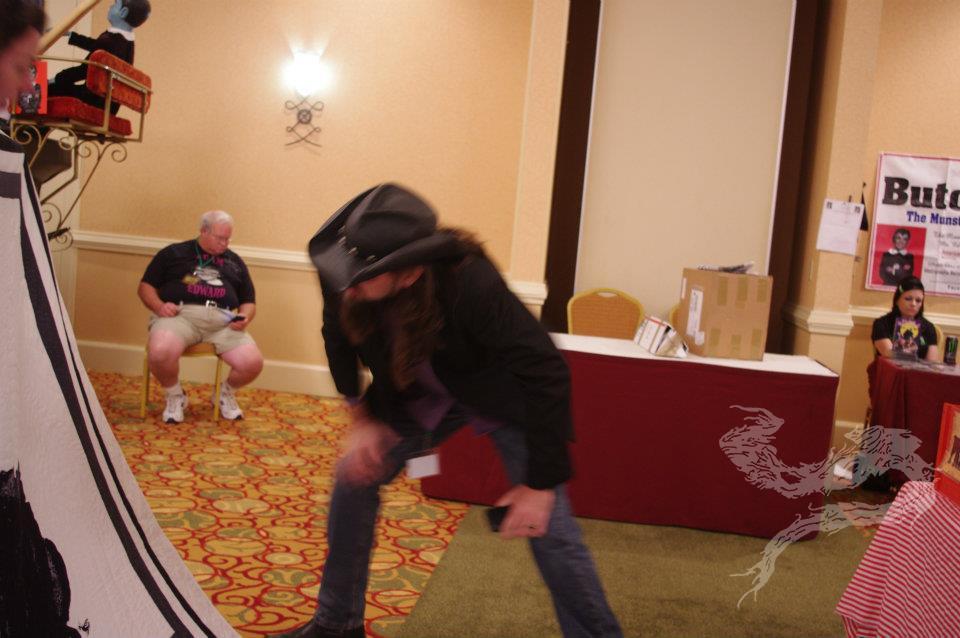
My husband and I went to the St. Louis convention. I had friends I wanted to see, but there was one stop I had to make first. It was time to present what I’d done to the original artist. I was grateful the vendor’s room wasn’t really all that busy that early in the day, because I was going to take up a bit of space.
The first photo shows Mr. Tackett’s expression the first time he saw what I’d made. The other two are me explaining the detail work I’d put in.
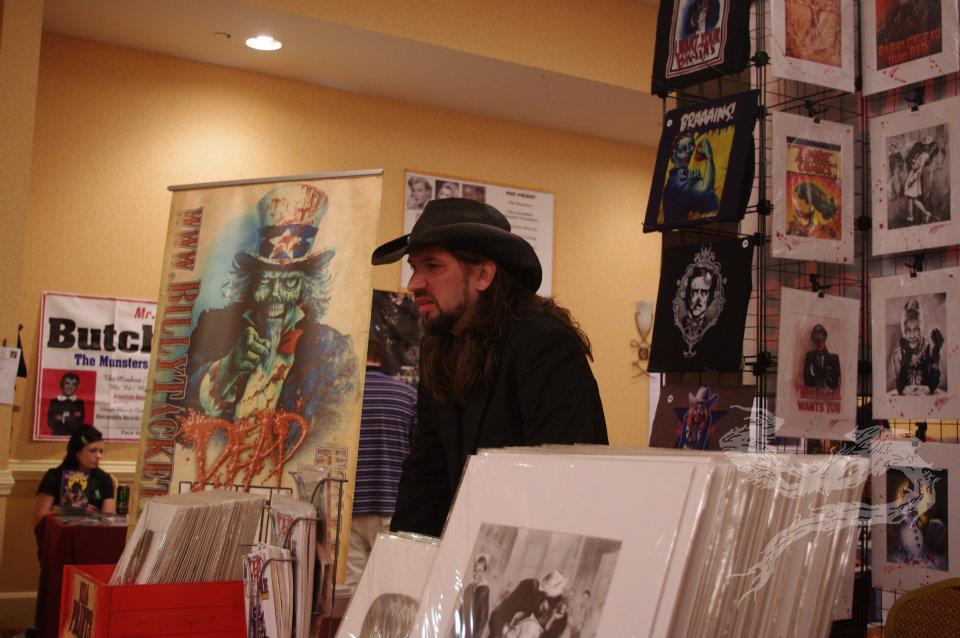
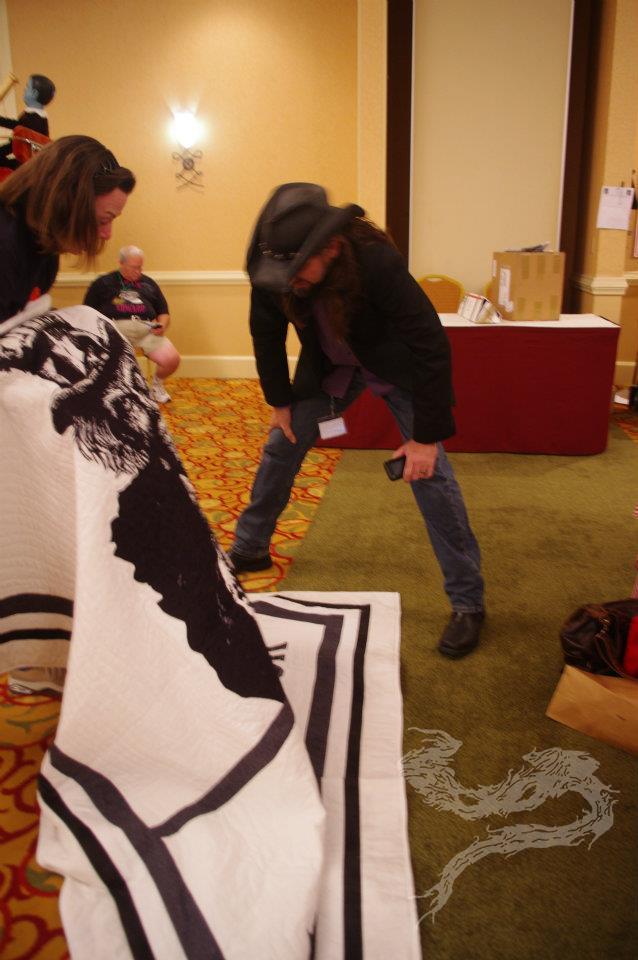
The original artist, Mr. Billy Tackett, and I.
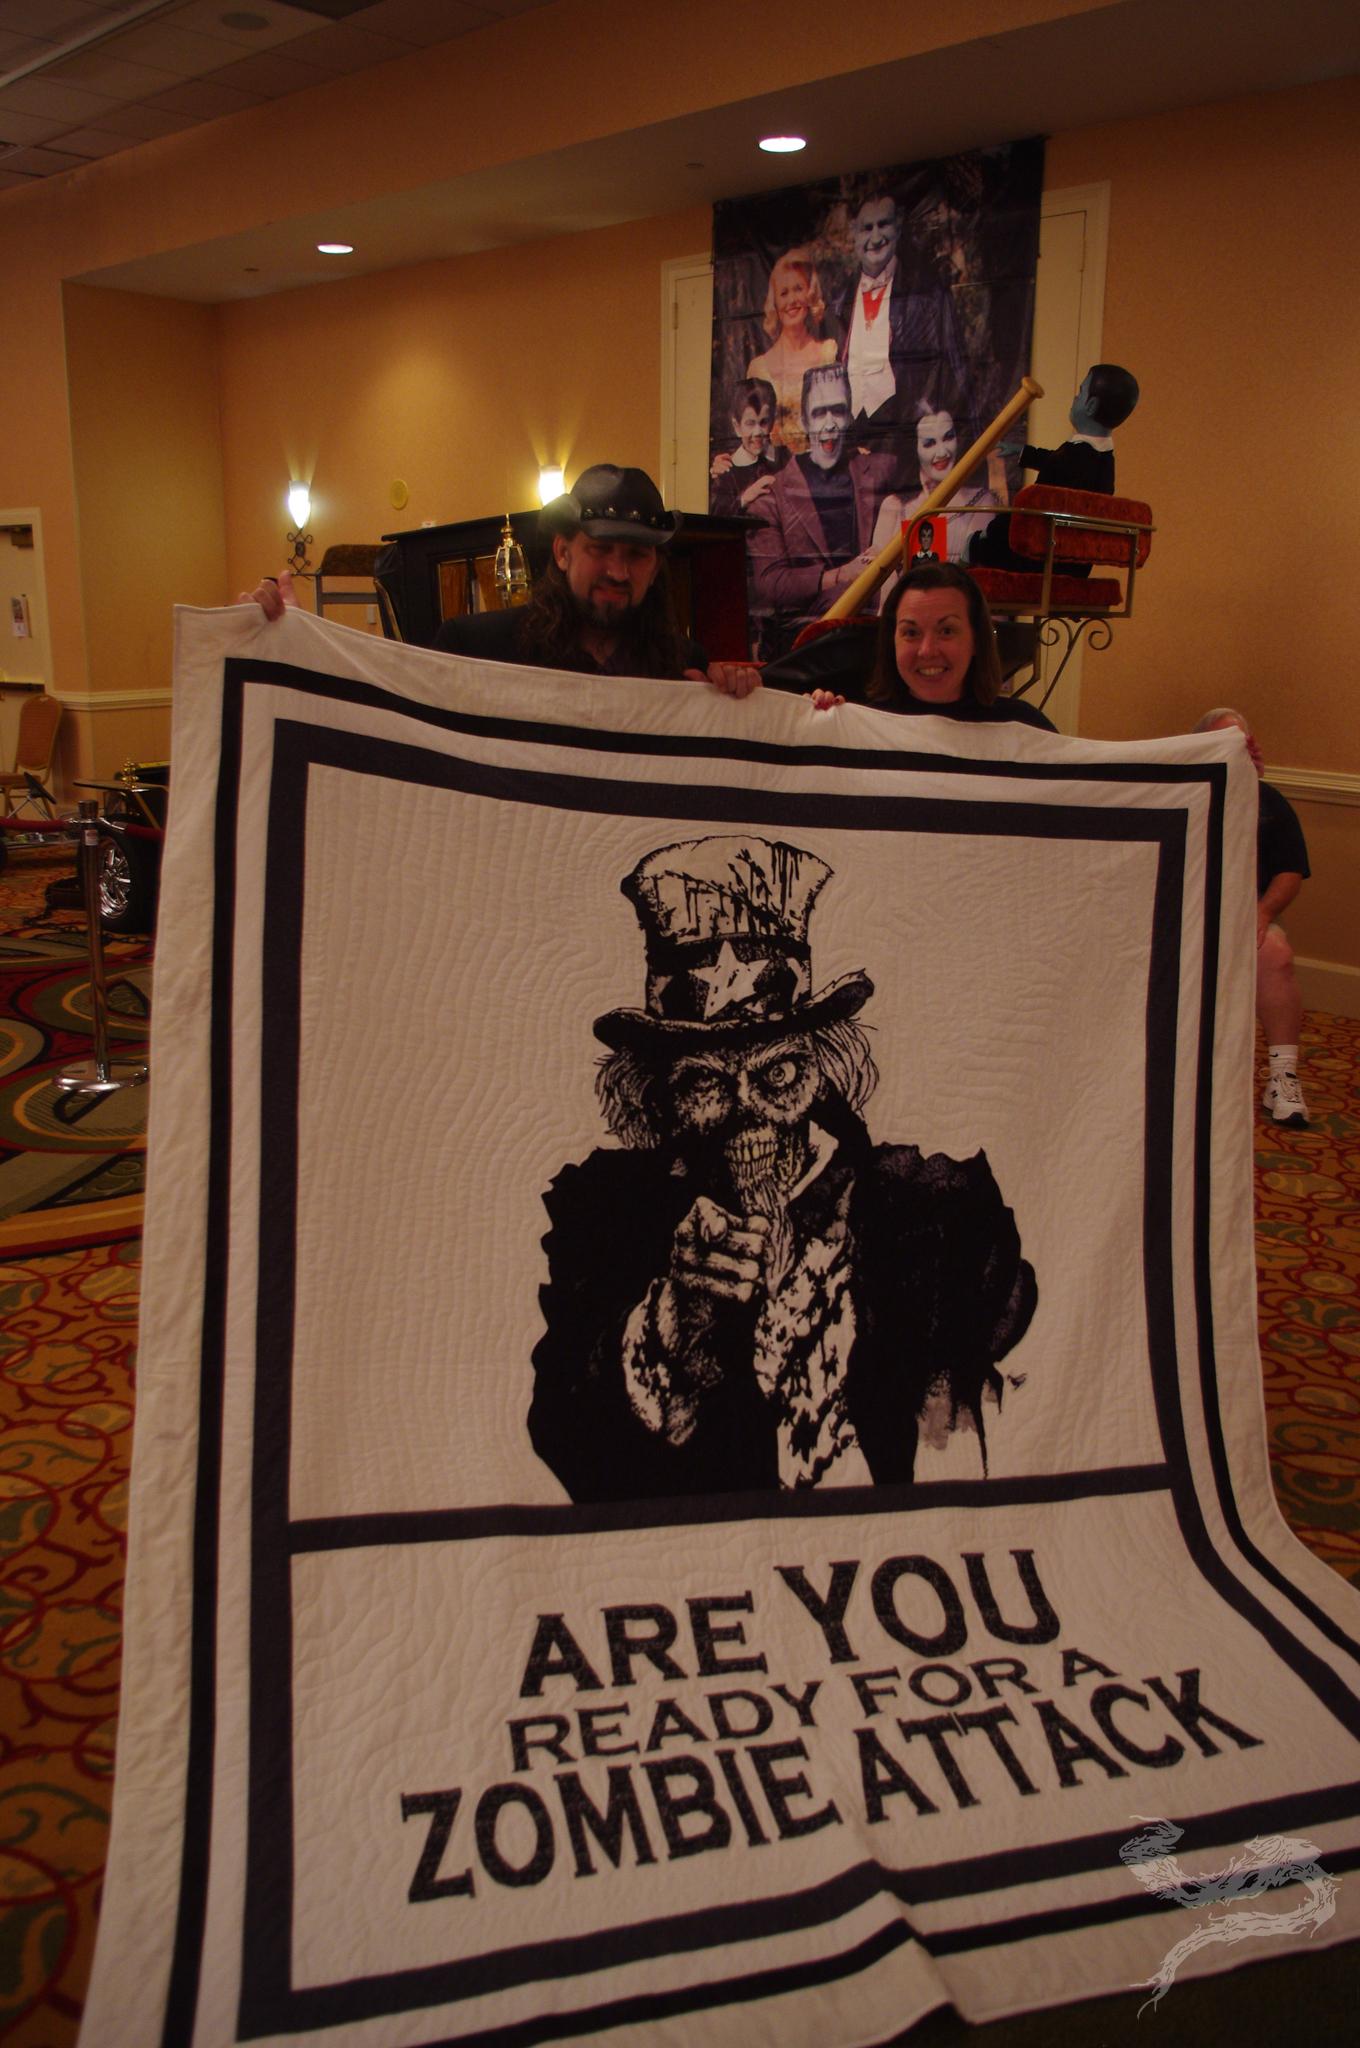
Finished size: 84 1/2 by 94 1/2 inches
Completed on June 14, 2012
Machine pieced and raw edge appliqued
Machined quilted
Cotton fabrics and batting
I am still as amazed seeing the pictures of this quilt now as I was while you were making it!
Outstanding! 😀
ZS blew my mind and I knew then that you’d accomplish anything you put your mind too 🙂
I love how your logo/watermark plays with the thumbnails – becoming a mask around Sam’s eyes, looking like smoke exploding out of his head when the hat-top is not attached. I’m also grateful that the full size pics have the watermark in the corner do I can look at the unobscured details.
Beautiful! I like that it has Black, White, and Grey, it was originated from Sam, and how you took Sam and recreated him into The Zombie Sam. 😀