
If you have to start somewhere, this is as good a place as any – almost at the beginning. Granted, I’d been messing around with the idea of turning photographs into quilts for some time. I’d been trying different techniques and styles, looking for one I could work with and still get the effect I wanted.
It wasn’t until I was given permission to work with actual photo art that things really began to come together. The original photo art was done by Norman Reedus. Yes THAT Norman Reedus. The photo is of one of the characters from a movie he starred in.
I was given three images to go through. This happened to be the one that worked best for the technique I was developing. There are a lot of strong contrasts, good shape definitions, and the image forced a response from me.
The first step was to figure out how detailed I wanted to get. I ran the image through a few photo editing software filters, testing out different looks and effects. It wasn’t long before I had some idea of where I wanted to go with this image.
After figuring out how big I wanted the overall image to be, I printed out my base pattern to scale. It wouldn’t be long before I’d start cutting into the fabrics I’d been collecting, and really settle in to work.
The background fabric 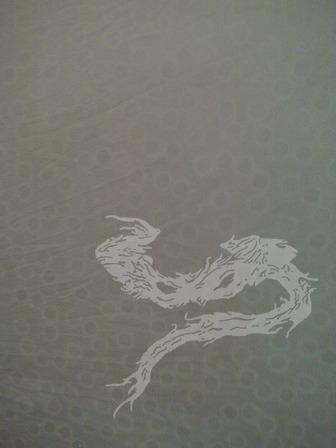 was a lucky find!! It’s a white, tone on tone print. The background reminded me a lot of the cigarette burns you see in movies (that little orange circle that shows up in the upper right of the screen, that allowed projectionists to know where to splice the next reel in), I knew I had to use it. For the unknowing, the image I was given was called “Willowy Being”, from the “Masters of Horror: John Carpenter’s Cigarette Burns”
It wasn’t until I was setting the third fabric in place  that I finally began to see what I was creating. I knew I was on to something! It’d be another six hours before I was ready to call it for the night. I was pretty happy with the day’s worth of work!
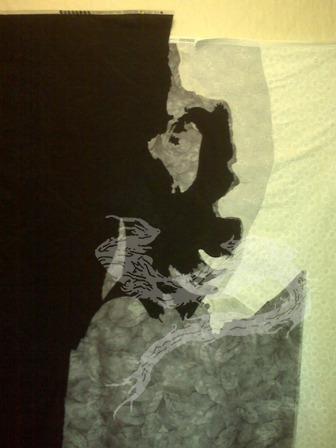
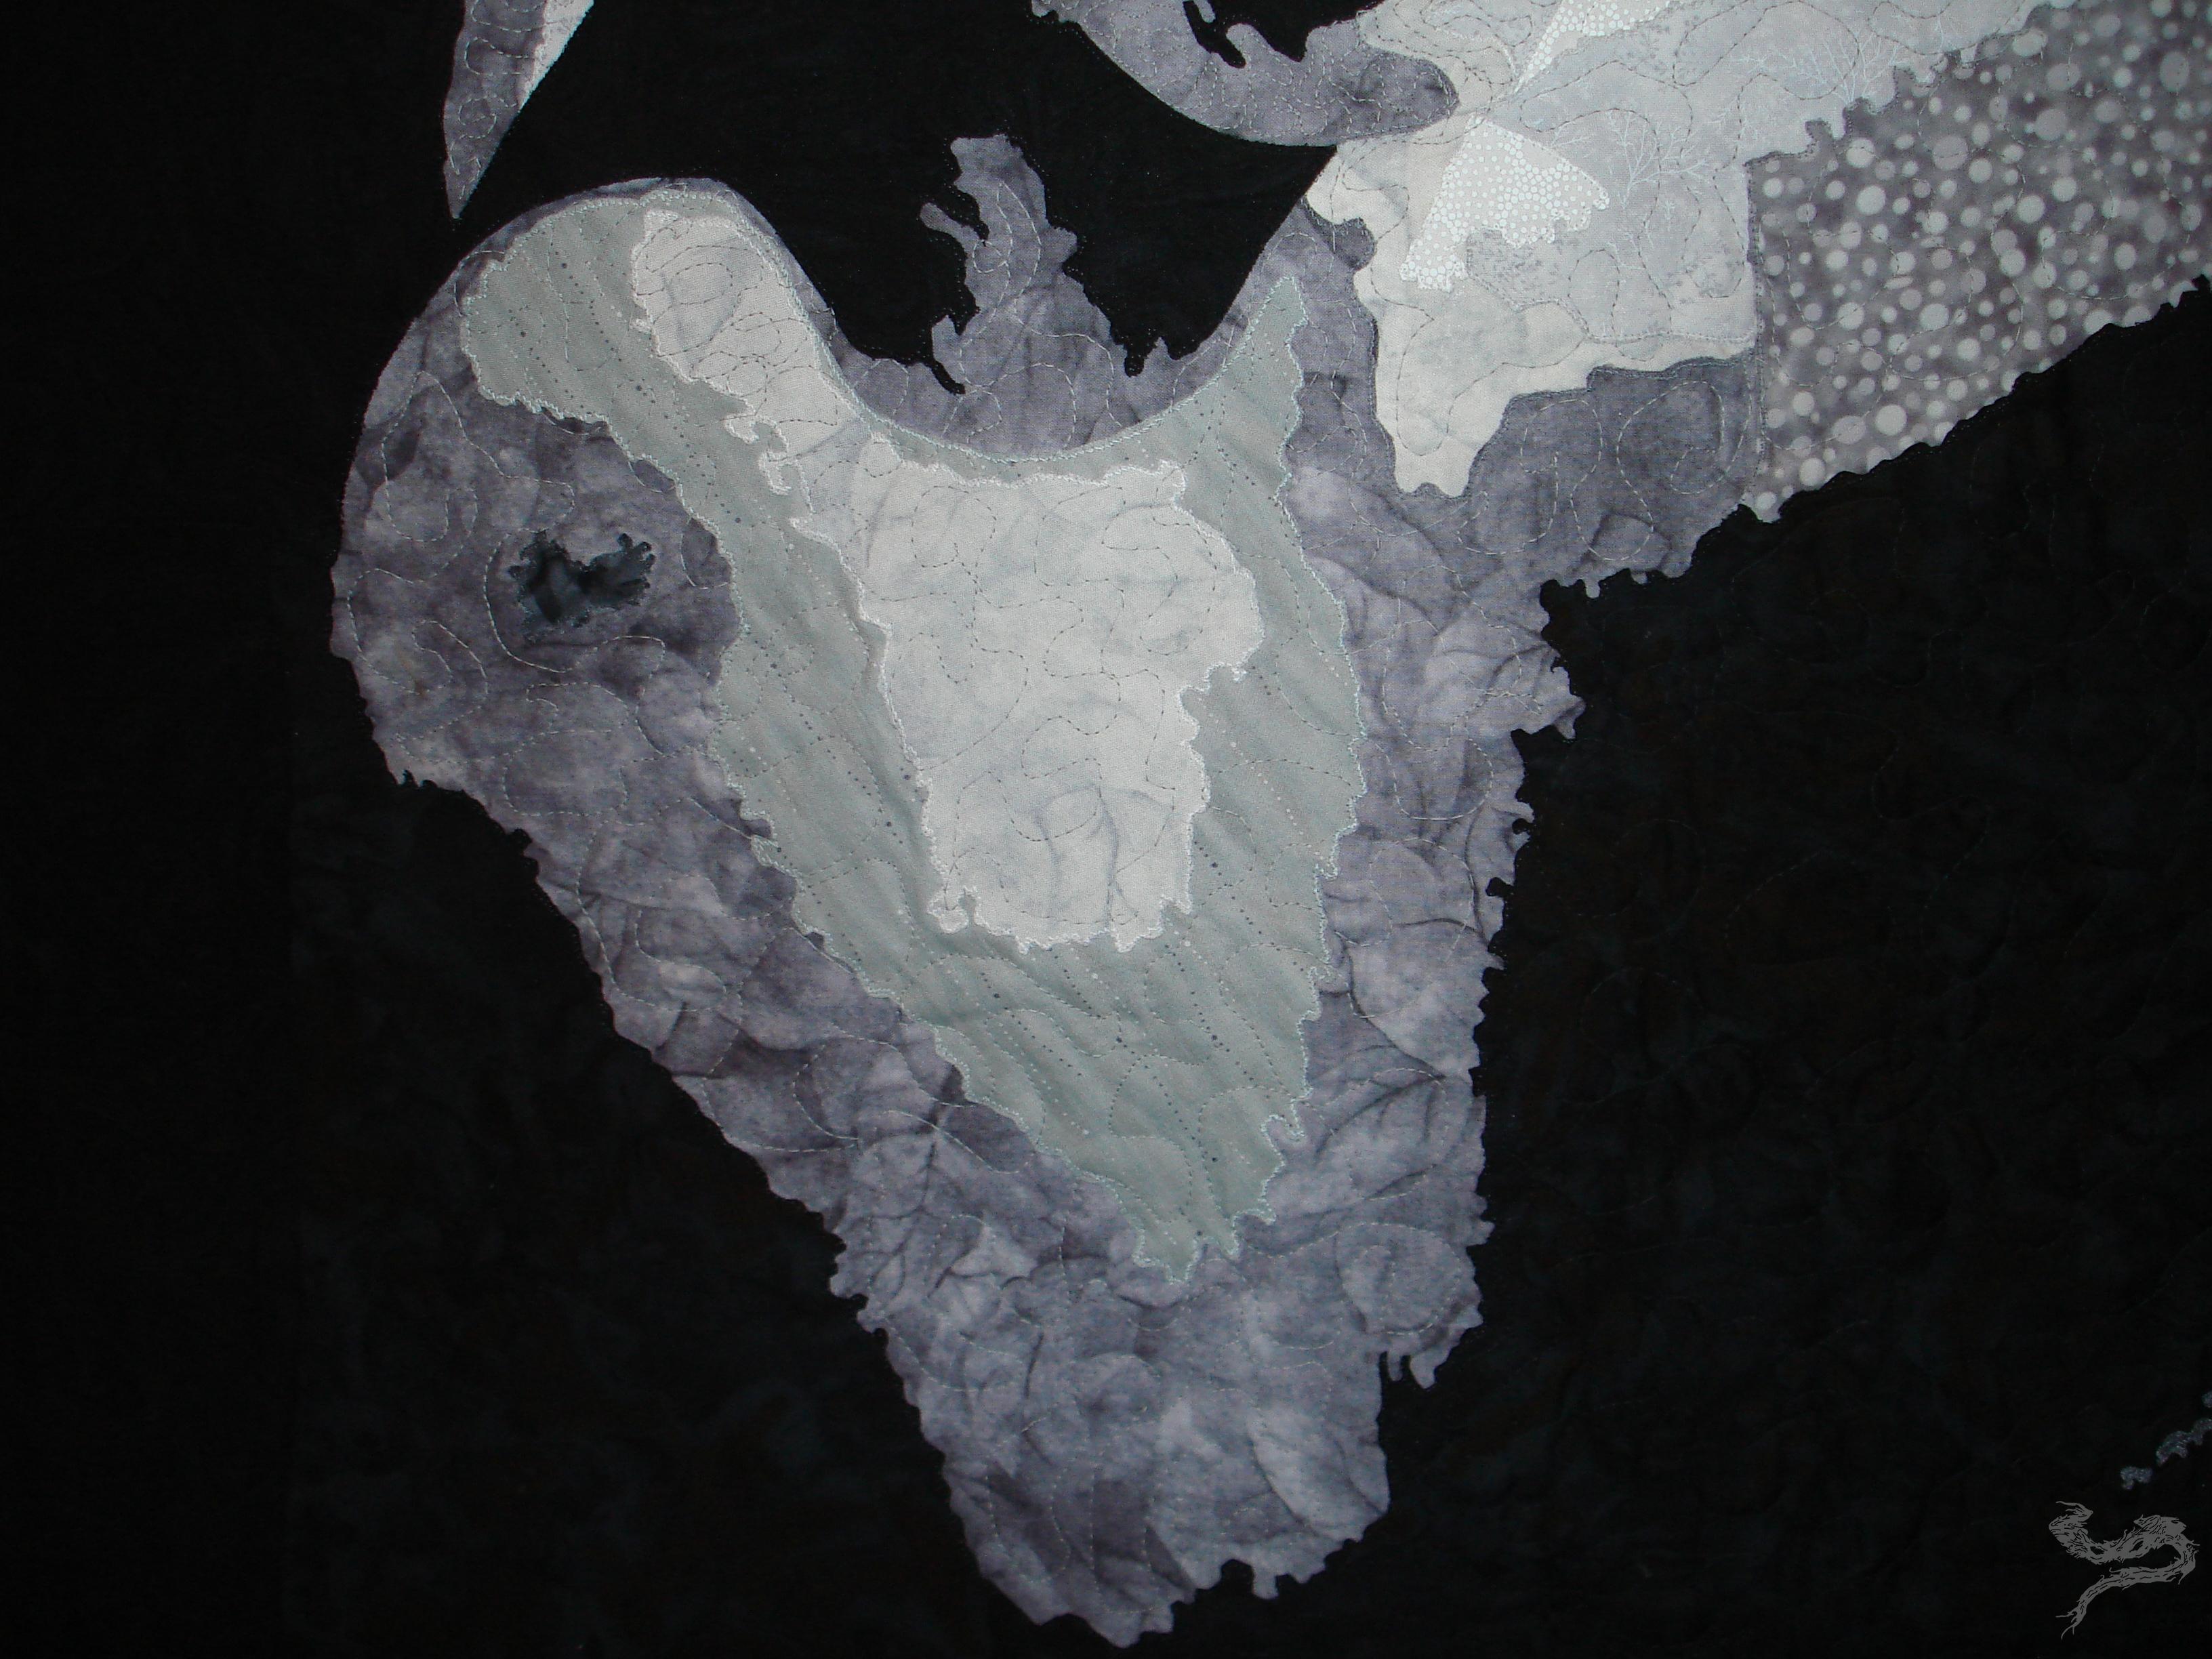
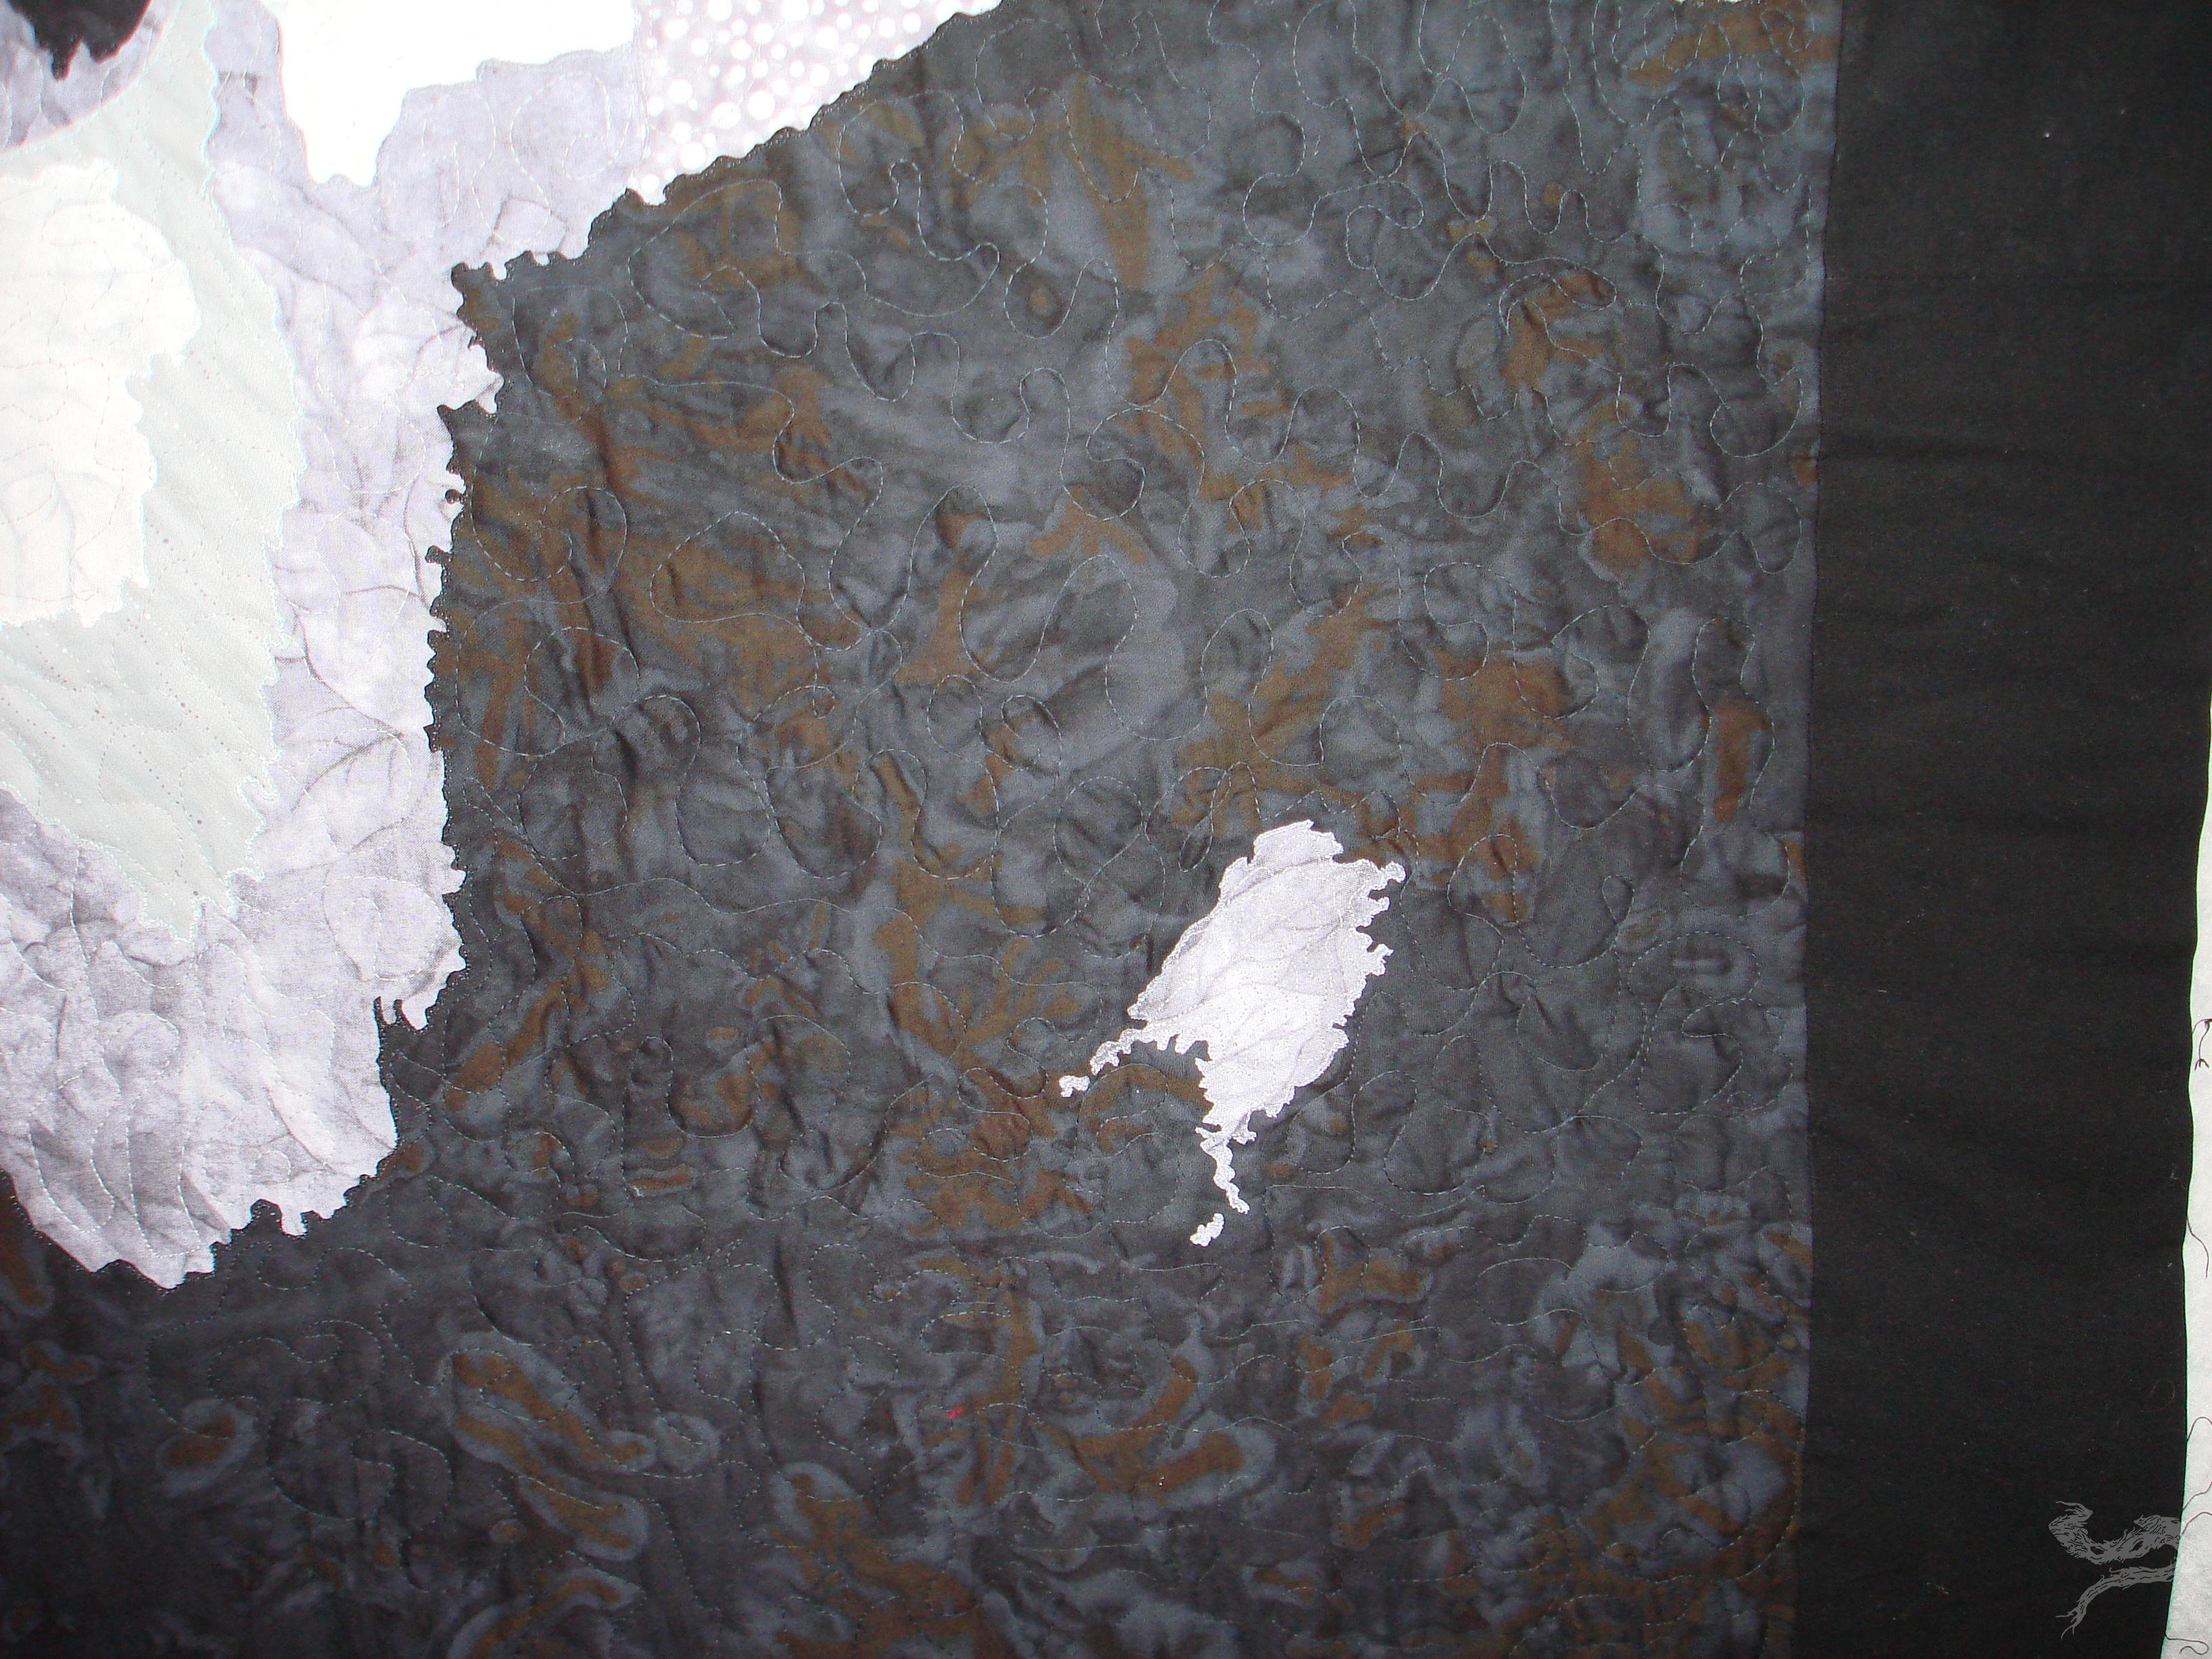
All of these pieces are hand cut. Meaning, It was just me and my scissors working away. All of those little twisty-turns, all those little zig zags? Yes, all of those pieces of fabric. Each of those were hand cut.
It was a couple of nights later, after working on the eyes, that I’d scared the bejeezus out of myself. I’d gone into the kitchen, to get something to drink, and when I looked to my right (at my design wall), I’d screamed and about dropped my soda. Those eyes. They creeped me out! It felt like they were following me everywhere. It got bad enough that I knew I wouldn’t be able to get anything done if I didn’t do ‘something’. So, I blindfolded him. 
While friends and family gave me a bit of grief about the blindfold, because that what friends and family do, I was able to continue working on him.
Bit by bit and piece by piece, the Willowy Being was coming together. I was pretty excited to see him come alive on my wall. Fabrics I wouldn’t have normally put together were working out very well. I was definitely learning A LOT on this project. 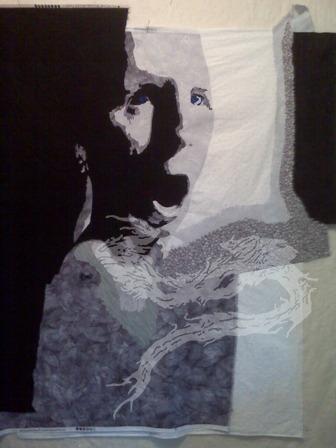
Just to give you some kind of idea of the detail I was putting in. This is seven layers of fabric work. 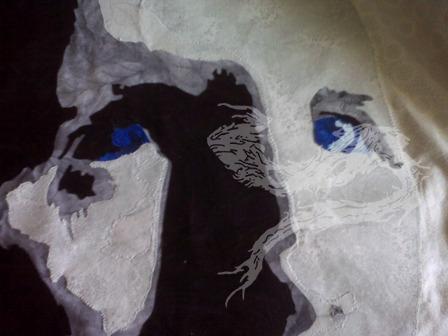 This is still my favorite image from this project.
I’d sent Mr. Reedus a photo of an enlarged copy of his photo art next to my work. I’ll never forget the excitement and rush I’d gotten from his reply. I’d made this work. Now, I needed to finish it.
After getting the borders put on,  I’d have to figure out a way to quilt it. This was the part that made me the most nervous. HOW was I going to make this work? I’d seen gorgeous quilt tops destroyed because of bad quilting. I didn’t want all of this work to go for nothing.
With a little bit of luck, and a lot of work, I was pretty pleased with the end result. 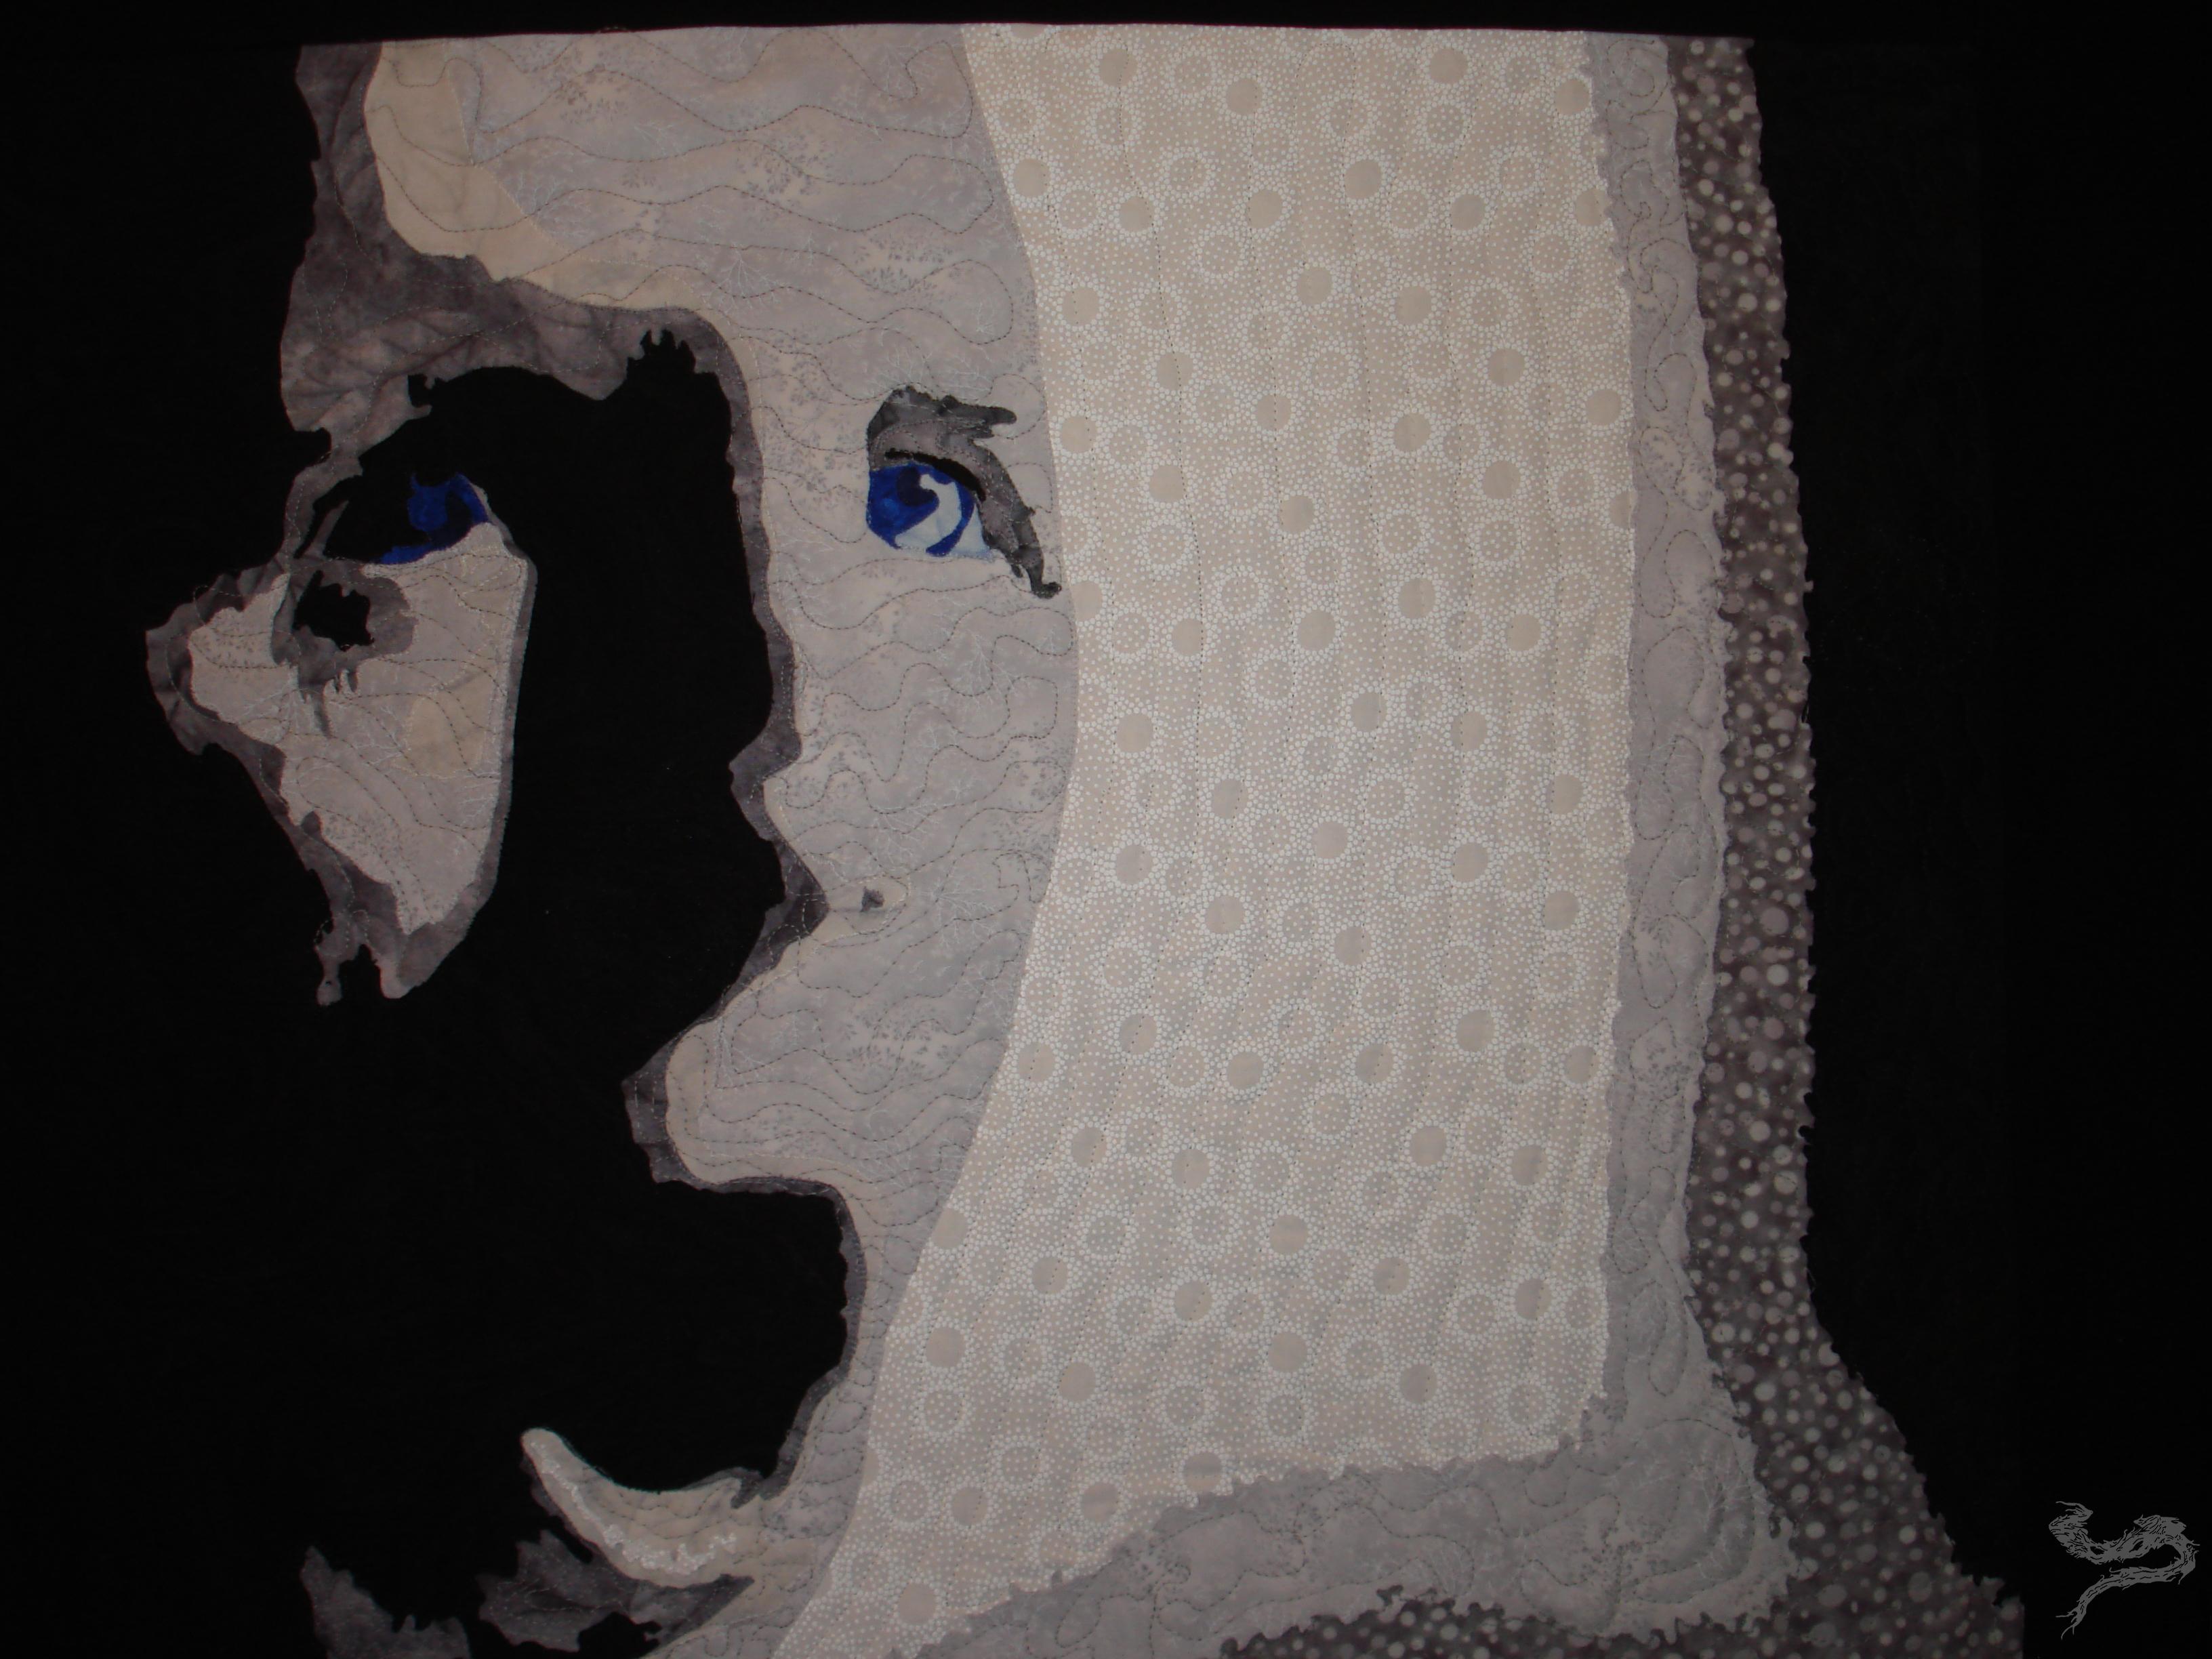
Finished size: 46 inches by 59 1/2 inches
As of this writing, and as far as I know, The Willowy Being quilt is owned by Mr. Reedus.
Applause for your new blog and beautiful work, Cindy! I admire your eye for color and attention to detail! I look forward to seeing more of your fiber art.
I did have a question: just out of curiosity, what iron and sewing machine do you use for your quilt projects?
Thank you, Gary. 🙂
I use a Brother Pacesetter NX-600 sewing machine. As for the iron? I went through a couple of different irons when I was making this particular quilt. Irons seem to like to do swan dives off my ironing board from time to time. I “think” (but don’t hold me to it) I was using either a Sunbeam or a Black & Decker at the time.
Amazing detail!